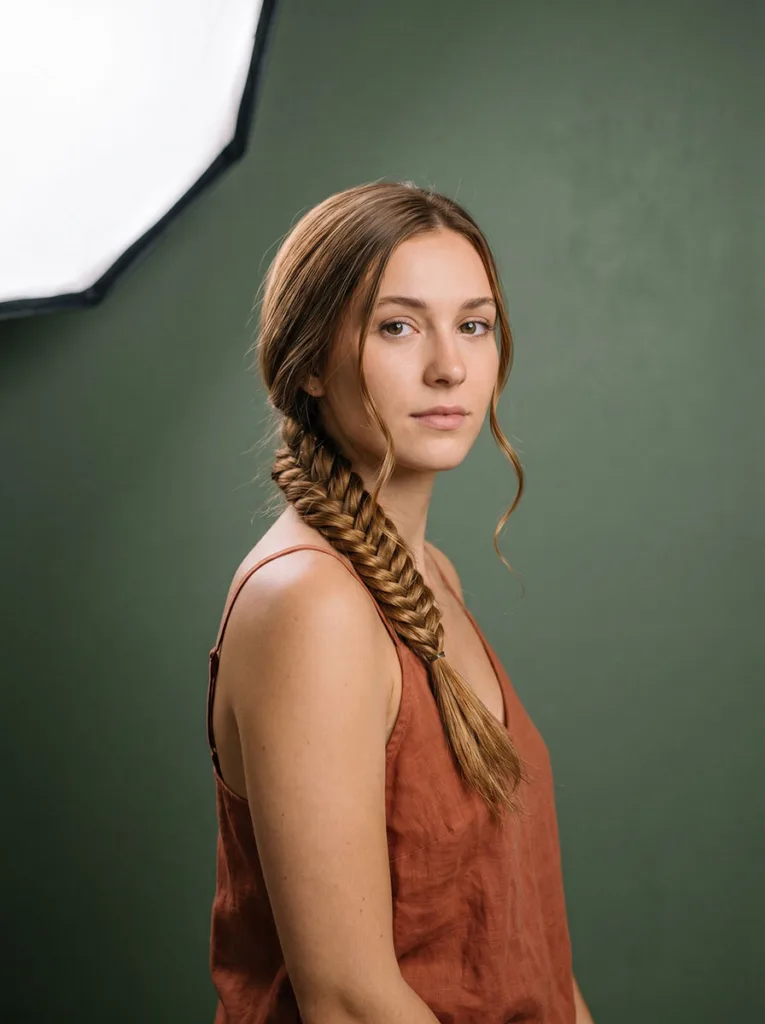
18 Easy Half Up Claw Clip Hairstyle Looks To Try

Why does your claw clip always slide out before you even make it to the door? You are not doing it wrong. You are just missing one step that most tutorials never mention.
The half up claw clip hairstyle looks simply, but three things decide whether it holds or falls apart: the clip size for your hair type, the placement height, and a single prep technique almost no one explains. Get all three right and this style takes under two minutes and lasts all day. Get one wrong and you are adjusting it every hour.
Thick, fine, curly, or straight, there is a version here for your hair. These 18 variations range from a 60-second messy look to a wedding-ready style, with exact steps and a fix for every common problem.
Quick Guide
- Clip size matters most (wrong size = sliding clip)
- Use a hidden elastic for all-day hold
- Placement (high / mid / low) changes the entire look
- Works on thick, fine, curly, and straight hair
What Makes The Half Up Claw Clip Hairstyle So Popular
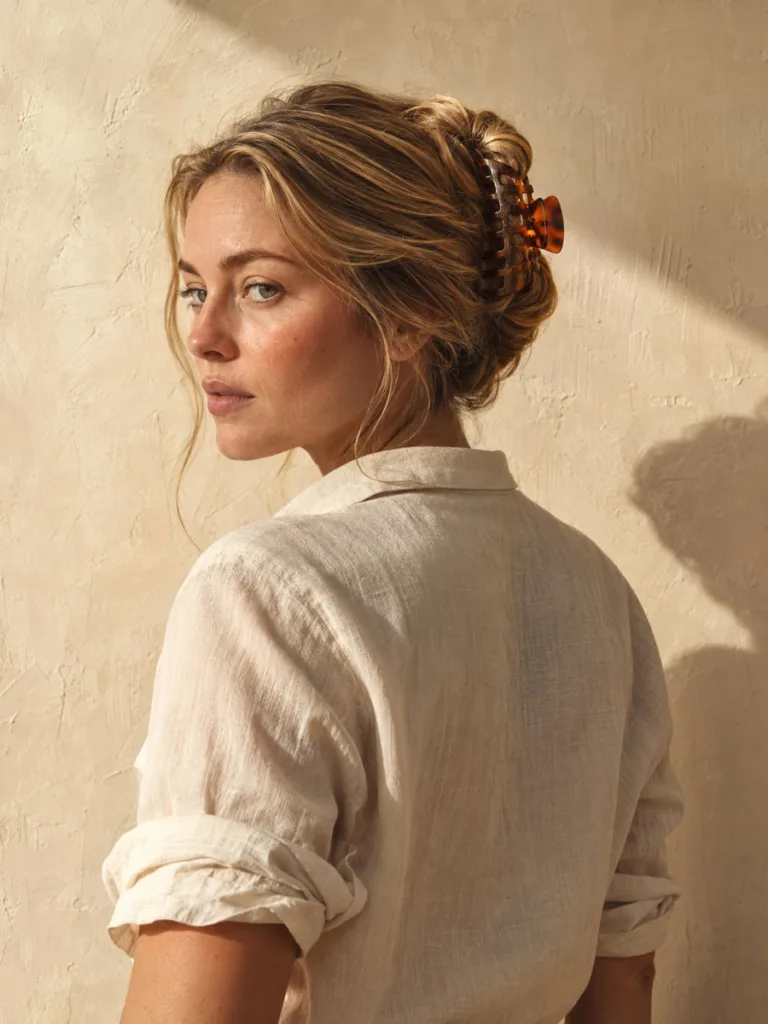
This claw clip updo is everywhere right now. The half up half down claw clip is effortless to put together and polished enough to wear anywhere, and it keeps hair out of your face without cutting the length you worked hard to grow.
It also crossed generations. The claw clip peaked in the 1990s and early 2000s and came back with more options than before: oversized tortoiseshell, dainty butterfly shapes, chunky acetate, pearl finishes. That variety is a big reason this style photographs so well. The clip choice matters as much as the technique.
Most people miss that clip placement changes the entire shape of the style. A clip at the crown of the head creates volume and lift. One at eye level gives a softer result. Getting that right is the difference between a style that holds together and one that seems slightly off.
How To Choose The Right Claw Clip For Your Half Up Claw Clip Hairstyle
The wrong clip size is the top reason this style falls apart mid-day. Before you try a single variation, match your clip to your hair type. Clip size determines how much hair the teeth can grip. Too small and it never holds. Too large and it shifts constantly.
| Hair Type | Clip Size | Clip Style |
| Fine / Thin | ~2 inches | Flat or rectangular clip |
| Medium / Normal | 2.5–3 inches | Classic claw clip |
| Thick / Heavy | 3–4+ inches | Jumbo claw clip (acetate or metal-coated) |
| Curly / Wavy | 3–4+ inches | Large open-jaw claw clip |
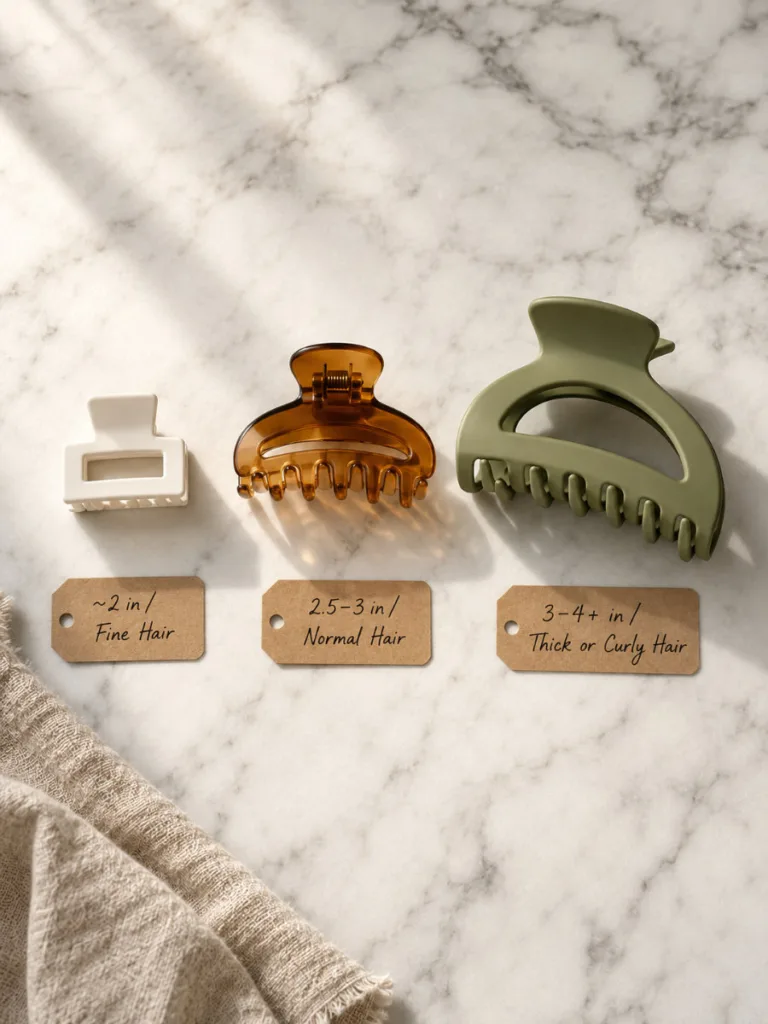
Claw Clip For Thick Hair
You need a jumbo claw clip, at least 3 to 4 inches long. Look for clips with deep, sturdy teeth. Metal-coated plastic and acetate options hold thick hair far better than lightweight acrylic.
If your hair is exceptionally thick, try using two medium clips placed side by side. This distributes the weight evenly and prevents the style from drooping by midday.
Claw Clip For Fine Hair
Fine hair needs a small to medium clip, around 2 inches long. Flat claw clips or rectangular clips sit flush against the head without sliding. Avoid heavy embellished clips. The extra weight drags a fine half-up section down within an hour.
Claw Clip For Curly Hair
Curly hair is naturally voluminous, so a large open-jaw claw clip works best because it accommodates your curl pattern without crushing it. For loose waves, a medium clip works. For tighter curls or type 4 hair, go with the largest open-jaw option you can find.
The Secret To A Half Up Claw Clip That Does Not Slip
Most clips slip for a simple reason: there is not enough for the teeth to grip. Hair is smooth, clips are not designed for it, and the weight of the gathered section slowly pulls everything down.
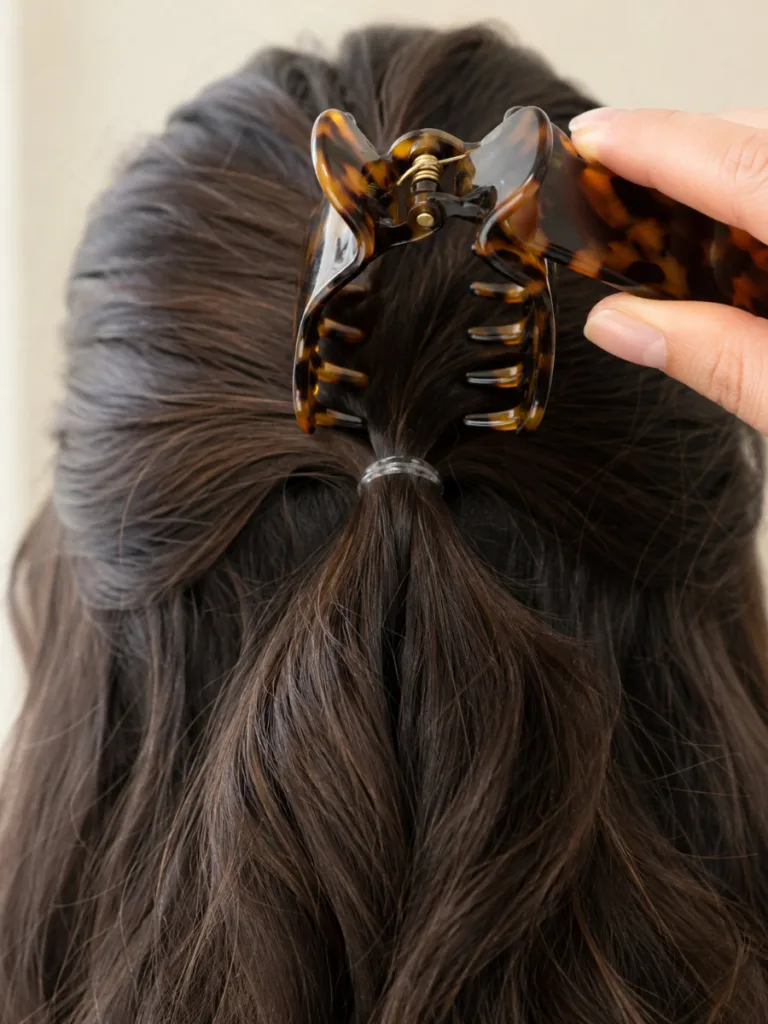
The Fix: Hidden Thin Elastic Before placing your claw clip, gather your half-up section and secure it loosely with a small, color-matched ponytail holder. Then clip over the elastic. The clip grips the elastic instead of smooth hair, and the style holds for hours. You can also adjust the tightness and height before you snap the clip shut.
Half Updo Tutorial: The Basic Half Up Claw Clip
- Part your hair however you prefer: center, side, or no part.
- Leave out face-framing pieces on both sides if you want a softer finish.
- Gather hair from the top of your ears to the mid-crown of your head.
- Secure that section loosely with a thin elastic.
- To add volume, tease the gathered section lightly at the root before clipping.
- Twist the section slightly and hold it at your preferred height.
- Open your claw clip, position it firmly over the elastic, and close it.
- Pull a few strands loose around the face to soften the overall look.
Total time: about 90 seconds. After a few tries, you won’t need a mirror.
18 Half Up Claw Clip Hairstyle Variations To Try
The basic version is just the starting point. These 18 variations range from 60-second everyday looks to styles that hold up at a wedding or prom.
Everyday And Casual Looks
1. The Classic Messy Half Up Best For: All Hair Types | Effort: 60 Seconds

Gather the top half of your hair loosely, without smoothing or combing it, and clip. Imperfect texture is the entire point. The unevenness, the flyaway, the sections that are not perfectly aligned. All of it is fine. This works on every hair type and every length. It takes about 60 seconds, requires no prep, and actually looks better on day-two or day-three hair because the natural oils add grip.
2. The Tousled Volume Lift Best for: Fine or straight hair | Effort: 90 seconds
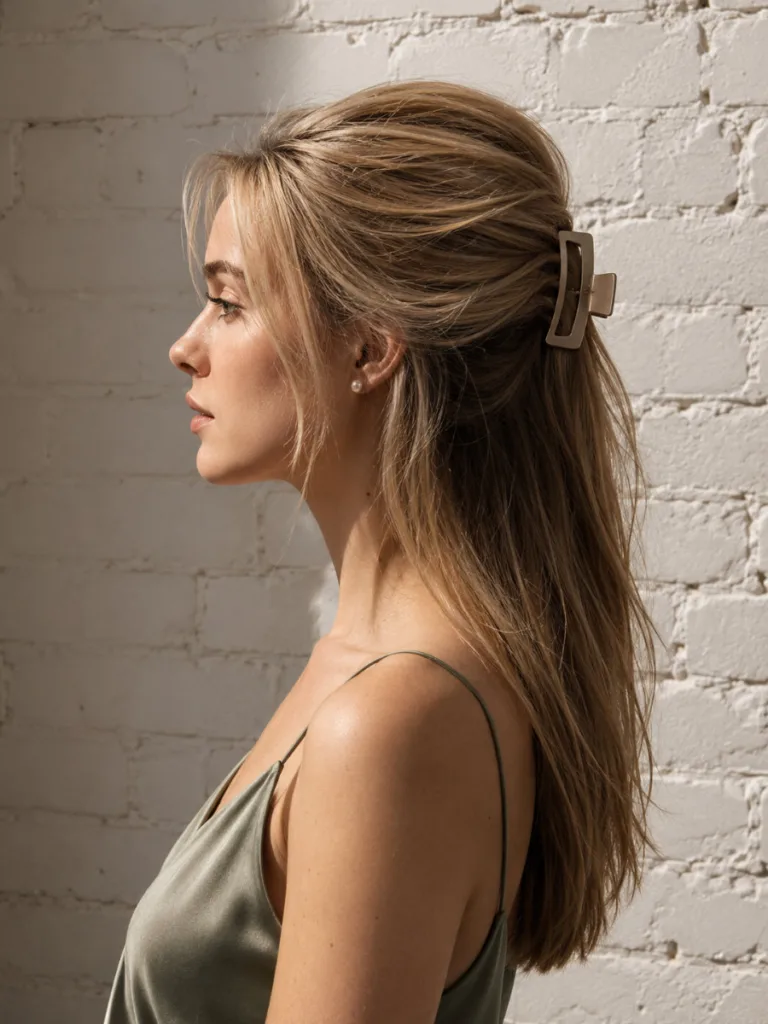
If your hair lies flat, this variation lifts it. Gather the hair from your crown, then use a fine-tooth comb or teasing brush to backcomb the roots of the gathered section before you clip. The teasing creates internal structure that pushes the top upward into a full, domed shape. Clip the section high, at or above the crown, so the extra volume shows. A medium to large claw clip in a neutral or metallic finish works best here. You want the shape to be what people notice, not the clip. This works especially well on fine or straight hair.
3. The Loose Side Pull Best for: All hair types | Effort: 60 seconds

Pull your gathered section slightly to one side, roughly above or behind one ear, instead of centering it at the back. The asymmetric half-up reads differently from the standard version. More directional, less expected. This works on any hair type with no extra steps. The offset angle flatters a wide range of face shapes because it draws the eye diagonally rather than straight back. For a softer finish, leave a few strands loose on the opposite side. About 60 seconds total.
4. The Faux Half-Up (Side Sections Only) Best for: Curly hair | Effort: 90 seconds
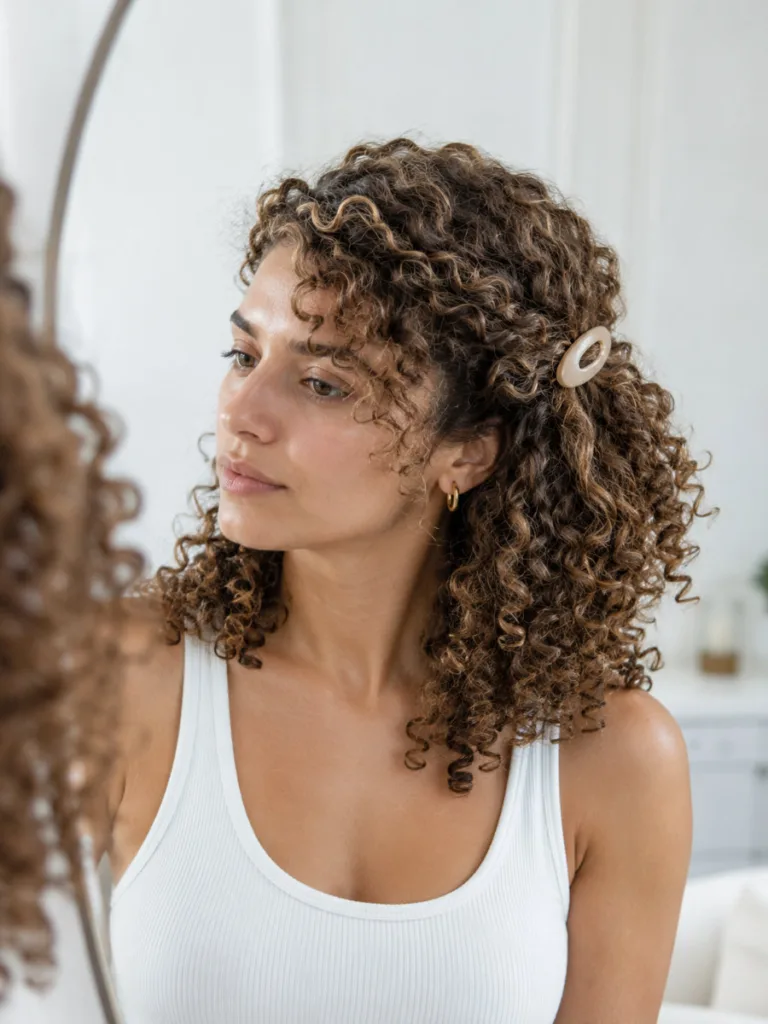
On days when your hair won’t sit right, try this instead of the full half-up. Take only the two side sections (the hair from your temples to just behind your ears) and bring them together at the center back. Leave everything in the middle untouched. From the front it looks like a full half-up. From the back it’s lighter and more comfortable. This is the best option for curly hair because the middle section stays undisturbed. A medium claw clip works well here. No teasing, no prep, done in 90 seconds.
Styled And Share-Worthy Half Up Claw Clip Looks
5. The Half-Up Twist Best for: All hair types | Effort: 2 minutes
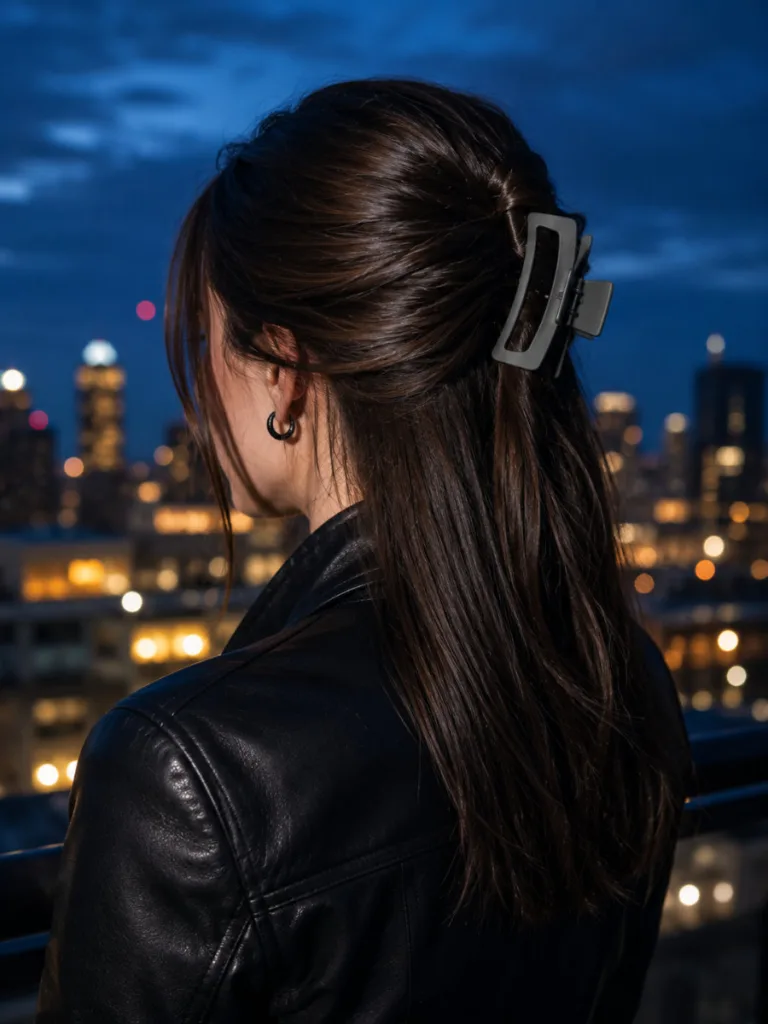
After gathering your section, hold it in one hand and roll it around itself from root to mid-length. One or two rotations is enough. Keep the twist loose so it fans out at the sides rather than bunching. Hold it flat against the back of your head and close the clip over it. The twisted section stays visible above the clip, which adds texture you don’t get from a plain gathered section. Takes about two minutes. Shows most clearly on straight or lightly wavy hair.
6. The Mini Braid Half-Up Best for: Long or medium hair | Effort: 3 minutes
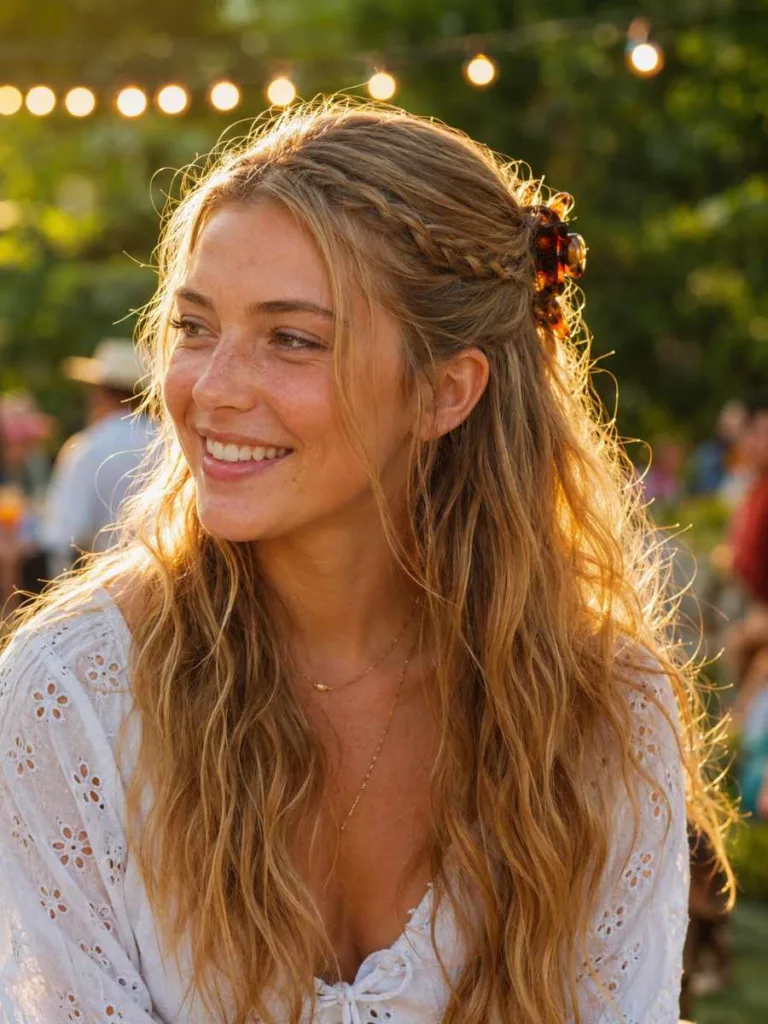
Take a small strand of hair from just in front of each ear, no wider than your finger. Braid each in a simple three-strand braid to the end and secure with a tiny clear elastic. Then gather all your top hair, including the braids, and clip everything together at the back of your head. The braids frame your face and sit next to the clip rather than disappearing into it. Leave the ends out, tuck them under, or let them blend in. All three work. About three minutes total.
7. The Dutch Braid Half-Up Best for: Long hair | Effort: 5–7 minutes
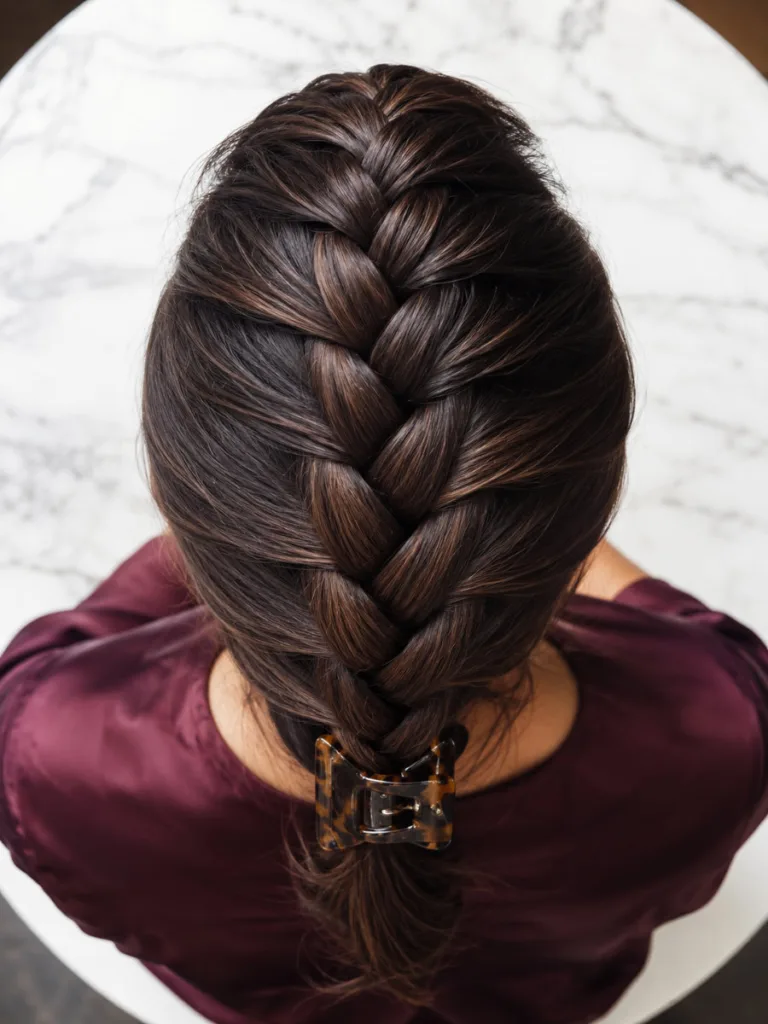
The Dutch braid adds real structure and works well for occasions where you want something more polished. Start at your hairline with a small section at the center front. Add hair from the left and right as you braid downward, weaving each strand under rather than over. That is what separates a Dutch braid from a regular one. Continue to the mid-back, then clip the tail into a claw clip alongside any loose side hair. The braid sits on top of the head rather than blending in. It holds well all day. Allow 5 to 7 minutes.
8. The Sleek Pulled-Back Best for: Straight or medium hair | Effort: 2 minutes
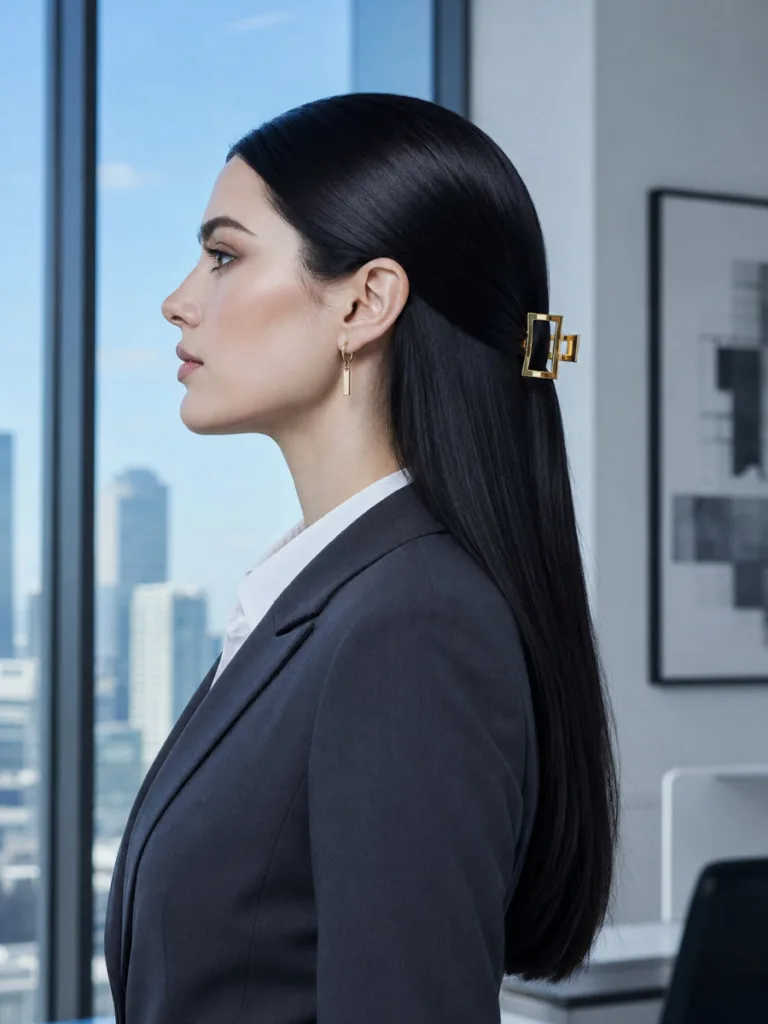
Apply a small amount of edge control, pomade, or smoothing serum to your hands before gathering the top section. Use a fine-tooth comb to smooth the hair from the hairline backward, removing any bumps or frizz before the clip goes in. Once secured, run the comb over the gathered section once more. The result is flat and clean. This works best on straight or medium-textured hair and reads professional, which makes it the right pick for work or a formal dinner. Use a sleek clip in gold or silver.
Occasion-Specific Half Up Claw Clip Looks
9. Wedding Or Prom Half-Up Best for: Long wavy or curly hair | Effort: 5 minutes
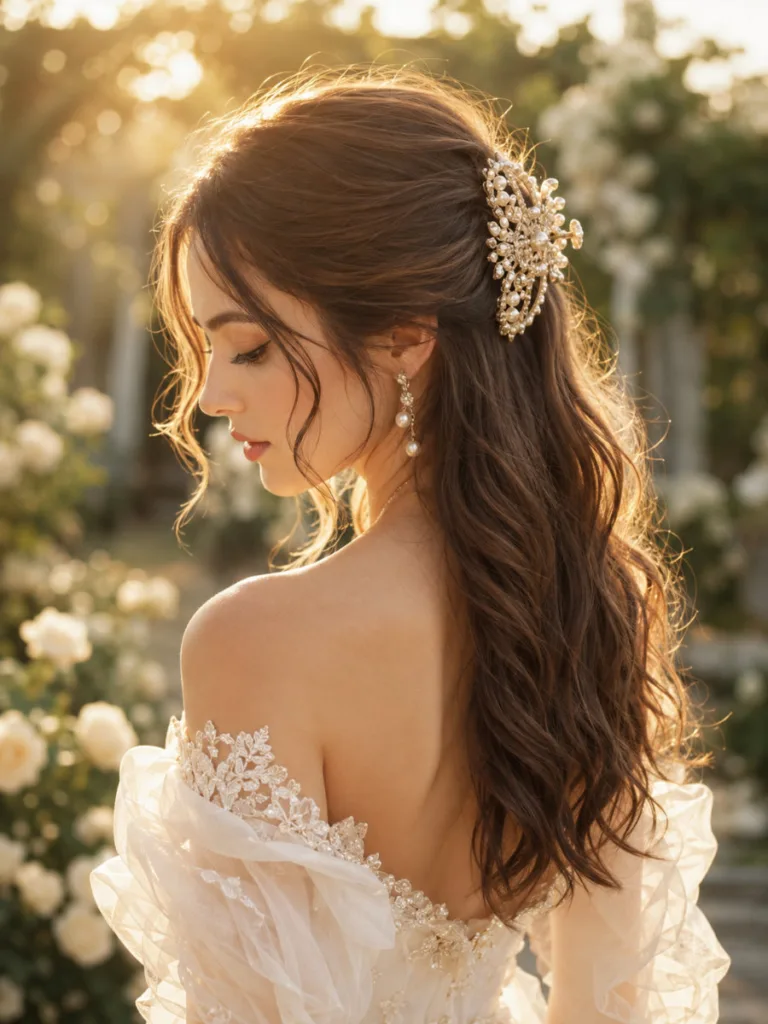
Start with waves or loose curls throughout, made with a wand or curling iron, and let them cool fully before you touch them. Gather only the top third of your hair (not the full top half) and clip loosely with a pearl, crystal, or jeweled claw clip. The clip should sit slightly off-center or at the mid-back. Leave three or four curled tendrils framing the face. The clip does most of the work here, so choose one you’d want someone to notice. The finished style works for weddings, proms, or any formal occasion where you want your hair partially up but not stiff.
10. Workout Half-Up Best for: All hair types | Effort: 60 seconds
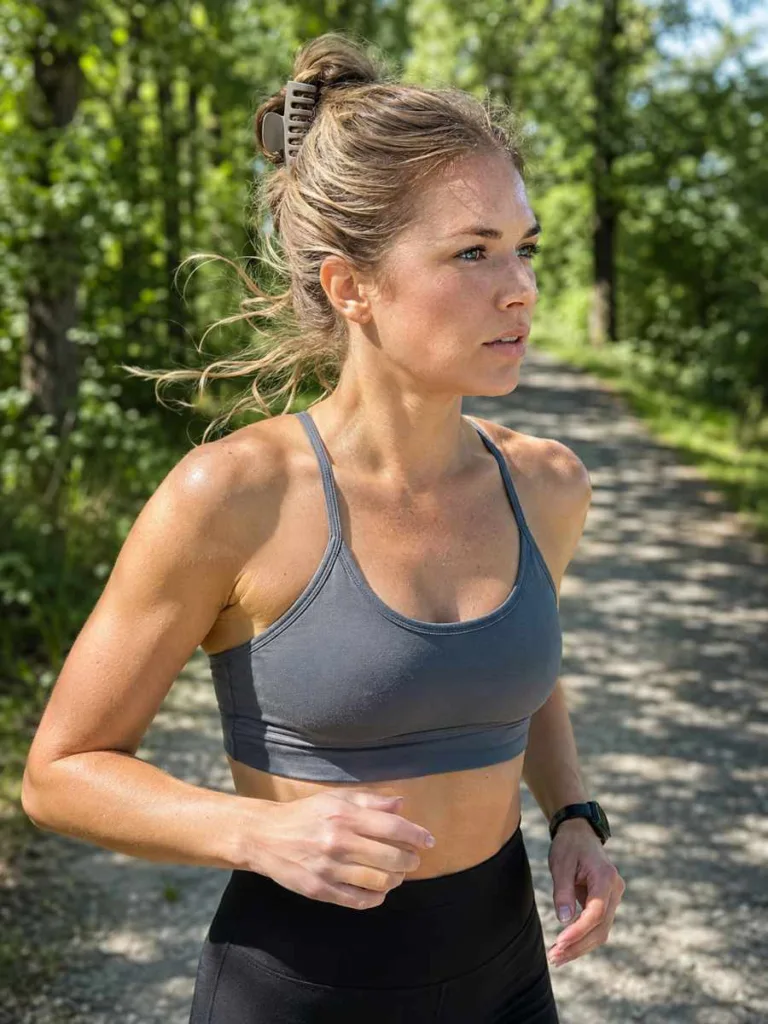
This version is about hold, not style. Start with the hidden elastic trick. You need it here more than anywhere else. Tie the top half of your hair with a small, snag-free elastic first, then lock a flat claw clip with extra-deep teeth firmly over it. The flat profile keeps the clip from catching on clothing or getting knocked loose during exercise. Keep the placement high, at or above the crown, so the bottom half hangs freely. Add a light-hold hairspray over the gathered section before clipping if you sweat heavily.
11. Y2k Inspired Half Up Claw Clip Hairstyle Best for: All hair types | Effort: 60 seconds

The clip is the point here, so choose it before you do anything else. Look for a butterfly, star, heart, or flower-shaped clip in an iridescent, frosted, or pearlescent color. Translucent lavender, baby pink, and icy blue are the most recognizable Y2K tones. Gather the top section and clip it high, between the crown and the forehead. Leave two face-framing sections loose on each side. Keep the rest of the hair loose and unstyled. The clip needs room to be the thing you notice. Works best on straight or slightly wavy hair. Under 60 seconds.
12. The Curly Half-Up Best for: Curly and coily hair | Effort: 2 minutes
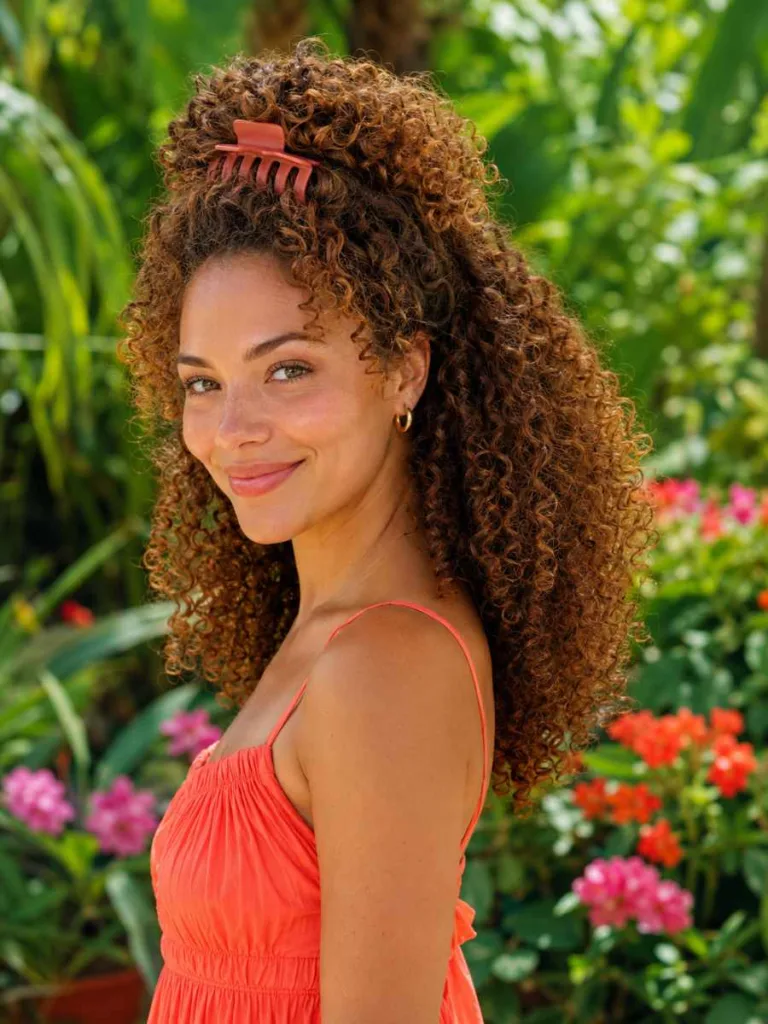
Wait until your curls are completely dry and fully defined before you start. Never try this on damp hair. The curls won’t be in their final shape yet and the clip will flatten them. Use your fingers to separate only the top layer of curls from the layers below. A large open-jaw jumbo claw clip is necessary here because it is wide enough to close around the volume without crushing the curl. Position it at mid-crown or slightly higher and close it gently. Let the curls fall naturally. Do not go back and adjust.
More Half Up Claw Clip Hairstyle Ideas To Try
These last six variations include the most visual claw clip styles for long hair, though most adapt well from shoulder length upward.
13. The Knotted Half-Up Best for: Medium to long straight or wavy hair | Effort: 2 minutes
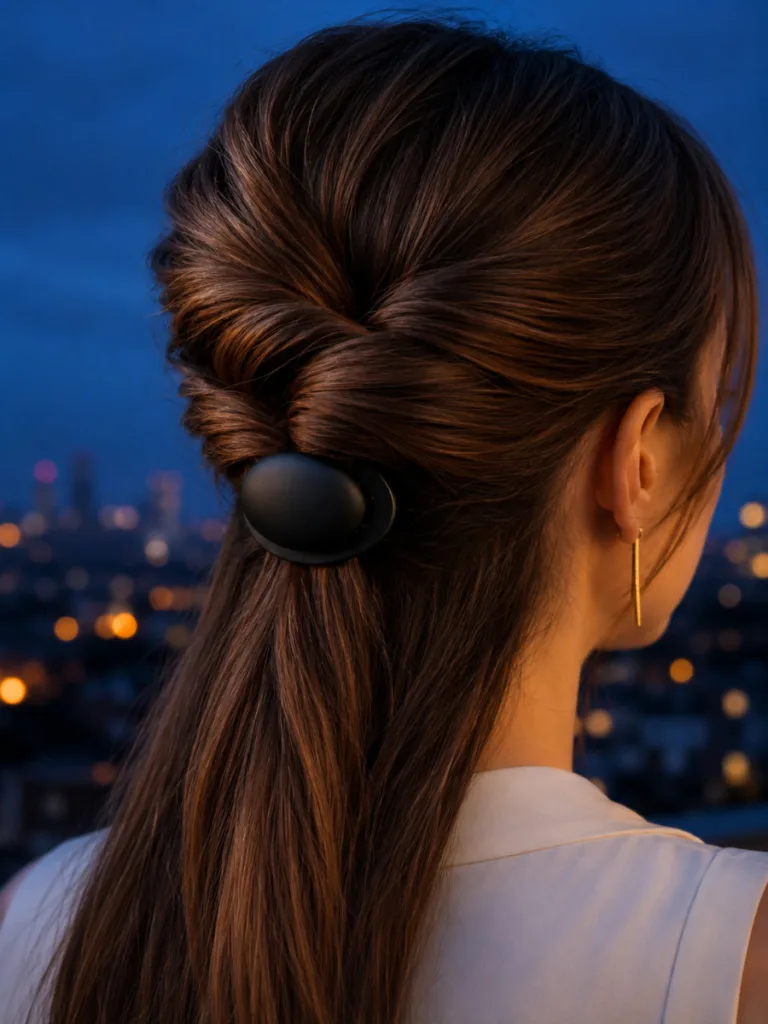
After gathering your section, hold the hair in both hands and cross it over itself exactly once, the same motion as the first step of tying a knot. Flatten the knot against the back of your head with one hand, then position the claw clip directly over the center and close it. The knot gives the clip something solid to grip, which is why this holds better than a plain gathered section. The finished shape sits raised and dimensional above the clip. No braiding needed. Works best on medium to long straight or wavy hair.
14. The Double Twist Half-Up Best for: All hair types | Effort: 3 minutes
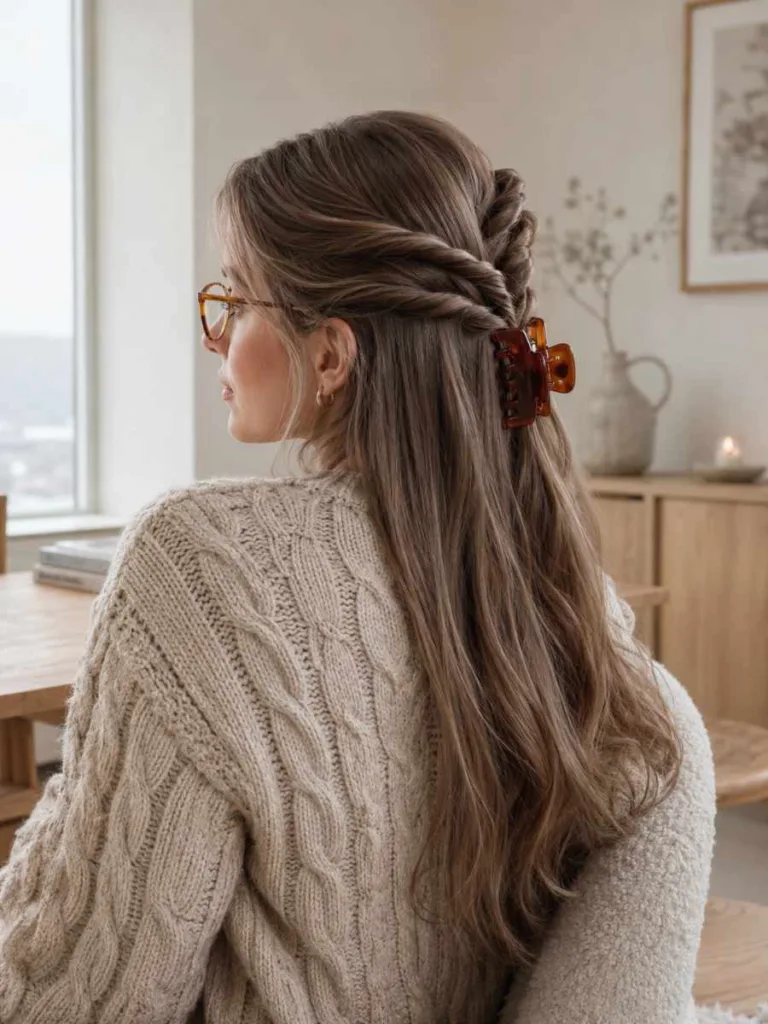
Divide your top section into two equal parts, one from the left and one from the right. Twist each one individually, rolling it away from the face toward the center back of your head. Once both are done, bring them together and clip them as one. The two twisted ropes sit side by side above the clip. The texture reads like a rope braid without any braiding. Takes about three minutes and shows most clearly on straight or lightly wavy hair.
15. The Layered Double Clip Half Up Claw Clip Hairstyle Best for: Thick or long hair | Effort: 3 minutes
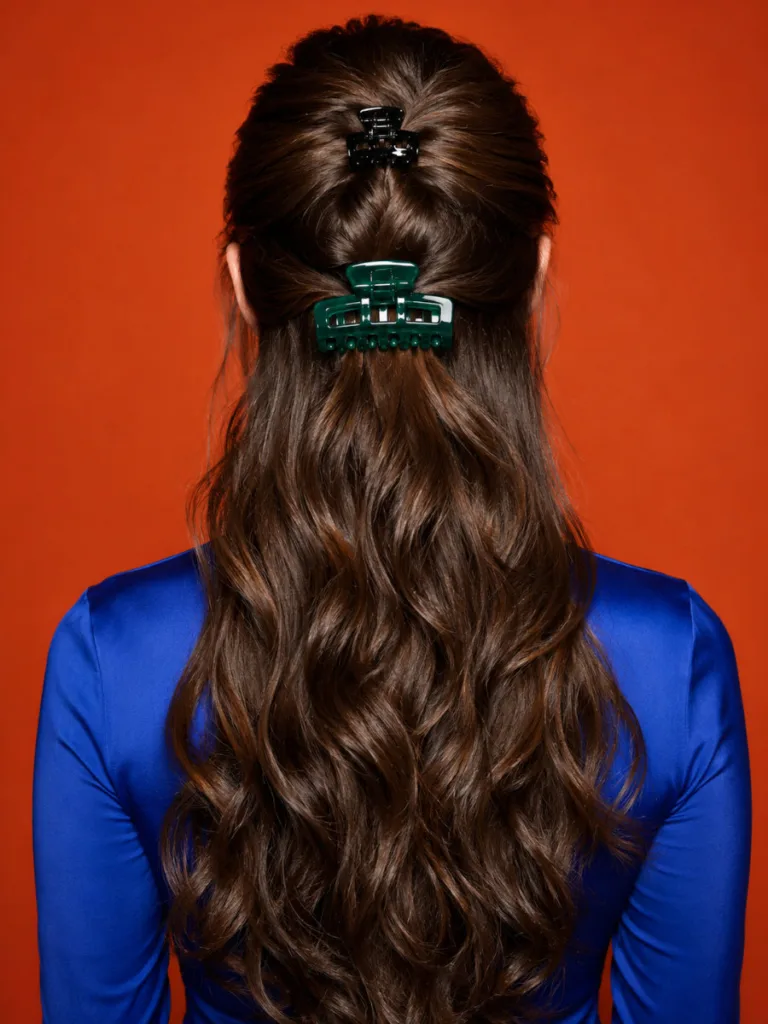
Use two clips instead of one. Place a smaller claw clip at the crown, gathering just the top layer and lifting it high. Then position a larger clip about two inches lower, catching the second layer from just behind the ears. Both clips should face the same direction. The stacked result looks taller and more structured than a single clip, especially on thick or very long hair. Use matching clips if you want them to read as a set, or mix different designs. About three minutes to finish.
16. The Feathered Half-Up Best for: Long hair with layers | Effort: 2 minutes
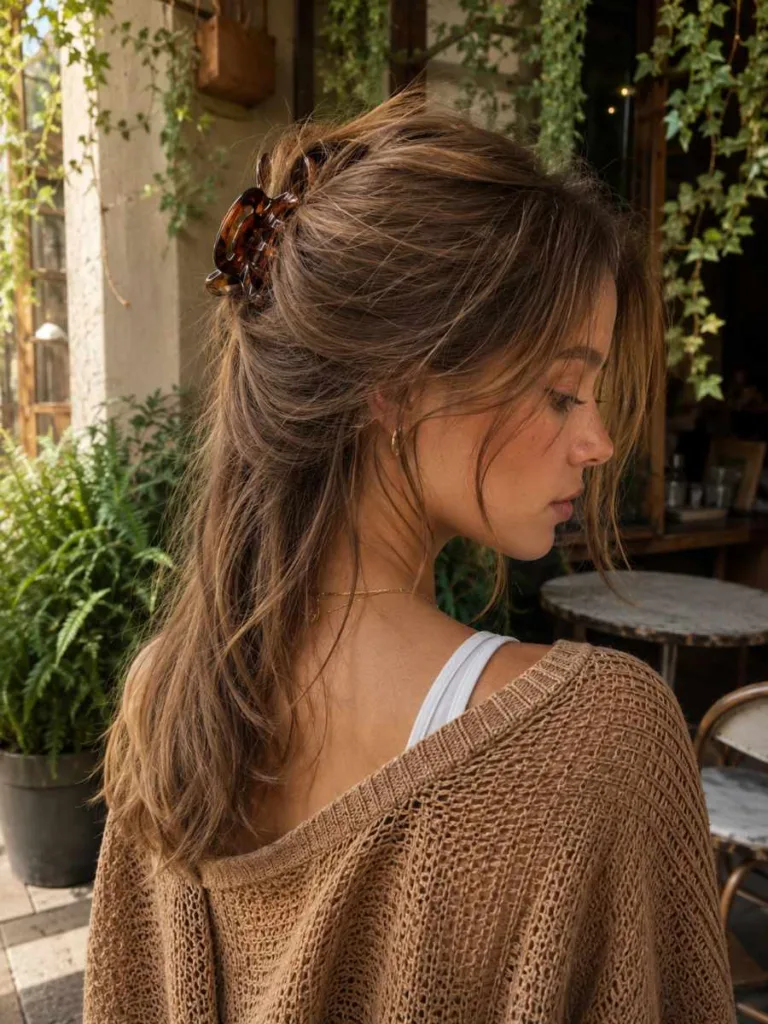
Start with a standard half-up at mid-crown. Once the clip is in, spend 30 to 45 seconds pulling individual strands free from around it: a piece from the right temple, one from the left side, a strand or two from the nape. Each piece you release loosens the overall shape. You’re aiming for a finish where the clip looks like it barely caught your hair on the way past. This works well on layered or textured hair because the shorter pieces fall at different levels and add depth without any product.
17. The Half-Up With Decorative Pins Best for: Any occasion, any hair type | Effort: 3 minutes
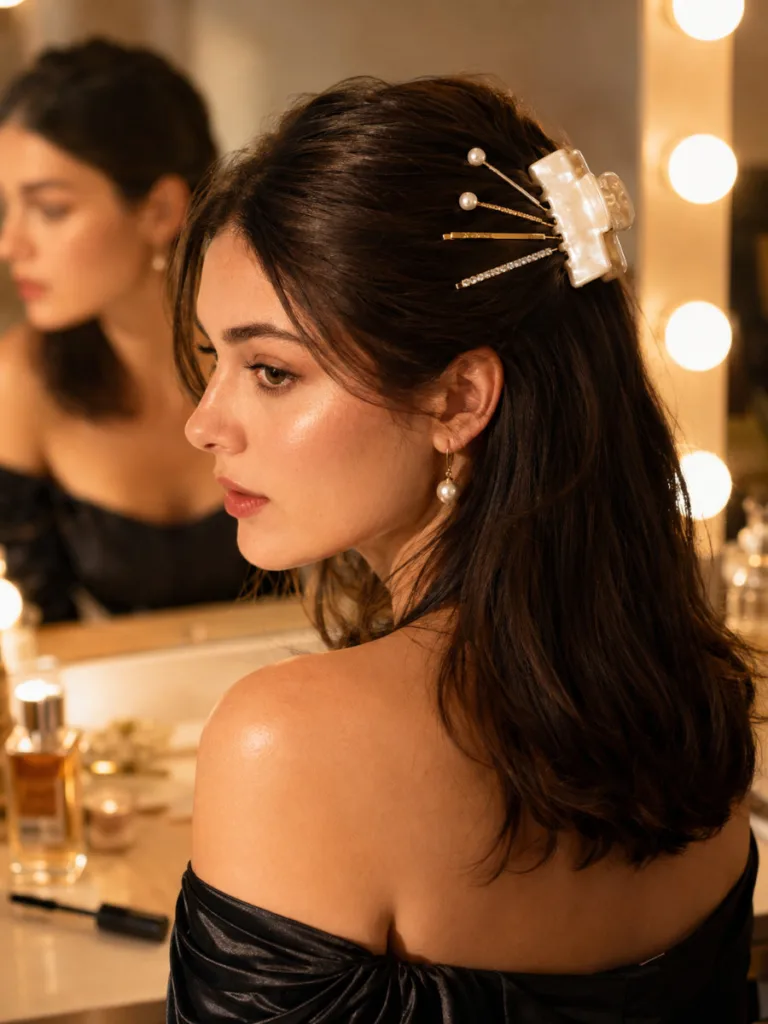
Start with your standard claw clip at mid-crown. Take three to five decorative hair pins and fan them from the base of the clip, inserting each at a slightly different angle, some pointing up and some horizontal, so they spread out from the clip. Pearl pins give a bridal look. Gold bar pins read modern. Rhinestone pins work for evening. The pins don’t grip any hair. They just change how the clip looks, turning it from a single accessory into something that looks arranged. About three minutes.
18. The Bubble Half-Up Best for: Long straight or wavy hair | Effort: 5 minutes
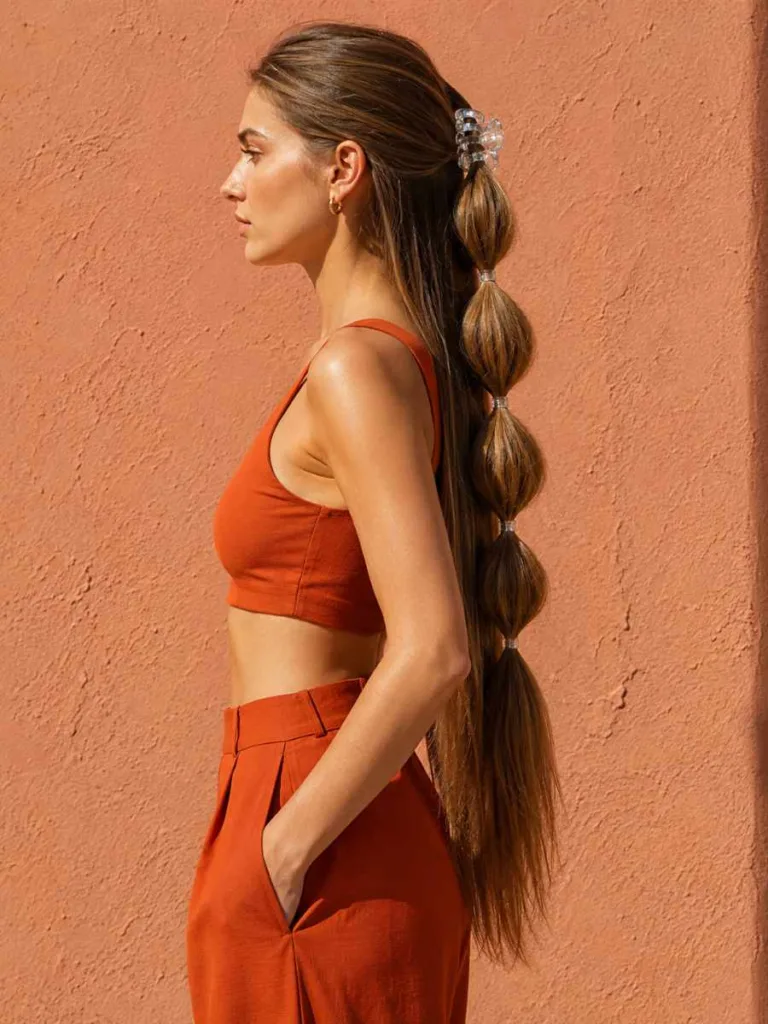
Clip the top section as normal. Then take the hair below the clip and secure it into a loose ponytail with a clear elastic. Place a second clear elastic about 2 inches below the first, push the hair between the two elastics outward and upward to create the first bubble. Add another elastic 2 inches lower and repeat. Continue down the length of your hair until you have three to five bubbles. The bubbled section below the claw clip gives the whole style more visual weight than a plain half-up. Works best on long, straight or wavy hair.
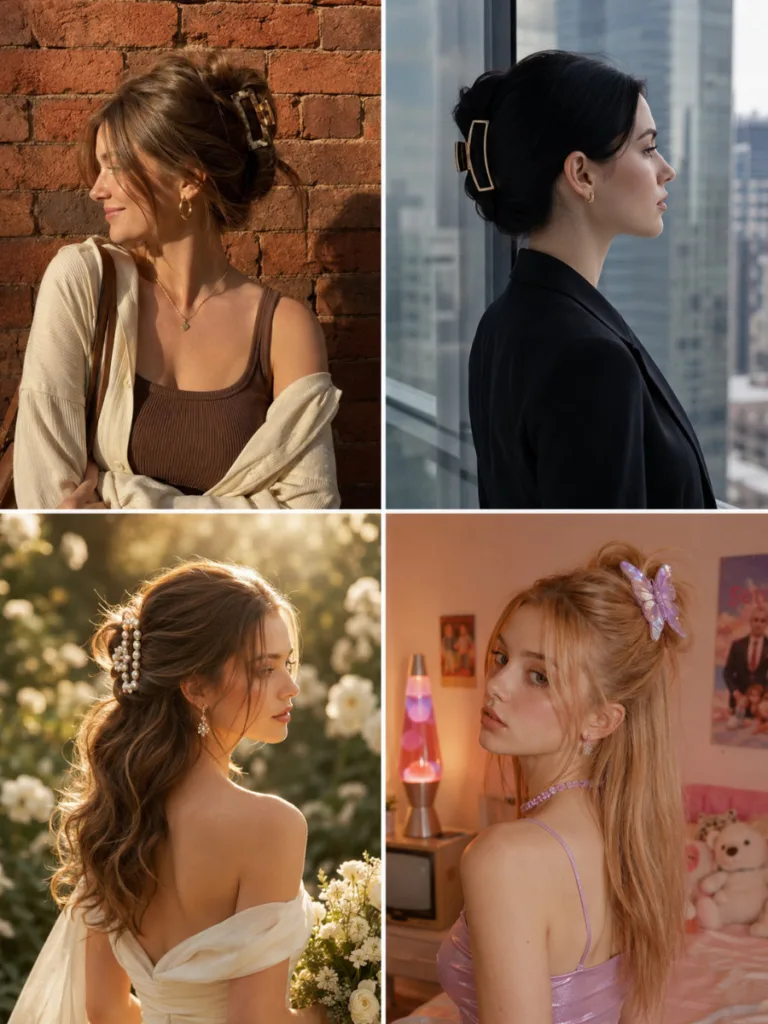
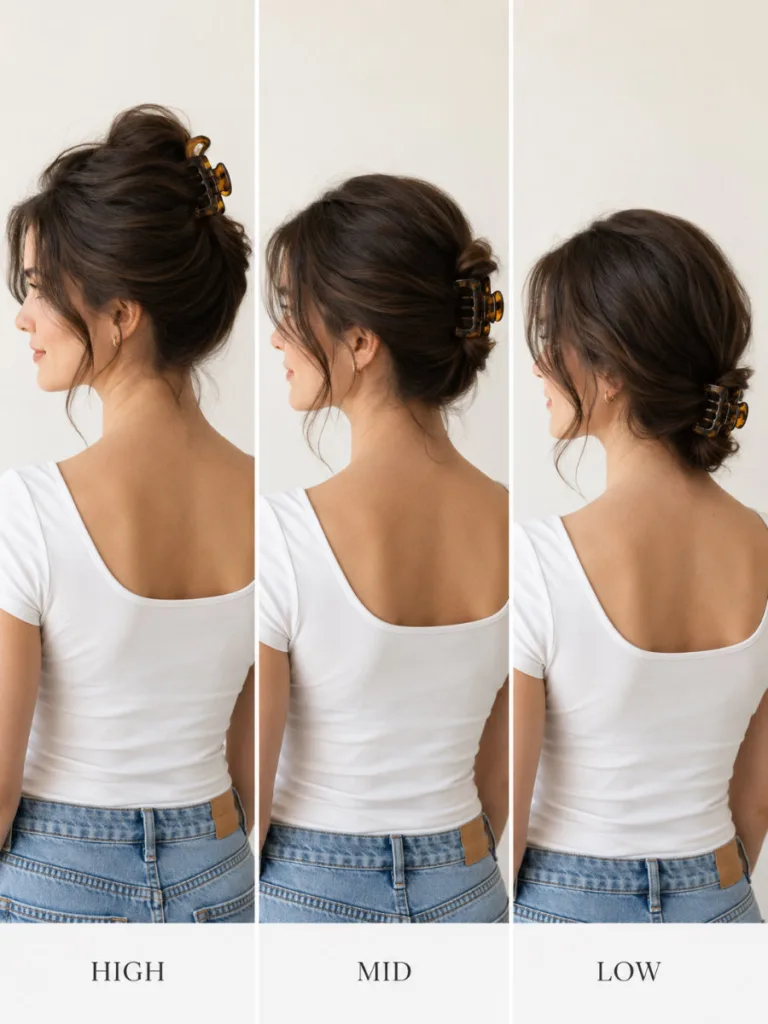
Half Up Claw Clip Placement: High Vs Mid Vs Low
Most tutorials skip placement entirely. That is why so many people end up with a look that feels slightly off even when they followed all the steps correctly.
| Placement | Position | Effect | Best For |
| High | Crown or above | Volume, lift, drama | Fine or straight hair |
| Mid | Aligned with tops of ears | Balanced, effortless | All hair types, any occasion |
| Low | Near the nape | Romantic, soft, vintage | Long hair with waves or curls |
Experiment with all three positions before settling on your go-to. Your face shape, hair density, and the occasion all influence which height looks best.
Common Mistakes That Ruin Your Half Up Claw Clip Hairstyle
Even a simple style has a few ways to go wrong.
| Problem | Why It Happens | Fix |
| The clip slides out | The section is too smooth or too heavy for clip teeth | Use the hidden elastic method or switch to a larger clip with deeper teeth |
| Looks too stiff | The clip is placed too tightly; there are no loose pieces | Pull a few strands free from around the clip and along the hairline |
| The top section is flat | No root volume before clipping | Tease at roots first, or pinch section upward as you close the clip |
| Feels uncomfortable | Clip placed too high, tension on scalp | Lower the clip to mid-placement for all-day comfort |
FAQ
What size claw clip is best for a half up hairstyle?
For most hair types, a medium to large claw clip (2.5 to 4 inches) works well. Thick hair needs a jumbo clip. Fine hair does better with a small or medium flat clip that sits flush against the head.
How do I keep my claw clip from sliding out?
Secure the gathered section with a thin, color-matched elastic first, then close your claw clip directly over it. This gives the clip an anchor point and keeps the style in place for hours without adjustment.
Can I do a half up claw clip with short hair?
Yes. Use a small or mini claw clip and gather only the hair at the crown. Even 4 to 6 inches of length at the top is enough to create a half-up look with the right clip size.
Is the Half Up Claw Clip Hairstyle Suitable for Formal Occasions?
Yes. Choose a jeweled, pearl, or metallic claw clip and pair it with soft waves or defined curls. The right clip makes this work for weddings, proms, or formal dinners.
How High Should I Place the Claw Clip for the Most Flattering Result?
Mid placement (aligned with the tops of your ears at the back of the head) is the most universally flattering position. Move the clip higher for more volume, lower for a softer effect.
Does the half up claw clip work on all hair textures?
Yes, but the technique varies. Curly hair needs a large open-jaw clip and works best with a faux half-up that only gathers the side sections. Straight hair benefits from teasing at the roots before clipping. Fine hair needs a smaller, flatter clip for a secure hold.
Conclusion
The half up claw clip hairstyle takes under two minutes once you know the three things that matter: your clip size, the hidden elastic, and where to position it. Get that right and the style holds.
Try one of these 18 variations today. If you find a look you’ll use again, save this page.
For more helpful articles related to haircut ideas, please visit blushhairflow.