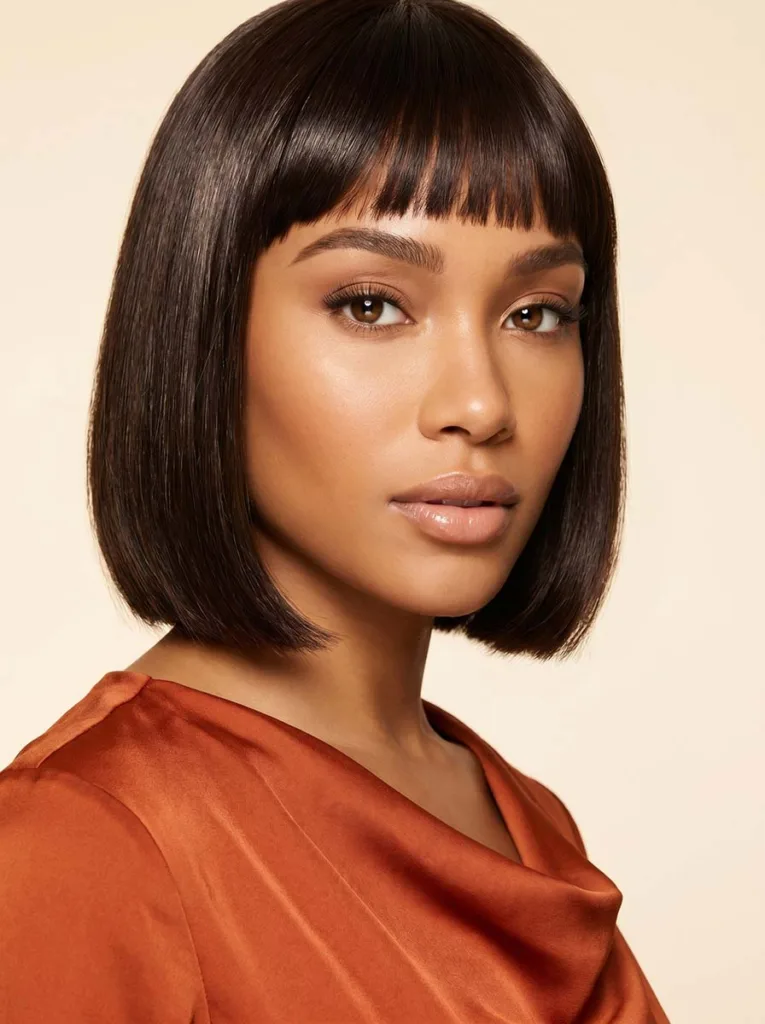
20 French Fishtail Braid Style Ideas: Step-By-Step Tutorial
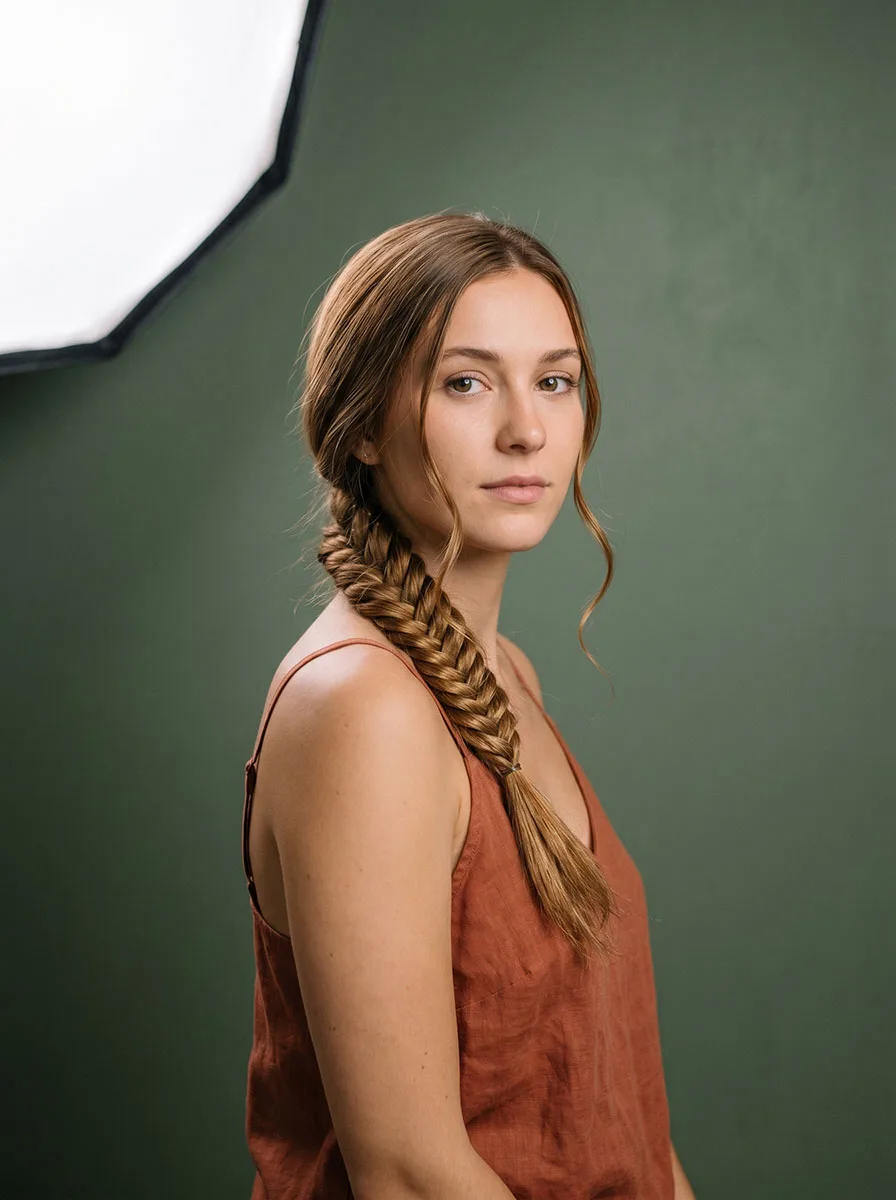
The french fishtail braid isn’t advanced. It just looks that way because most tutorials skip the one step that makes it click. Once your hands know that motion, you can do it on yourself in under 15 minutes.
It combines two techniques: the French braid, which builds from the crown by picking up new hair as it moves down, and the fishtail, which uses two sections instead of three to create the herringbone pattern. It looks intricate but only needs coordination, which comes quickly with a few practices runs.
This guide covers the full technique, common mistakes, and 20 style variations. Master the six steps here and every variation on the list is within reach.
What Is A French Fishtail Braid?
It’s a cross between a French braid and a fishtail braid. Like a French braid, it starts at the crown and picks up new hair as it works down. Like a fishtail, it uses just two sections instead of three. That’s where the herringbone pattern comes from. It looks more involved than a regular plait but is learnable with a bit of practice. Maybe three sessions, maybe less.
French Fishtail Vs. Dutch Fishtail: What’s The Difference?
Two similar braids, one distinction:
- French fishtail: sections cross over the top, so the braid lies flat against the scalp. Classic.
- Dutch fishtail: sections pass under, so the braid sits raised and 3D.
This tutorial covers the French version. The Dutch fishtail braid is just flipping the crossing direction, so once you have this down, you can try that one in the same session.
What You Need To Do A French Fishtail Braid
- Fine-tooth comb or paddle brush
- At least 2 clear hair elastics
- Bobby pins
- Texturizing spray or dry shampoo
- Hairspray
- Hair clips (optional)
Hair Type Matters Here
Straight hair: Do not braid it on wash day. Freshly washed straight hair is too smooth to hold sections. They slide apart constantly. Second-day hair works. So does texturizing spray.
Wavy or curly hair: You’re at an advantage. Natural texture grips well. Light brush to stretch if you want a cleaner look, or don’t bother if you want something more textured.
Thin hair: Smaller sections, lighter tension. A loose braid looks fuller than a tight one when your hair is fine. Pull the sides out a little after you tie it off.
Thick hair: Section carefully. Thick hair can turn into one unwieldy mass if you’re not deliberate about it. Take your time on Step 1.
Length: You need at least shoulder-length hair, roughly 10–12 inches. Shorter and you run out of hair to incorporate before you hit the nape.
How To Do A French Fishtail Braid: Step By Step
Step 1: Prep
Brush everything back, no part. Like you’re about to tie a ponytail. At the crown, take two medium sections side by side. Hold them separately. These are your starting point.
Step 2: Build The Base
One hand holds both sections. With the other, pinch a thin strand from the outer edge of Section 1 and cross it over into Section 2. Then pinch a thin strand from the outer edge of Section 2 and cross it into Section 1. That alternating crossover is the whole fishtail motion. Do it 2–3 times to get the pattern going.
Thinner strands make a more detailed pattern. Pencil-width is about right.
Step 3: Add The Scalp Hair (The French Part)
This is the part most people find awkward at first. It’s the only part with a real learning curve.
Along with the thin outer strand, pick up a small piece of loose hair from the scalp before you cross. Section 1 side: scalp piece plus outer strand, cross both into Section 2. Section 2 side: same thing, crossed into Section 1.
Your holding hand has to stay firm on the two main sections the whole time while your other hand grabs two things at once. It’s a coordination thing. It clicks after a few tries. Don’t overthink it.
Step 4: Work Down
Same motion: scalp piece plus outer strand, cross, repeat. Keep going until you’ve pulled all the loose hair in. This usually happens around the nape.
Step 5: Finish The Tail
No loose scalp hair left to add, so switch to a plain fishtail: alternate pinching thin outer strands and crossing them in. Work to the ends and secure with an elastic.
Step 6: Loosen It
This is the step most tutorials skip. Tug the sides of the braid outward, starting from the top and working down. This is pancaking. It takes the braid from tight and flat to wide and dimensional. It’s sturdier than it looks, so pull with confidence.
Finish with hairspray.
Love how it turned out? Save this tutorial for your next braid day and share it with a friend who’s been wanting to try it.
20 French Fishtail Braid Styles To Try
1. Classic Full Fishtail
Start at the crown and braid all the way down to the ends using the standard french fishtail technique. This is the base version, the one to learn before any variation. Kept tight and smooth, it reads as polished enough for work or a formal event. Tugged loose with the pancaking technique, it becomes casual and wearable every day. The herringbone pattern shows most clearly on medium to long hair. Works on all hair types, though straight hair needs texturizing spray first to keep sections from sliding. Once you can do this version consistently, every other style on this list gets easier.
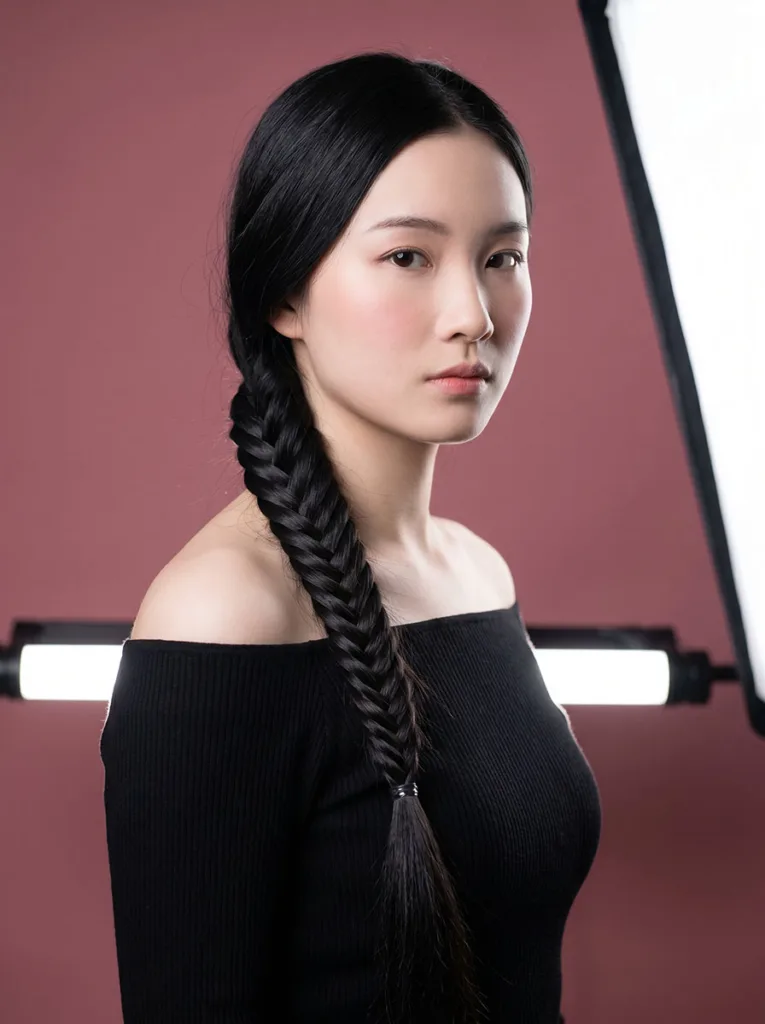
2. Half-Up French Fishtail
Section off the top half of your hair, from the temples back to the crown, and clip the rest out of the way. Braid just that top section using the french fishtail technique, incorporating scalp hair until you run out, then finish with a plain fishtail and tie it off. Release the bottom hair and let it hang loose. The braid sits across the crown like a soft headband. This works well on days when your ends are too dry or damaged to braid, since only the top layer is involved. It also pairs well with waves or curls in the loose section below.
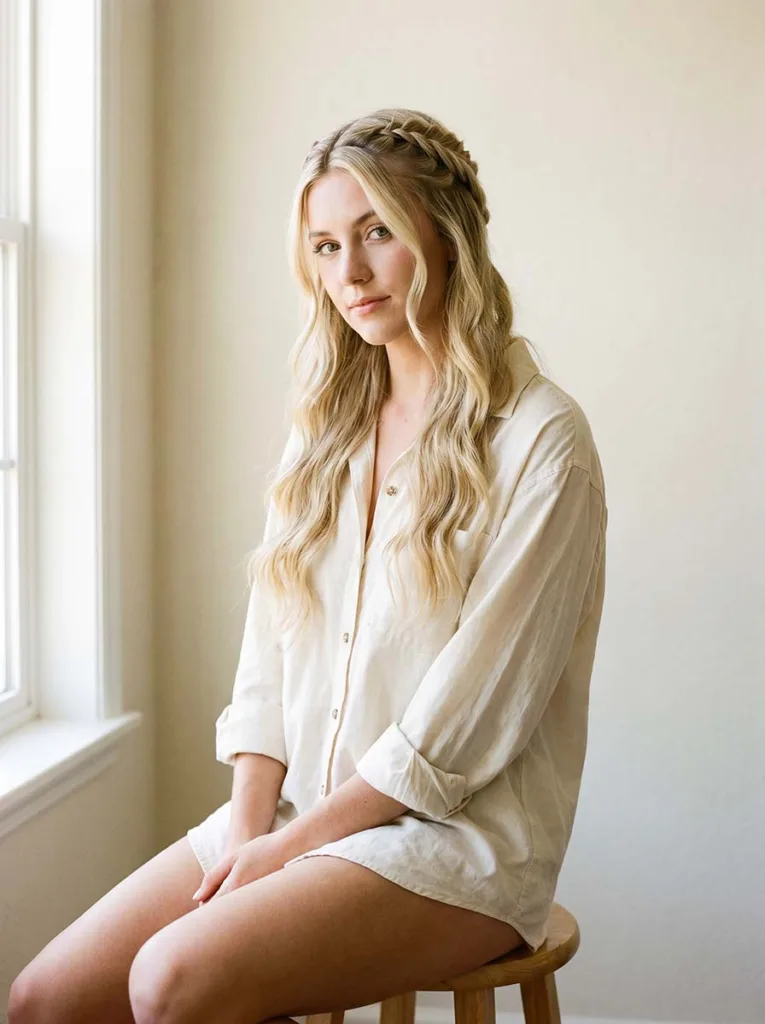
3. Side French Fishtail
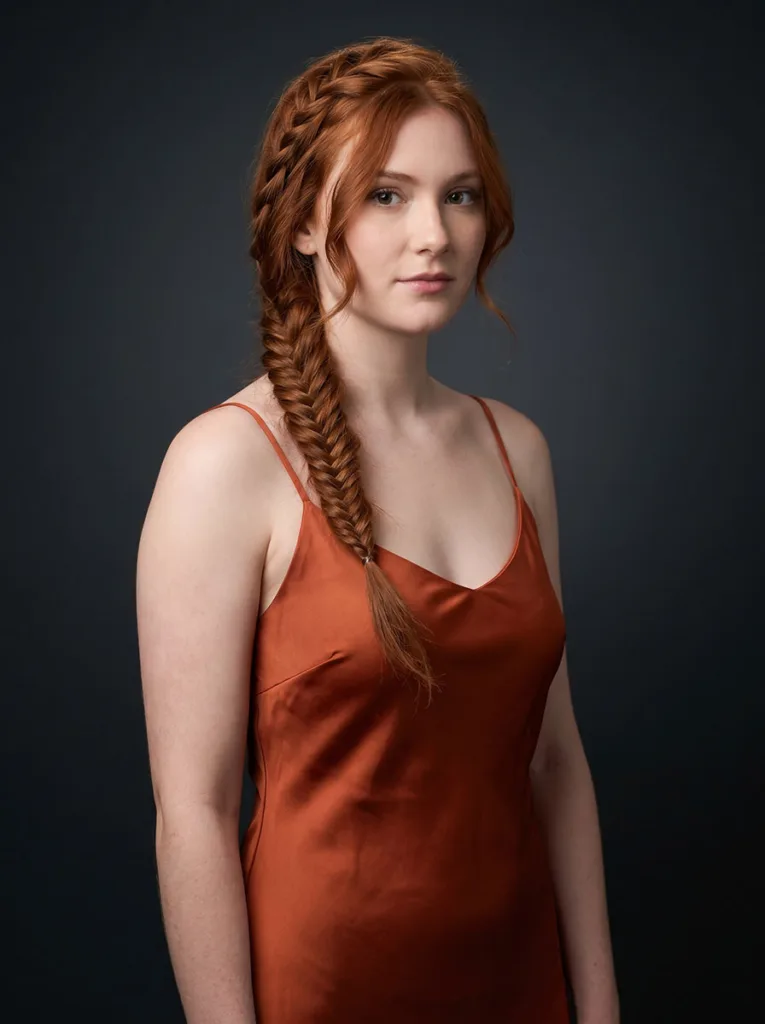
Rather than braiding straight down the back, direct everything to one side before you start. Brush all your hair to the left or right, then begin the french fishtail at the temple on the heavier side, incorporating hair as you work diagonally across and down. The finished braid sits over one shoulder. This is the most beginner-friendly version because you can watch your hands the whole time instead of working blind at the back of your head. It photographs well from most angles. Medium to long hair gets the best results since you need enough length for the braid to reach the shoulder comfortably.
4. French Fishtail Into A Low Bun
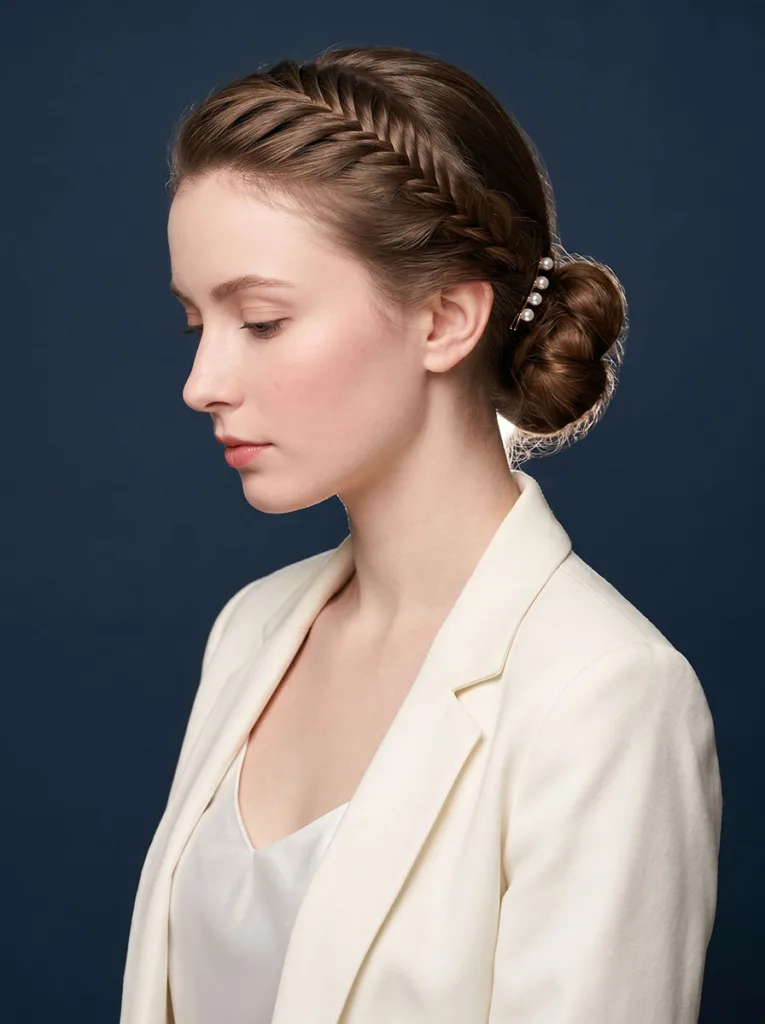
Complete a full french fishtail braid from crown to ends, secure with an elastic, then coil the braid around itself at the nape of the neck. Pin it in place with bobby pins, tucking the tail underneath so the elastic is hidden. The braid gives the bun texture and structure that a plain bun doesn’t have. It holds all day without much product, useful for braided wedding hairstyles or any long event. Add a few pearl or crystal pins into the braid for a formal finish.
5. Double French Fishtail Braids
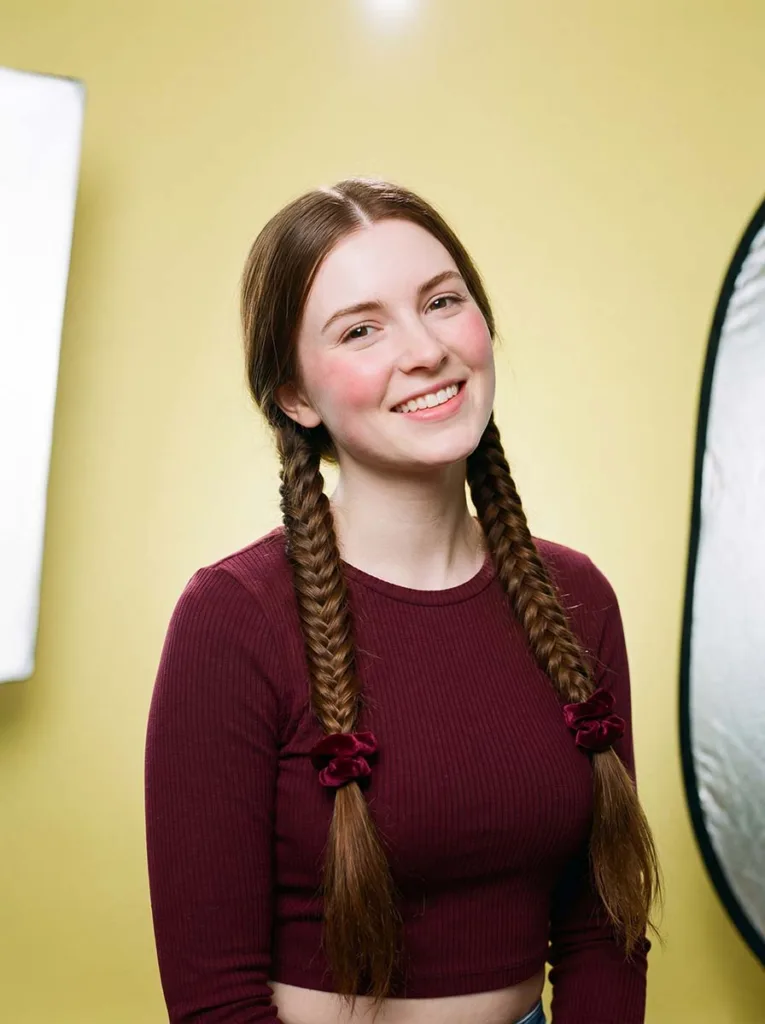
Part your hair straight down the middle, then create one french fishtail braid on each side. Start both at the temple and work them down to the ends. This shows the herringbone pattern on both sides simultaneously and looks best on wavy or naturally textured hair, where the sections have some grip and the finished braids have more body. For a cleaner look, keep the part sharp and the braids even. For something more casual, let the part be slightly off and pull both braids loose after securing. Ribbon or scrunchies at the ends work better here than plain elastics.
6. Crown Fishtail Braid
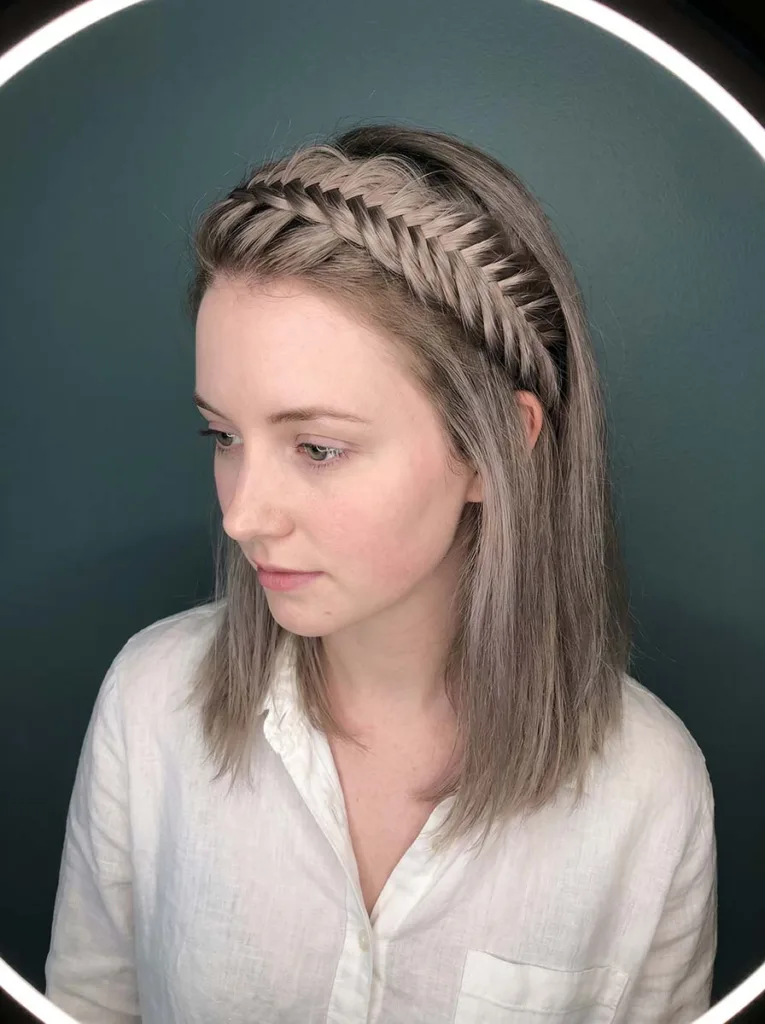
Start at one temple and create a french fishtail braid that travels across the top of the head to the opposite temple, picking up hair from above and below the braid as you work across. When you run out of scalp hair to incorporate, continue with a plain fishtail to the end and pin the tail behind the opposite ear or tuck it under the braid. The finished style sits across the head like a braided headband. It keeps hair off the face entirely, good for active days, hot weather, or anywhere you need your hair contained but still want it to look considered.
7. French Fishtail Ponytail
Gather all your hair into a low or mid ponytail and secure it with an elastic. Then split the ponytail into two sections and fishtail braid down the length, treating it like a standard fishtail from that point. This skips the built-in crown section, so it’s faster than a full french fishtail, but the finished braid has the same detailed pattern. It works when your hair is shorter and there isn’t enough length to build from the crown down. Pancaking the tail after you secure it adds volume. Wrap a small piece of hair around the base elastic to hide it.
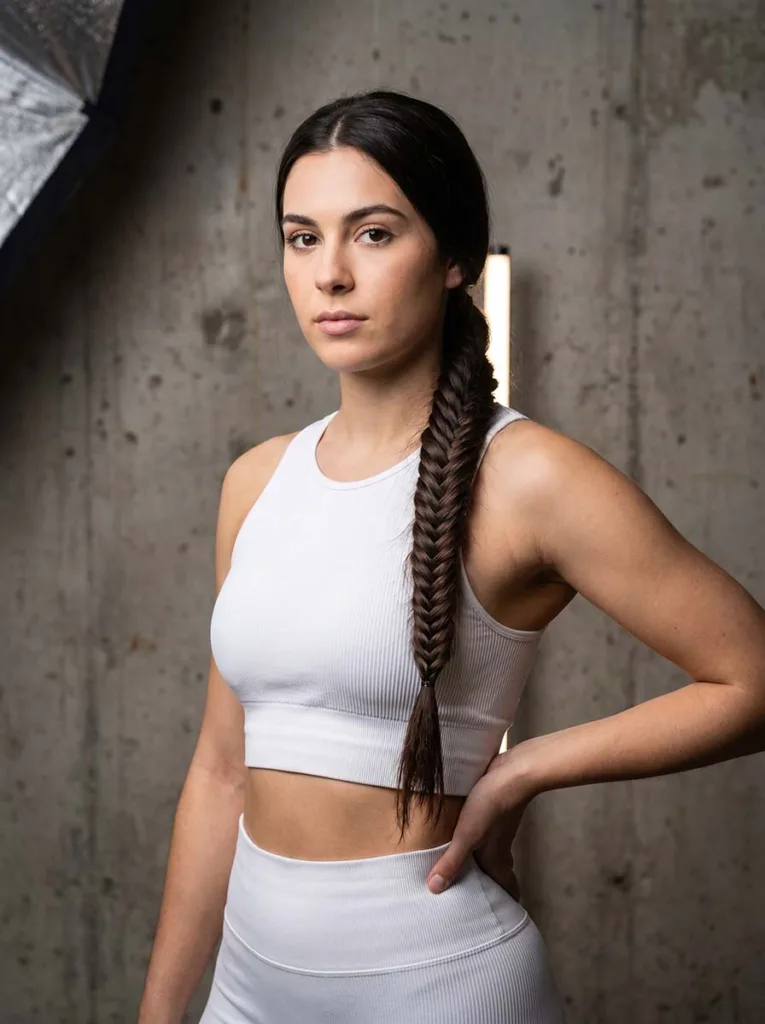
8. High Bun With A Fishtail Base
Start braiding a french fishtail from the crown, incorporating scalp hair for the first 3–4 inches to create a visible braid section at the top. Then stop incorporating new hair. Gather the partial braid and all remaining loose hair together and twist into a high bun. Secure with an elastic and pins. You can see the fishtail pattern at the crown before it disappears into the bun. This skips a full-length braid, so it’s faster. Good for when you want texture at the crown but want the rest of your hair off your neck.
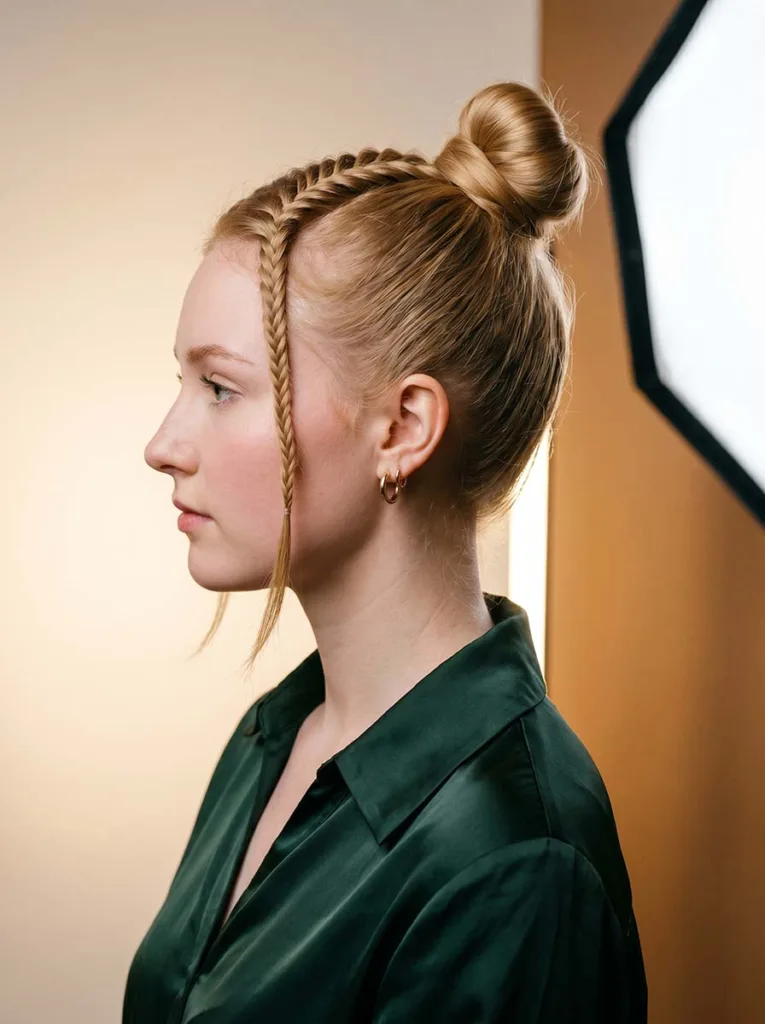
9. French Fishtail With Ribbon Woven In
Choose a thin satin ribbon, about a quarter inch wide, in a color that either matches or contrasts your hair. As you braid, lay the ribbon alongside one of your two main sections and treat it as part of that section throughout. It weaves into the braid as you cross strands. The ribbon runs as a visible detail through the finished braid. Tie it off at the end with the elastic, leaving a small bow if you want, or trim the excess. This shows up clearly on dark hair but works on any color with the right ribbon. Metallic ribbons work well for evening looks.
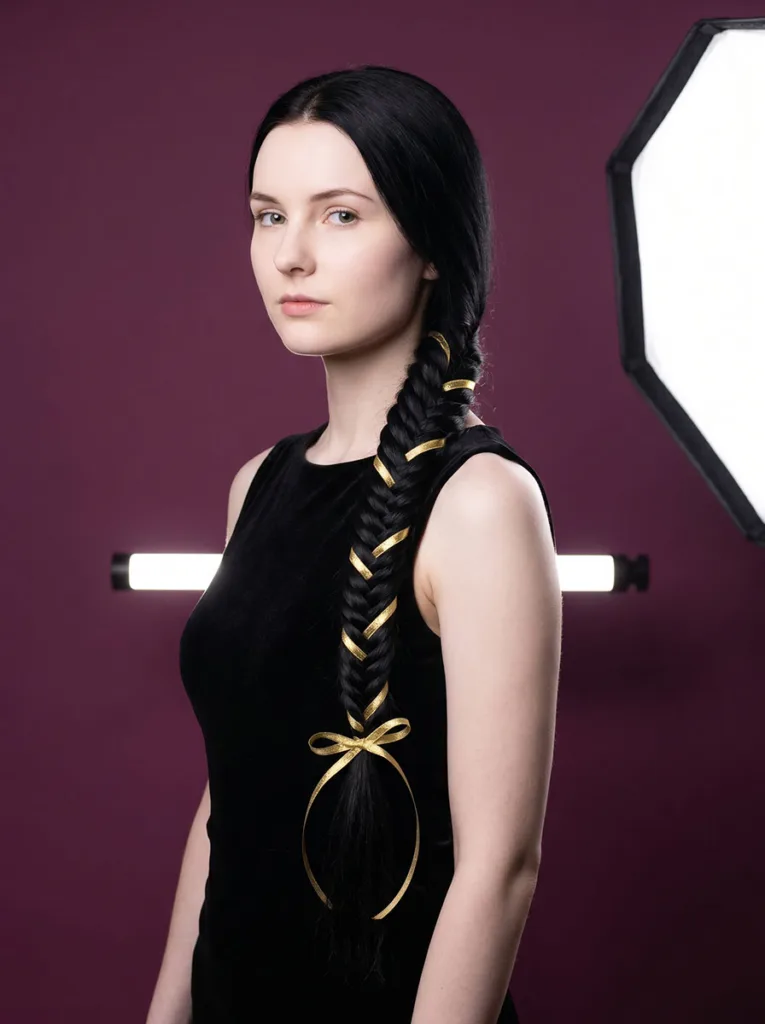
10. Fishtail With Flowers
Work small flowers directly into the braid as you go rather than pinning them in after. Each time you cross a section, tuck a small flower stem into the crossing point and let the next section hold it in place. Baby’s breath, small spray roses, lavender stems, and wax flowers all work because their stems are thin enough to weave in without creating bulk. Dried flowers hold better than fresh ones over a long day. It works at outdoor weddings, garden parties, or summer events. Start with flowers spaced out, one every 4–5 crossings, then adjust for how full you want it.

11. Loose Boho Fishtail
If you love boho hairstyle ideas, this is the version for you. Aim for controlled looseness. Braid with larger sections than usual and don’t worry about keeping them even. Once you tie it off, spend 2–3 minutes pulling the sides of every section outward along the full length of the braid. This is aggressive pancaking. You want the braid wide and textured. Then tug a few strands free around the face and at the temples. The result should look like the braid loosened on its own over a few hours. Finish with flexible-hold hairspray to keep it from unraveling.

12. Sleek Low Fishtail
Apply a smoothing serum or cream to dry hair before you start, work in clean, consistent sections, and keep your grip firm throughout. Skip the pancaking. Slick any flyaways or baby hairs down with a small amount of edge control gel or a fine-tooth comb. You want the finished braid sitting flat and smooth, no volume or texture. This works in formal settings where polish matters: corporate environments, presentations, formal dinners. It also photographs the braid pattern more clearly, since the herringbone detail sharpens when the braid is smooth.

13. French Fishtail With Curtain Bangs Out
If you have curtain bangs, leave them loose to frame your face before you start. Section off everything behind the bangs and braid the french fishtail from that point back, treating the bang sections as off-limits. Loose pieces at the front soften the look and prevent it from reading as severe. This works well if your bangs are at an awkward length, too long to ignore but too short to braid cleanly. The loose front against the structured braid behind adds dimension a braid alone doesn’t have.

14. Waterfall French Fishtail
Instead of keeping every crossed strand inside the braid, you drop alternating strands and let them fall. On one side, cross the strand over as normal. On the other side, cross a new strand in from the scalp but drop the strand from the previous crossing, letting it fall. The dropped strands cascade alongside the braid. You end up with the braid running across or down the head with streams of hair falling through it. It is more complex than a standard french fishtail and worth practicing on a day when you have time to work through it slowly.
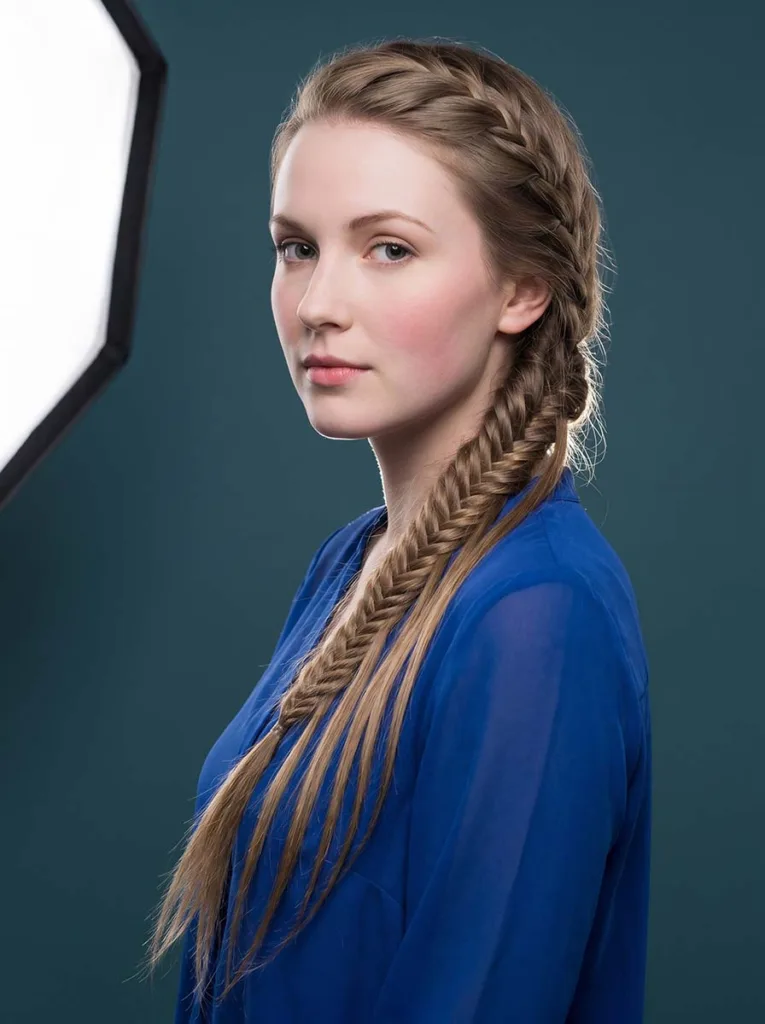
15. French Fishtail Updo
Braid a full french fishtail from crown to ends. Instead of leaving it hanging or coiling it into a bun at the nape, bring the braid up and across the back of the head, pinning it horizontally or diagonally. Tuck the tail end under the braid and pin it flat so nothing hangs loose. The effect is a structured braid that sits against the back of the head like a wide plait. It takes more work to secure than a low bun but creates a cleaner silhouette from the back. Better suited to formal occasions where you’ll be seen from behind: ceremonies, formal dinners, performances.
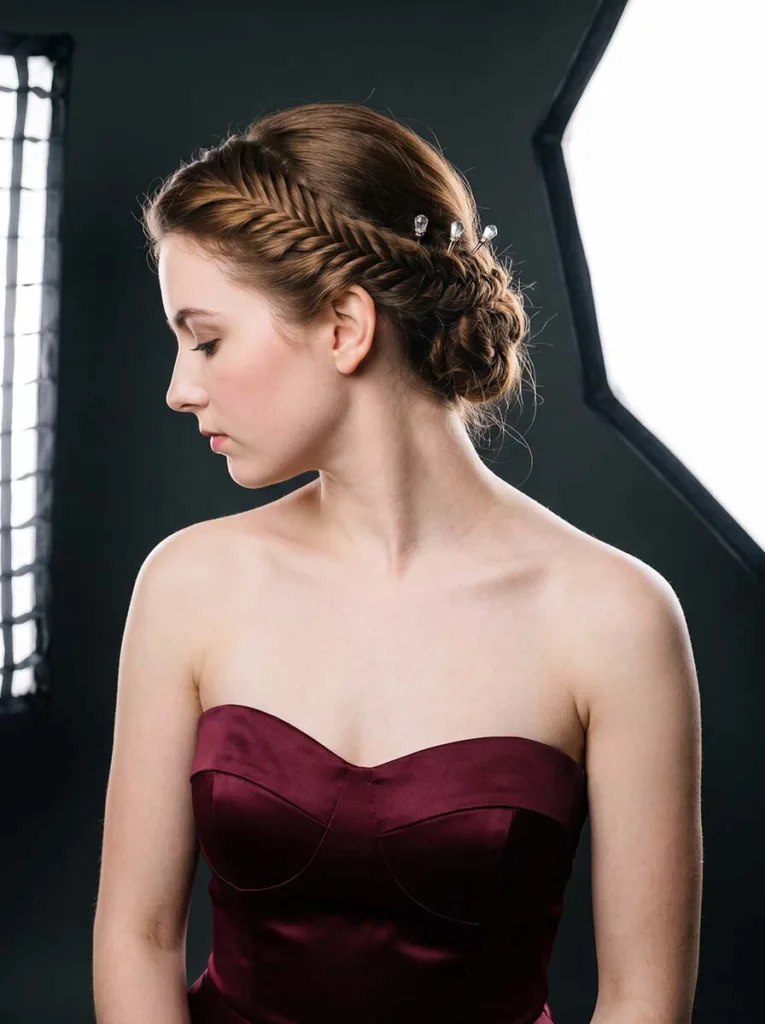
16. Accent Fishtail
Take a small section of hair, about an inch wide, from one side near the temple. Fishtail braid just that section down to the end and pin it back behind the ear. Everything else stays loose. It’s a small detail but adds enough structure to make loose hair look considered. This works on shorter hair that can’t be fully braided, and it’s the fastest option on this list since you’re only braiding a fraction of your hair. You can also do one on each side for a more symmetrical look with still mostly loose hair.
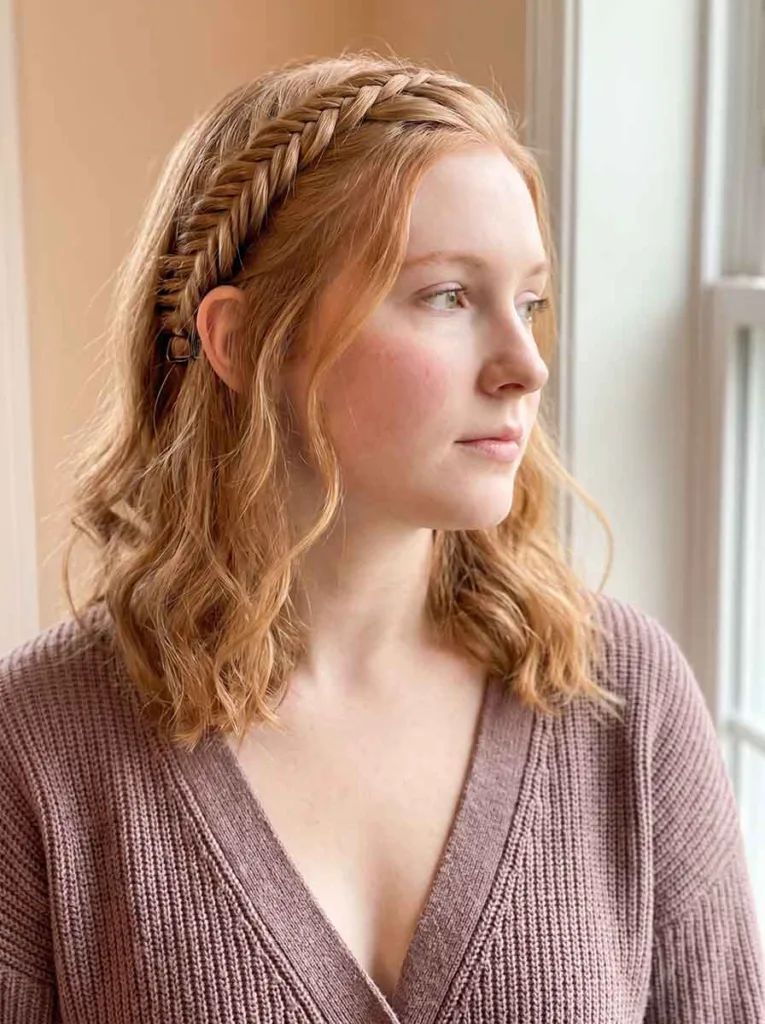
17. French Fishtail Into A Half-Up Bun
Follow the same starting steps as the half-up french fishtail: section off the top half of your hair and braid it. But instead of tying it off as a braid, gather the braid and the remaining top section together and twist them into a small bun at the crown or back of the head. Secure with an elastic and pins. The bottom half of your hair stays loose. You can see the start of the fishtail pattern at the crown before it gets twisted into the bun. The tightness of the bun determines whether it reads as casual or dressy.
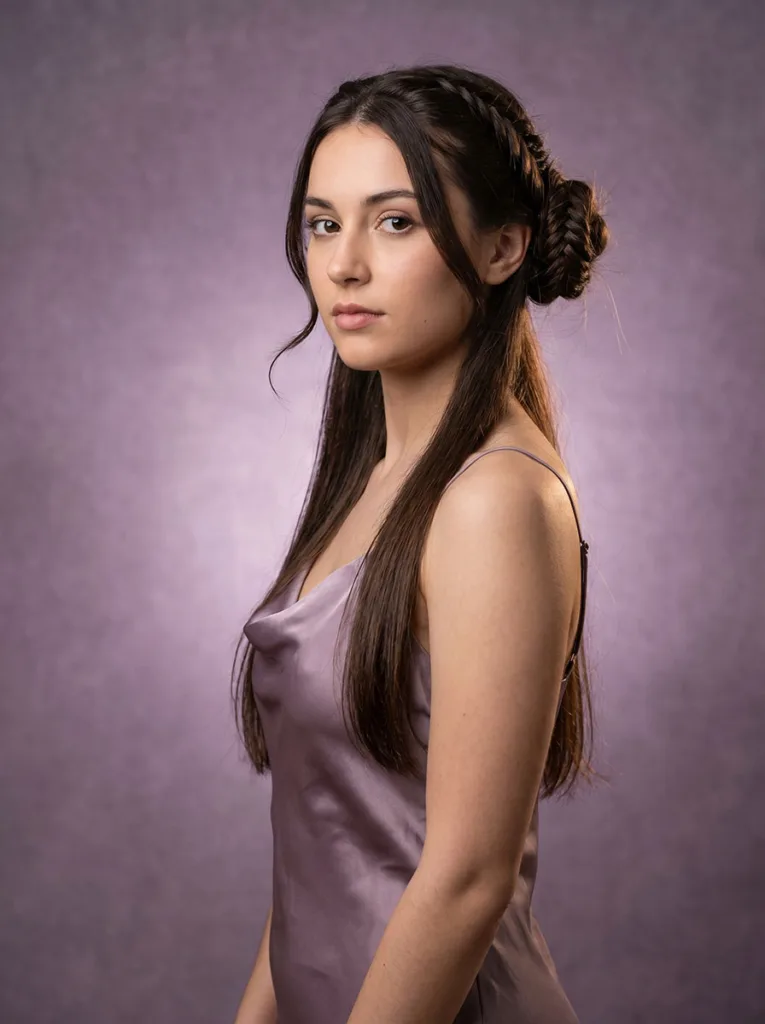
18. Beaded Fishtail
Before you start braiding, thread small hair rings or beads onto a few individual strands throughout your hair. As you work those strands into the fishtail, the beads become part of the braid and show up along the length of it. Metal rings in gold or silver are the most common choice and show up clearly. Smaller beads work better than large ones because they don’t create too much bulk at the crossing points. This takes longer to set up than a standard braid, but the finished result has more detail. Works on all textures but looks best on natural hair where the bead tradition has deeper roots.
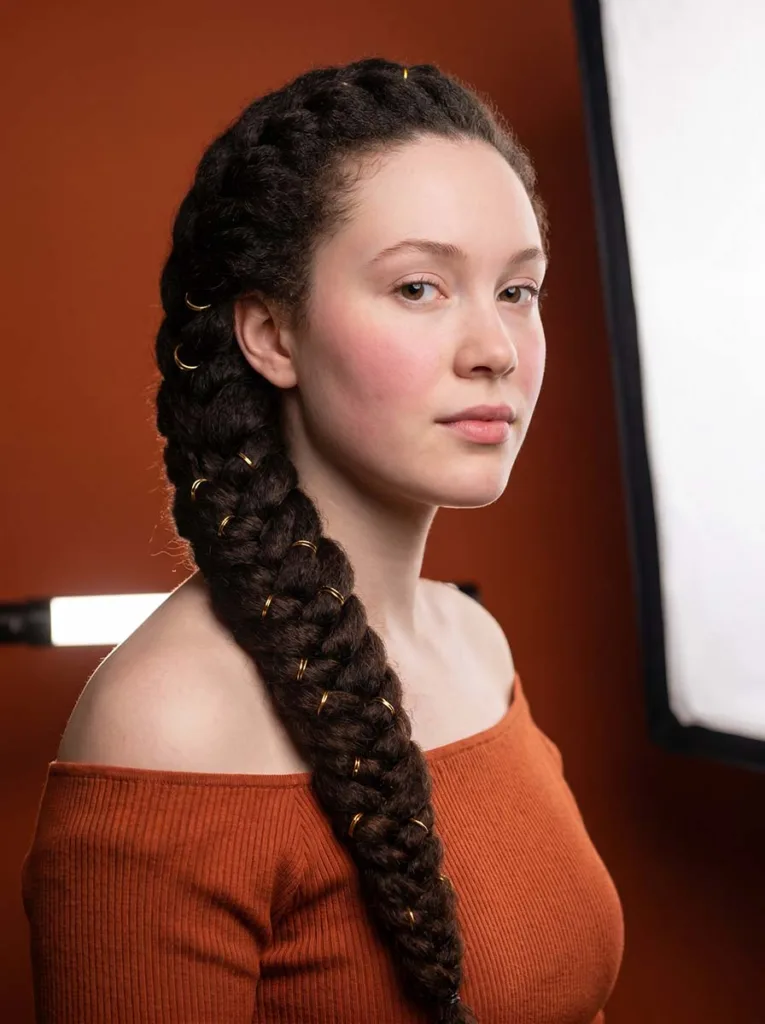
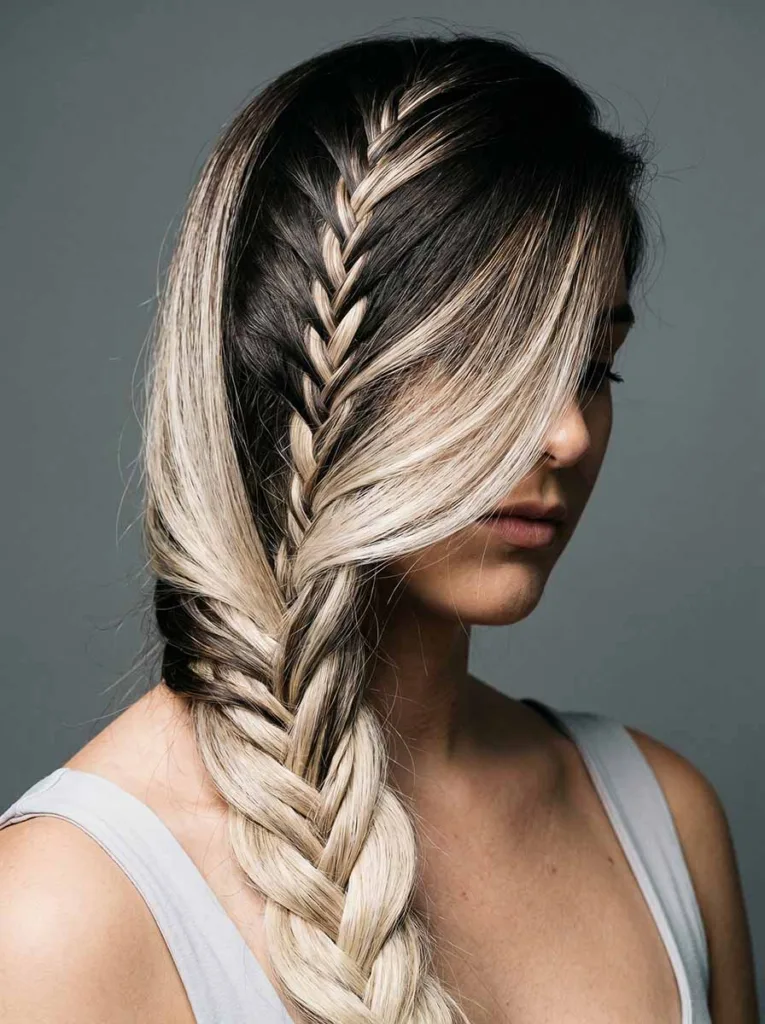
19. Two-Tone Fishtail
This works if your hair has two distinct color zones: highlights, balayage, ombre, or a color melt. Before braiding, position one color into Section 1 and the contrasting color into Section 2. As you alternate crossing strands, each color weaves into the opposite section, making the contrast part of the pattern. The herringbone structure makes the two tones read as more different than they do in loose hair. This requires some awareness of where your colors sit in your hair, but it doesn’t need any special technique beyond the standard french fishtail.
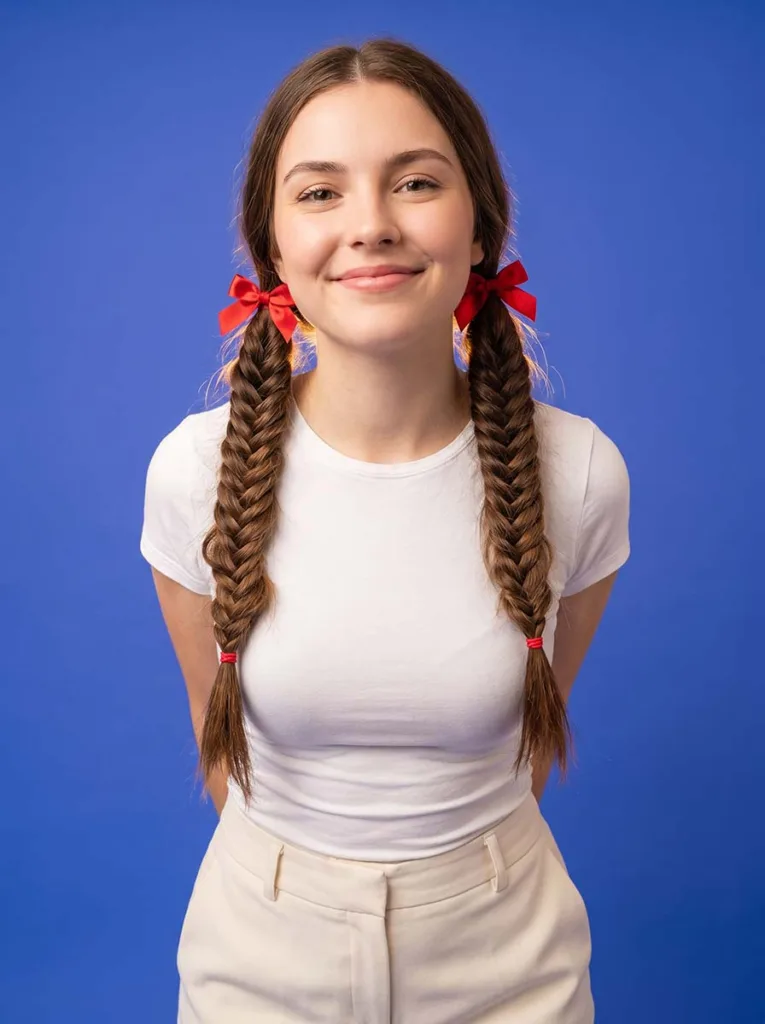
20. French Fishtail Pigtails
Part your hair down the middle and create two french fishtail braids, positioned at or above ear level rather than at the nape. Secure the top sections first with elastics to keep them separated while you braid each side. The higher position makes the style look more playful than low double braids. This works well on kids’ hair because the sections are easier to secure and the braids are shorter. On adult hair, keep the braids tight rather than pancaking them out for a more controlled finish. Finish with matching hair ties or bows at both ends.
Which style are you trying first? Save this to your favourites and come back to it whenever you need a new braid idea.
French Fishtail Braid For Different Occasions
Everyday: Loose and imperfect is the right call. Let a few strands fall around your face and don’t stress it.
Work or school: Tighter braid, smoother finish, no wispy pieces.
Weddings: Full braid into a low bun with a couple of pearl or floral pins worked in. It holds all day and photographs well.
Festivals: Wide and undone. Braid beads or flowers in. Messier is better, genuinely.
Beach or travel: Practical as much as anything — keeps hair in check in wind and humidity. Sea salt spray first, take the braid out after swimming for natural waves.
French Fishtail Braid Troubleshooting: Common Problems And Fixes
Braid slides apart: Grip issue or slippery hair. Dry shampoo or texturizing spray helps. Hold the main sections firmer. There should be some resistance when you cross.
Sections look uneven: A tugged-out finish hides a lot of unevenness. If it’s really bothering you, undo a few inches and redo more carefully.
Braid looks flat: You didn’t pancake enough. Go back in and pull the sides out more — it won’t fall apart.
Hair escaping the braid: You’re probably adding too much scalp hair at once. Smaller pieces, and make sure each strand actually crosses fully before you let go.
Arms aching: This just happens, especially when you’re learning. Bring your elbows closer to your body. Take breaks between sections.
FAQ
How long does hair need to be? At least shoulder-length, roughly 10–12 inches. Shorter and there’s not enough to work with from crown to nape.
Is it hard for beginners? Harder than a three-strand braid, easier than it looks. Step 3 is the only part with a real learning curve. Give it three tries before you decide it’s not for you.
Can I do it on myself? Yes, especially the side version. Use a back mirror or prop your phone up to film yourself — you’ll see immediately what’s going wrong.
How do I make it look fuller? Step 6. Patient tugging from top to bottom. The braid is more secure than it feels.
Does it work on curly hair? Yes, and curly hair grips better than straight hair does. Stretch the curls first for a smoother look, or braid as-is for something more textured.
What’s the difference between this and a regular fishtail? A regular fishtail start with all your hair gathered at the nape and doesn’t pick up anything new. A french fishtail builds from the crown and adds loose hair as it goes — same concept as a French braid, just using the two-section technique.
Ready to try your french fishtail braid?
The french fishtail braid looks like more than it is. Once your hands know the motion, it takes about 15 minutes. The first attempt will be messy. That’s fine. Messy looks good in braids.
Bookmark this for when you need the steps again, and tag us when you try it.
Save this and share it with a friend who loves braids!
For more helpful articles related to haircut ideas, please visit blushhairflow.