20 Cute Toddler Hairstyles For Long Hair
It’s 7:53am. Daycare drop-off is in 7 minutes. You spent three of them on a ponytail that’s already half-undone. Sound like every morning?
Toddler hair is hard to style not because you’re doing it wrong but because long, fine baby hair slips out of elastics, tangles in minutes, and belongs to a small person who refuses to sit still. The styles that look effortless in photos often fall apart before you reach the car.
These 20 cute toddler hairstyles for long hair are built for real mornings. Every style comes with a time estimate, an age guide, and a texture tip so you can pick what actually works for your child’s hair type, not just what looks cute on someone else’s. Quick enough for school runs, polished enough for family photos.
Why Toddler Hairstyles For Long Hair Need A Different Approach
Toddler hair and adult hair are not the same thing, and most styling guides don’t spend much time on why that matters. Most little ones between ages one and four still have fine, silky baby hair that slips out of elastics easily, tangles faster than you’d think, and breaks if handled too roughly.
Long toddler hair is more versatile than it looks. Whether you’re searching for little girl long hair ideas for school mornings or a special occasion, the same small set of tools covers most of it: a few snag-free elastics, some soft clips, and the right technique can carry you through most of the day (the sandbox will have opinions about that last hour, but two out of three isn’t bad).
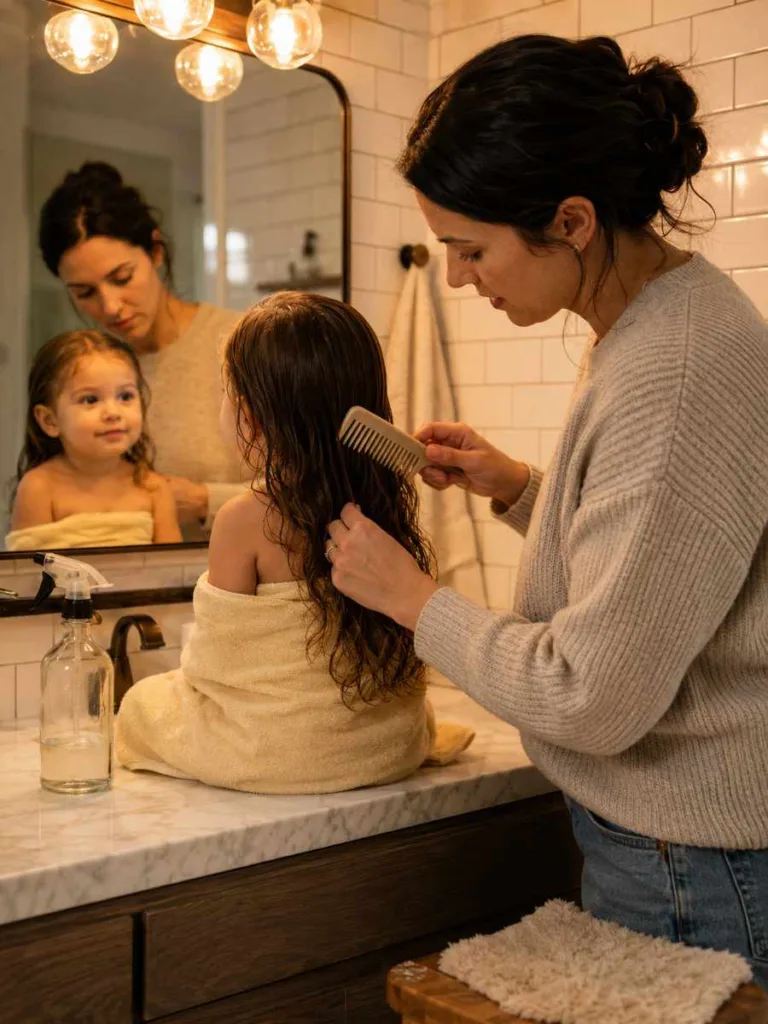
Before you start: Always use a wide-tooth comb and a spray bottle of water or a kid-safe detangling spray. Work from the ends up, never root to tip, to avoid the tear-filled mornings that haunt every parent of a long-haired toddler.
What You’ll Need: Tools For Toddler Girl Long Hair Styles
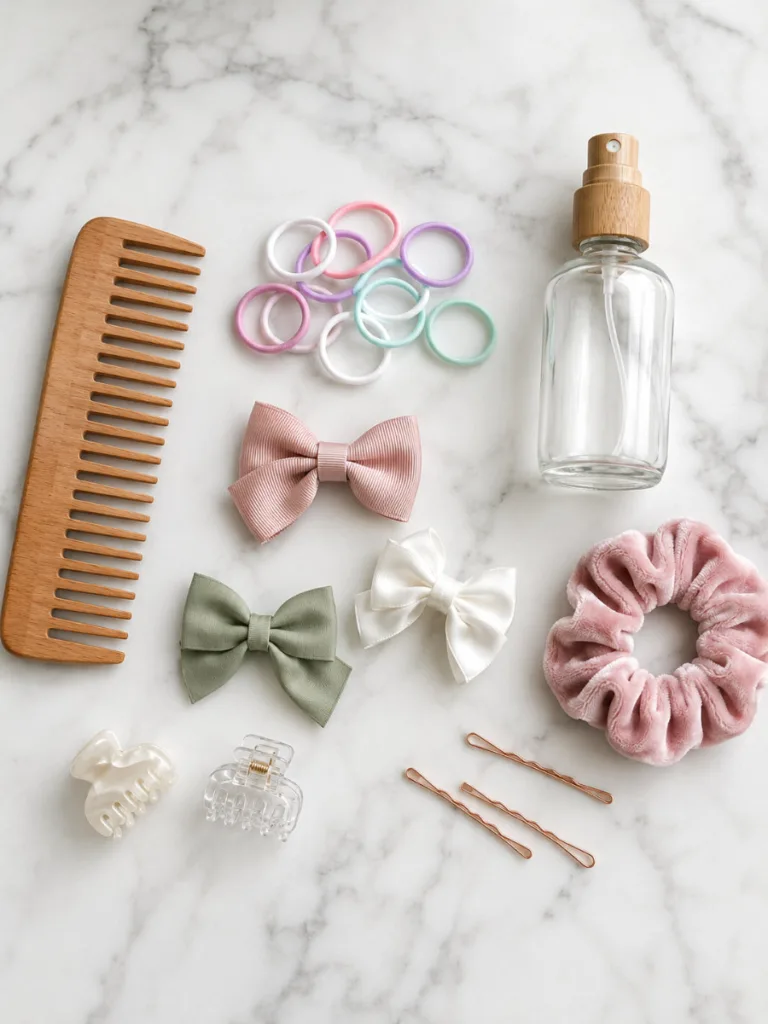
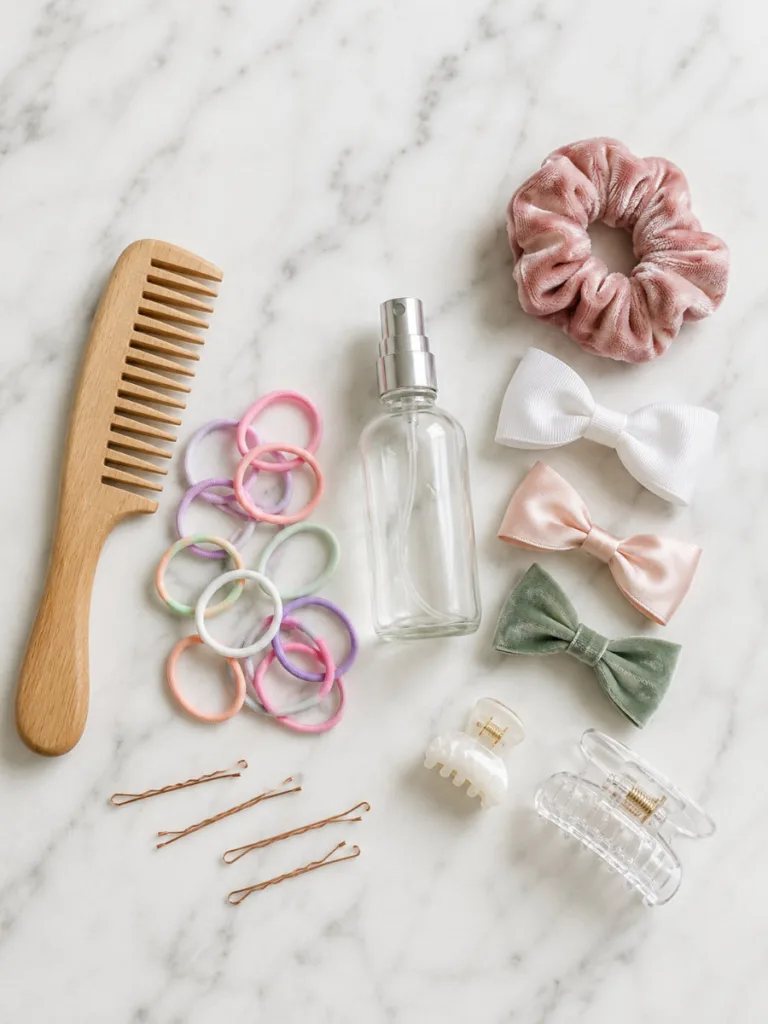
Having the right tools within arm’s reach makes every style faster, gentler, and more likely to actually stay put. Here’s what’s worth keeping in your toddler hair kit:
| Tool | Why It Matters |
| Snag-free elastics | Essential for fine baby hair, standard rubber bands snap strands and cause breakage. Look for seamless, no-metal options. |
| Wide-tooth comb or wet brush | The only safe way to detangle long toddler hair without pain. Start at the ends and work upward. |
| Detangling spray | A kid-safe formula (fragrance-free is best) sprayed on damp hair cuts combing time in half and prevents breakage. |
| Claw clips & barrettes | Perfect for quick styles that need no elastic at all. Keep a variety of sizes — small for front sections, medium for half-ups. |
| Bobby pins | Matched to your toddler’s hair color, they’re invisible anchors for buns, crown braids, and waterfall braids. |
| Bow clips & ribbon | The finishing touch that turns any basic style into something photo-worthy. Grosgrain or satin holds better than slippery materials. |
| Soft scrunchies | A gentler alternative to elastics for low buns and overnight styles no crease, no breakage. |
Easy And Quick Toddler Hairstyles For Long Hair (Under 5 Minutes)
These styles are your weekday lifesavers: minimal fuss, maximum cuteness.
1. The Classic High Ponytail
1–2 minutes | Ages 18 months+
The high ponytail has earned its place in the daily rotation. Sweep everything up to the crown, secure with an elastic hair is out of the face in under two minutes. A thin strand wrapped around the elastic hides the band and makes the whole thing look deliberate even when it wasn’t. It holds through most of the day on straight, wavy, and curly hair without needing a touch-up, and it works from 18 months onward because the technique stays exactly the same as the child grows. A reliable foundation for every other style on this list.

Texture tip: If your toddler has fine, slippery hair, use two elastics stacked together for extra grip.
Face shape tip: Works on all face shapes — the height at the crown adds length for round faces, and the clean lines suit heart and oval shapes equally well.
2. Half-Up Half-Down With A Bow
2 minutes | Ages 1+
Two minutes, one clip, and an oversized bow are all this takes. Gather the top section at the crown and clip it in place; the rest falls naturally below. A bow placed over the elastic takes it from functional to actually pretty. The best part is how forgiving it is: if the top slips a bit during the day, the loose bottom half still looks intentional. On fine hair, the flowing lower portion adds softness that tighter styles can’t manage. It’s the rare toddler look where a slightly imperfect result still passes as deliberate.
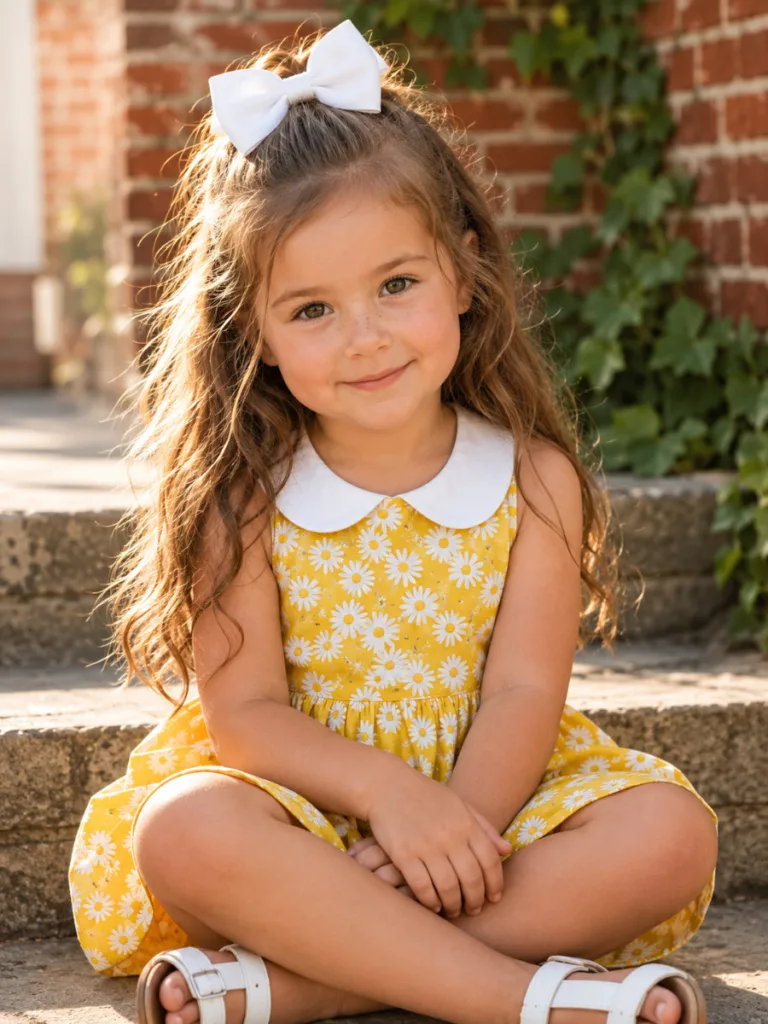
The bottom hair stays natural and down, so the style looks intentional even if it shifts a little.
Face shape tip: Flatters all face shapes — the volume at the crown helps elongate round faces, and the flowing lower section softens the look on heart-shaped faces.
3. Two Front Twists
2–3 minutes | Ages 1+
Two front twists keep hair out of the face without touching most of the head — which matters a lot for toddlers who shut down the moment they feel scalp tension. Take a small section from in front of each ear, twist it away from the face, and pin both sections at the back of the crown with a claw clip or barrette. No tight pulling, no complicated sectioning. The finished look sits cleanly off the face and works on straight, wavy, and curly hair. For the toddler who will only give you 60 seconds, this is the move.
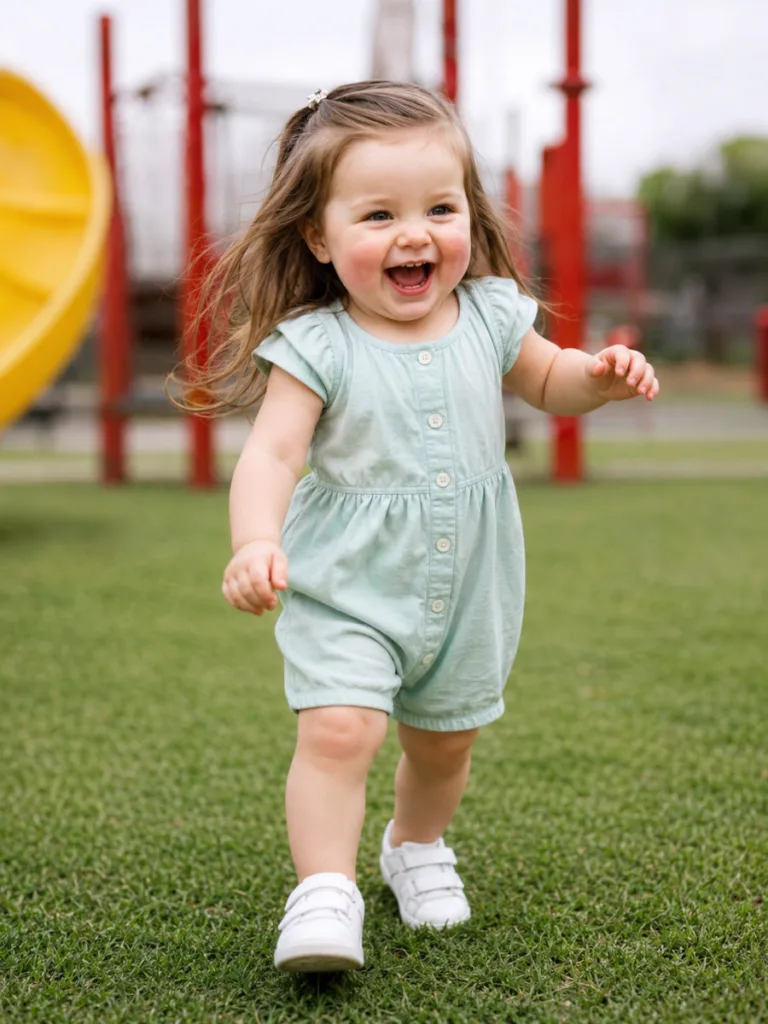
Works on every hair texture and is gentle enough for the most sensitive little heads.
Face shape tip: Great for round and heart-shaped faces — the open, swept-back sections frame the forehead and draw the eye outward rather than downward.
4. Bubble Ponytail
3–4 minutes | Ages 2+
Start with a ponytail at the crown, then add a small elastic every two inches down the length of the hair. Each segment puffs out slightly between the elastics that’s the bubble effect. The style looks involved but takes about four minutes and requires no technique beyond placing elastics evenly. Longer hair works in your favor here: More length means more bubbles, and the style gets more eye-catching as the hair grows. Pastel or rainbow elastics make each section pop and photograph really well for the toddlers who get their picture taken a lot.
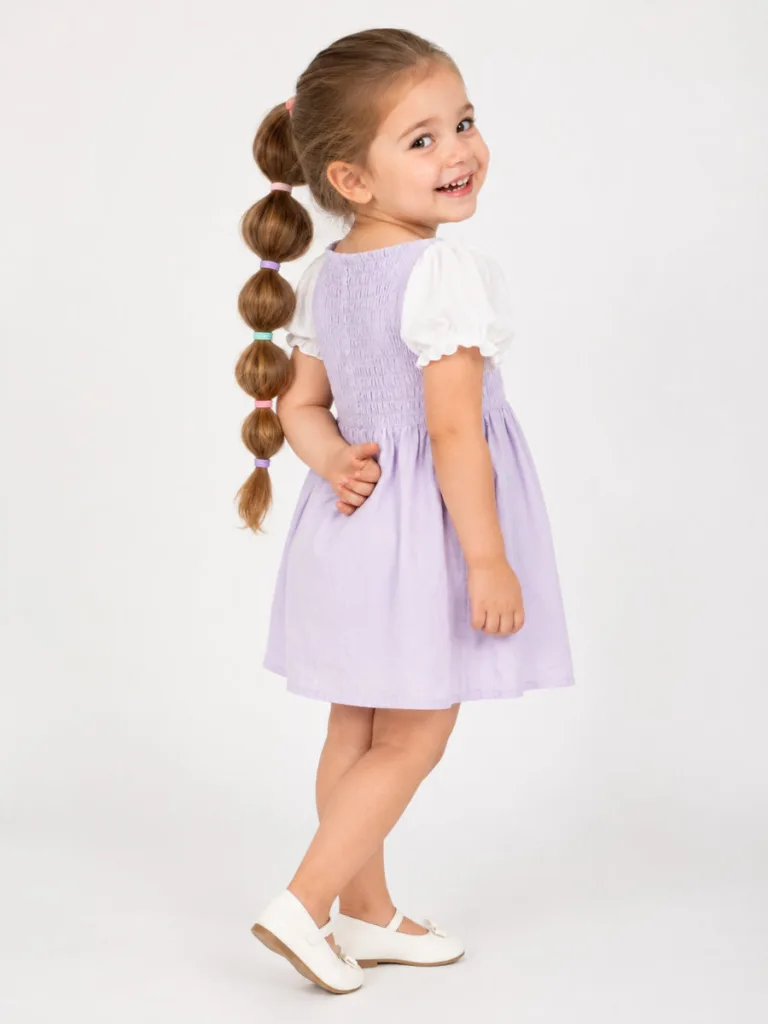
Styling tip: Use pastel or rainbow elastics to make the bubbles pop — this style photographs beautifully.
Face shape tip: Works on all face shapes — the vertical length of the bubbles draws the eye downward, which helps elongate round faces especially.
5. Messy Bun
2 minutes | Ages 18 months+
Gather the hair loosely at the crown, twist, wrap into a soft bun, done. The pieces that escape around the forehead are a feature, not a mistake — they make the whole thing look relaxed rather than rushed. This is also one of the more texture-friendly styles on this list. Toddlers with thick or curly hair get natural grip from their own texture, which means the bun holds longer and requires less fussing to stay up. Two minutes, and it works on days when there isn’t more time than that.
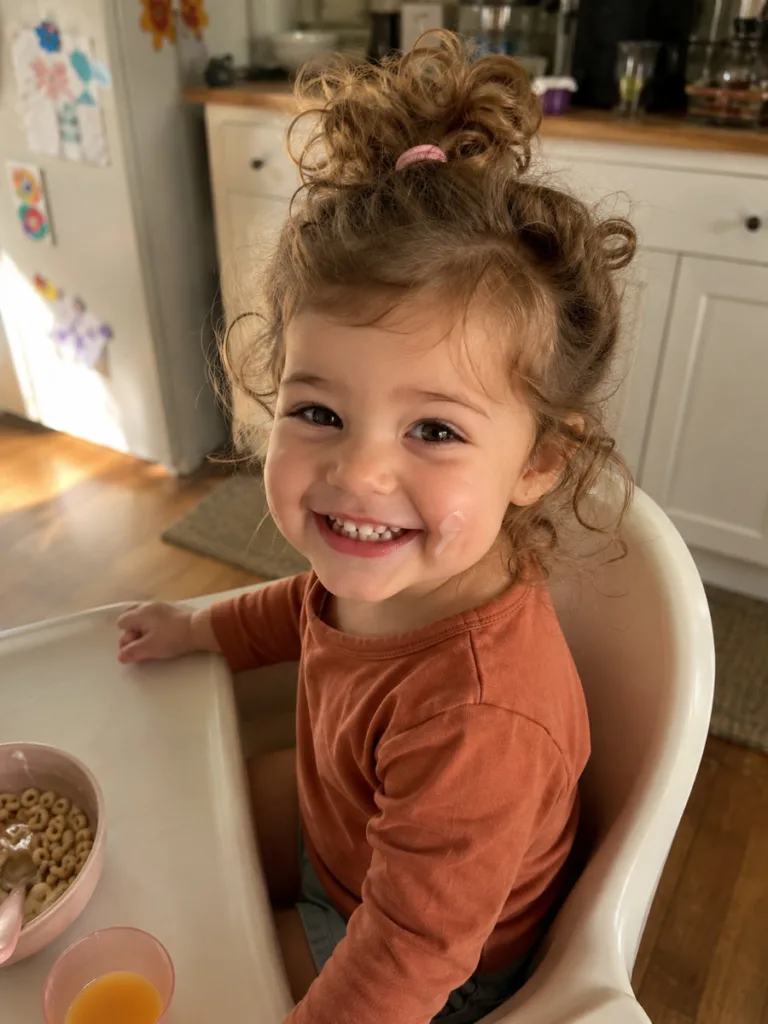
Texture tip: For thick or curly toddler hair, the messy bun holds better naturally because texture gives it grip.
Face shape tip: Best for round faces — the height at the crown creates the illusion of length. The soft, loose shape also keeps it from looking too severe on long face shapes.
6. Low Pigtails
1–2 minutes | Ages 12 months+
Low pigtails are the right call for babies and younger toddlers who spend most of their day in car seats, cribs, or high chairs. Split the hair down the middle and gather each side low, just behind the ears; nothing presses against the back of the head during naps or car rides. The style needs almost no scalp tension and comes together in about a minute. Add matching bow clips or soft scrunchies at each elastic and you have a complete look without any real effort.
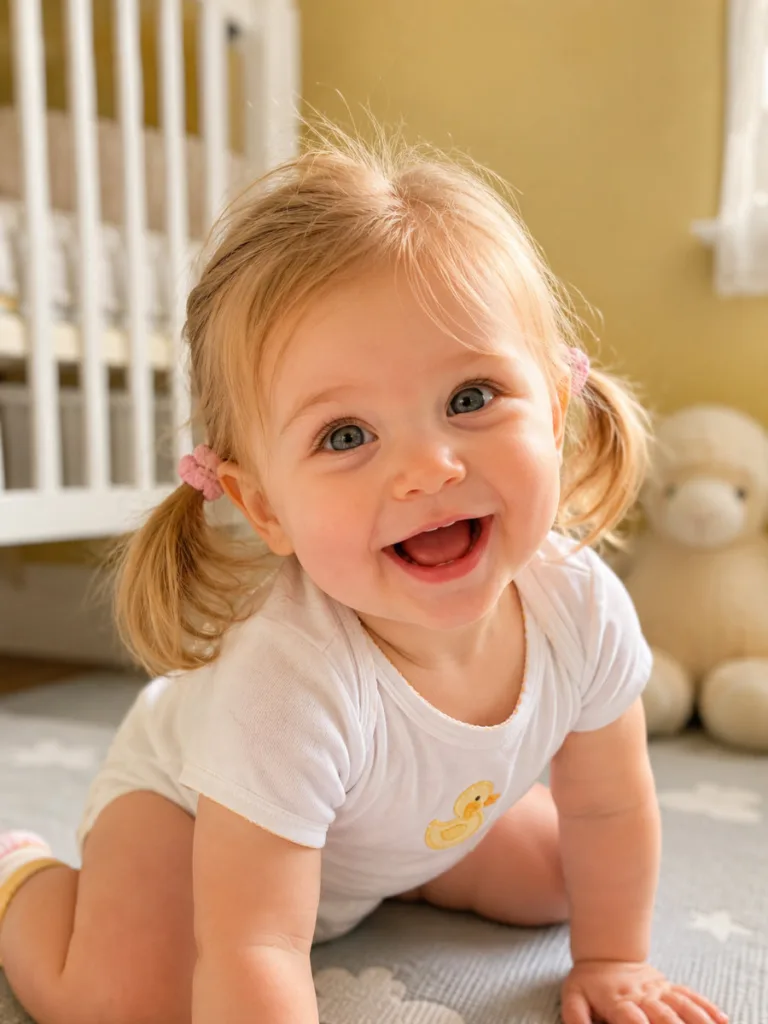
The lower the placement, the more comfortable for little ones who spend most of their day lying down or strapped in.
Face shape tip: Best for oval and long face shapes the low side placement adds gentle width at the jaw without widening round faces at the cheeks.
7. Top Knot
1–2 minutes | Ages 18 months+
The top knot puts everything at the very top of the head gathered, twisted, and secured into an upright knot rather than the soft shape of a messy bun. Hair stays off the face and neck, which makes it the right call for swimming lessons, hot weather, or any activity where a loose style would end up in her mouth or eyes. It looks neat from every angle and photographs cleanly. One thing to know: very fine hair can be too slippery for a single elastic, so stack two to lock it in.
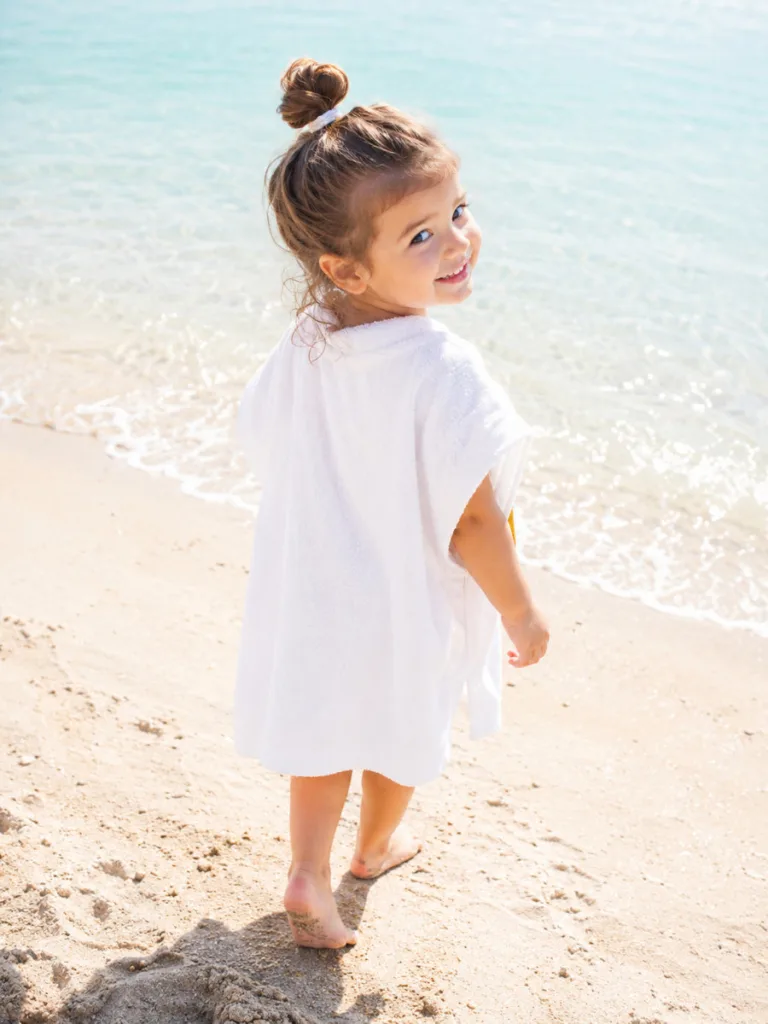
Stack two elastics on top of each other for extra hold on fine or slippery toddler hair.
Face shape tip: Ideal for round faces — the height at the very top of the crown creates strong upward length. Skip this one for very long face shapes where extra height can over-elongate.
Braided Toddler Hairstyles For Long Hair
Braids on toddlers don’t need to be perfect. Keep the sections loose, don’t overthink the tension, and remember that a slightly uneven braid on a two-year-old still looks great.
8. Braided Pigtails
5–7 minutes | Ages 2+
Part the hair down the middle, divide it into two sections, and work each side into a loose three-strand braid secured with a bow clip at the base. The result holds through most of the day on straight, wavy, and curly hair. For toddlers who won’t sit through both braids at once, do one braid, let her run off for two minutes, then call her back for the second. It’s much easier than fighting through both consecutively when patience is running thin. Keep the tension gentle tight braids on fine baby hair cause headaches and breakage.
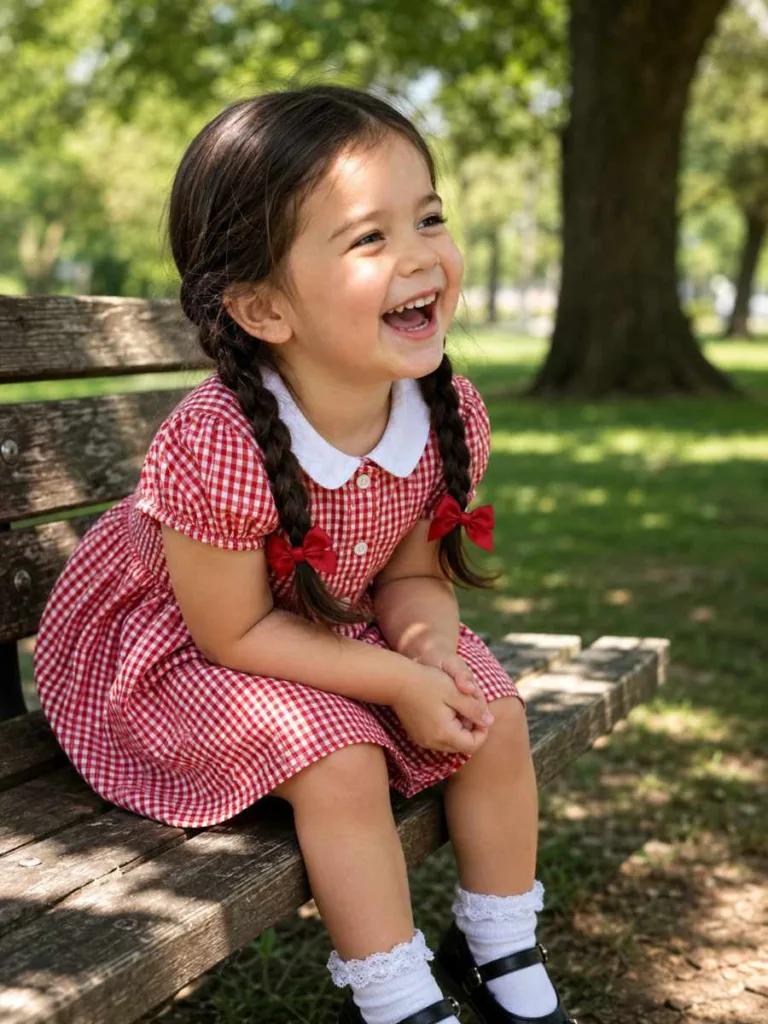
Age tip: At 18 months, a simple three-strand braid is plenty. Save Dutch or French braids for age three and up.
Face shape tip: Works on all face shapes — the symmetrical placement balances oval and round faces, and keeping the braids at medium height avoids narrowing a heart-shaped face.
9. Dutch Braid Headband
5–8 minutes | Ages 3+
A Dutch braid headband runs from one temple to the other along the front hairline, acting as a built-in headband that won’t slip or get pulled off mid-morning. The Dutch braid crosses strands under rather than over, which creates a raised, three-dimensional look that seems more complicated than it is. In practice, it’s the same motion repeated across the front of the head — you just need to work in small sections as you travel from temple to temple. Best for toddlers who can sit still for five to eight minutes, which realistically means age three and up.
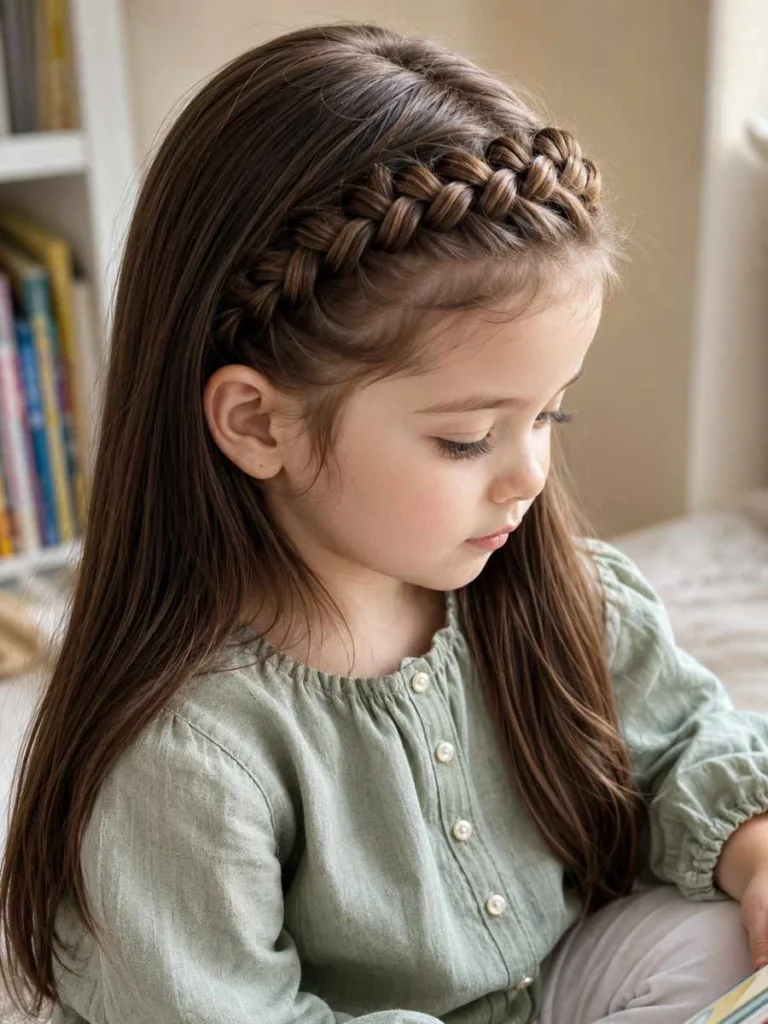
Mist the hair lightly with water before braiding it gives fine toddler hair just enough grip to keep the braid from loosening mid-day.
Face shape tip: Particularly flattering on round and oval faces the braid frames the hairline and draws the eye across the forehead, adding definition and structure.
10. Side French Braid Into Ponytail
6–8 minutes | Ages 2.5+
A French braid starts at the crown on one side and travels toward the opposite ear, picking up fresh sections of hair along the way. Once it reaches the ear, the remaining loose hair joins the braid tail, and everything comes together in a low ponytail. The useful thing about this structure is that the ponytail absorbs any unevenness in the braid sections; those that aren’t perfectly even just disappear once you secure the end. The finished look seems more polished than the effort involved, which makes it a reliable choice when you want something that reads as deliberate.
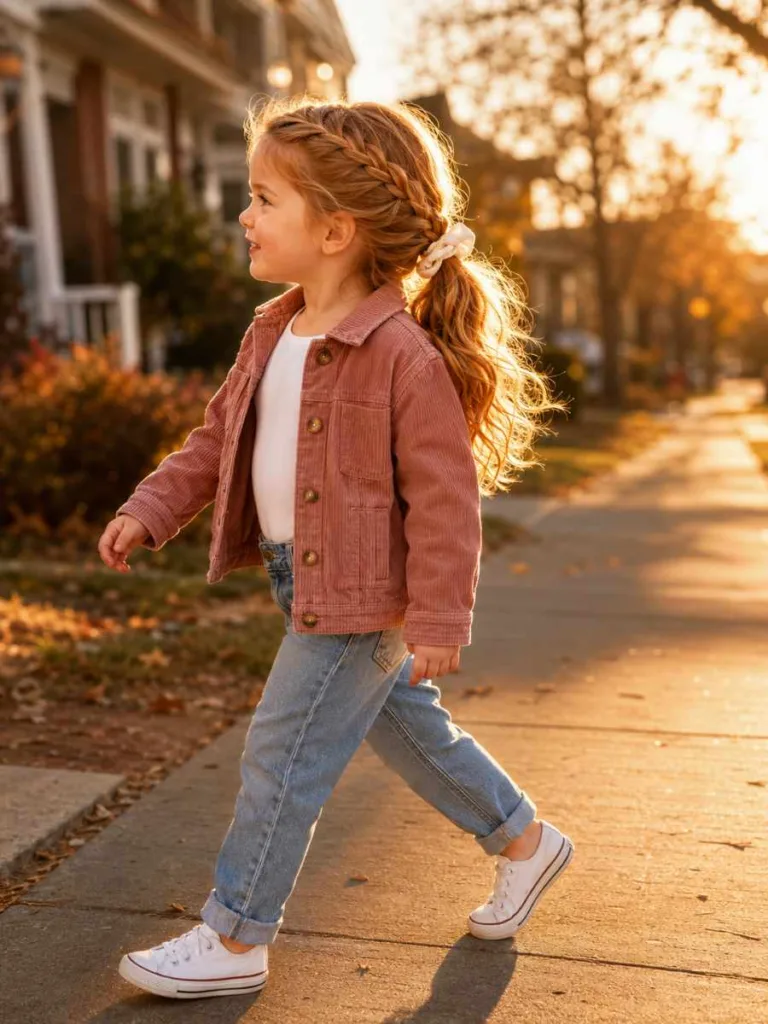
Keep the braid sections small and loose; tight sections are harder to maintain on active toddlers and can cause discomfort at the scalp.
Face shape tip: Great for heart and round faces. The diagonal sweep breaks up width at the forehead and cheeks, adding asymmetry that balances a rounder face shape.
11. Twisted Pigtails
3–4 minutes | Ages 18 months+
Twisted pigtails are what you reach for when you haven’t learned to braid yet. Split the hair down the middle into two sections and twist each side in one continuous direction before securing the end with an elastic. The twist gives the pigtails more structure than leaving them loose, and the hold lasts longer than plain pigtails. They come together faster than a proper braid and look more finished, which makes them a solid option for mornings that are already running late. No technique needed, and they work on any hair texture.
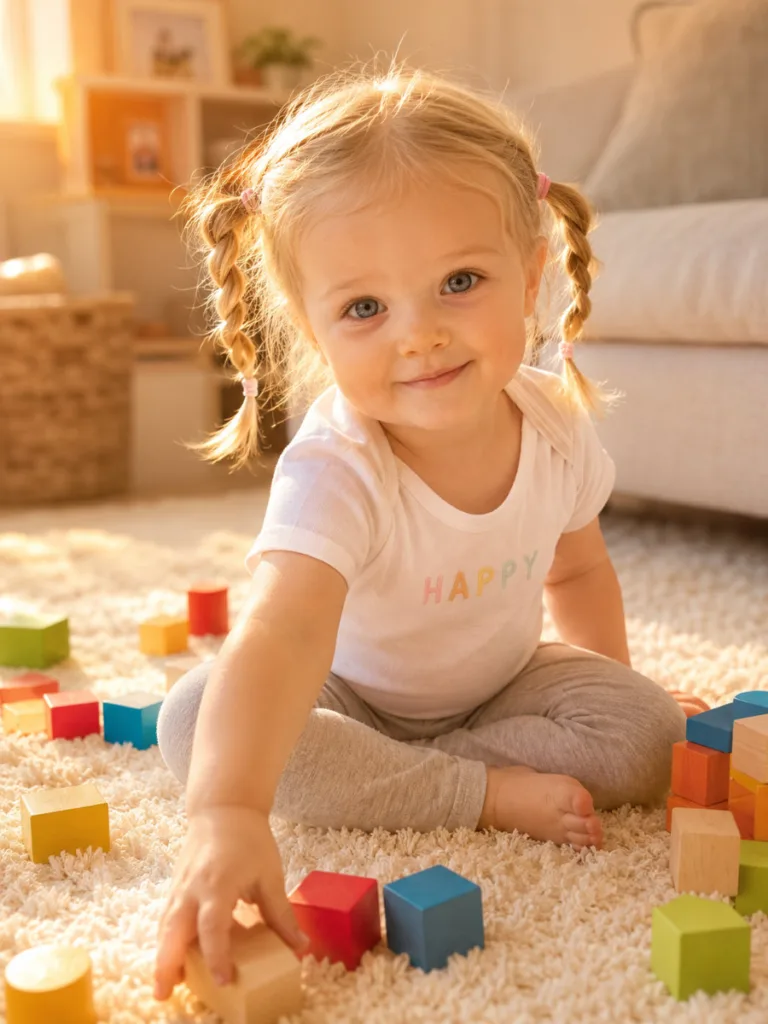
Face shape tip: Suits oval and round faces best — the symmetrical placement works well on oval faces, and the slight volume at each side softens the appearance of round cheeks.
12. Rope Braid Ponytail
4–5 minutes | Ages 2+
Gather the hair into a ponytail at the crown, then divide it into two equal sections. Twist each section tightly in the same direction, then wrap the two twisted sections around each other in the opposite direction that opposing tension is what keeps the rope effect from unraveling. The finished result looks textured and intricate without any actual braiding required. It takes about four minutes, and even if the twists aren’t perfectly even, the overall shape still reads as deliberate. Longer toddler hair shows the rope effect more clearly, so this style gets better as the hair grows.
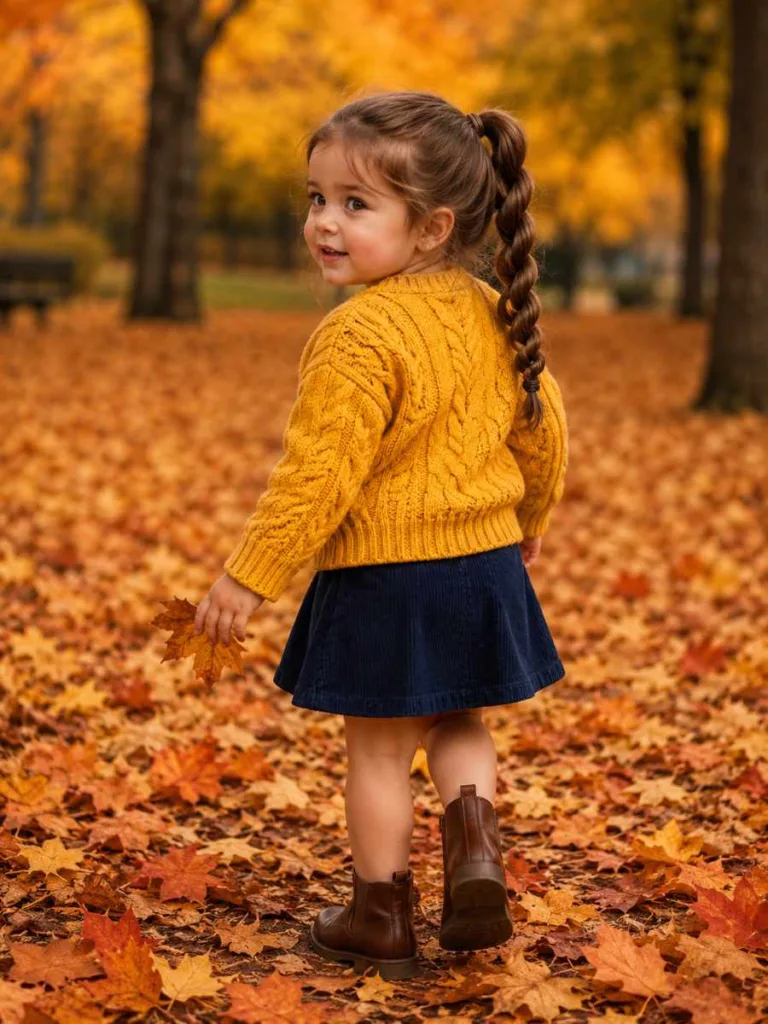
Twist each section in the same direction first, then wrap them around each other the opposite way that opposing tension is what keeps the rope braid from unraveling.
Face shape tip: Works on all face shapes the length and texture of the rope braid draw the eye downward, which helps create the illusion of length on round faces.
Cute Special Occasion Toddler Hairstyles For Long Hair
When your little one has a birthday party, family photos, or a holiday gathering, these styles are worth the extra few minutes.
13. Crown Braid
10–12 minutes | Ages 3+
Two loose braids, one on each side of a center part, wrap around the top of the head in opposite directions and pin where they meet. When they line up well, it reads as a single continuous crown braid running all the way around the hairline. The style holds once pinned and photographs cleanly at any angle. It takes 10–12 minutes and requires a toddler who can sit still for that long, so this one works better closer to age three or four. Worth saving for photos, parties, and the occasions that actually get remembered.
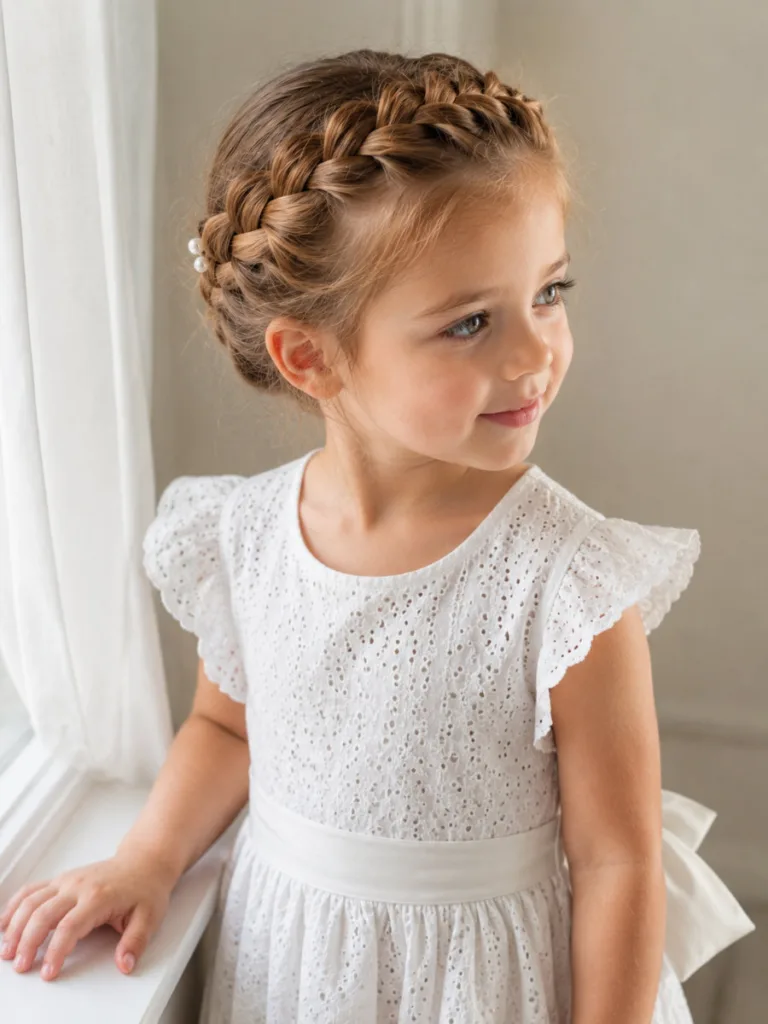
Use bobby pins that match your toddler’s hair color to keep the pinned ends invisible and the crown braid looking seamless.
Face shape tip: Most flattering on oval faces — the circular braid frames the face evenly. Also adds width to long face shapes, making it genuinely versatile across multiple face types.
14. Half-Up Space Buns
5–6 minutes | Ages 2+
Two small buns at the top of the head, with the rest of the hair falling freely down the back. Each bun is just a small twisted section of the top half of the hair, secured with an elastic; there’s nothing more complicated than that. Tiny bow clips at the base of each bun finish the look. On straight or fine hair, the loose bottom portion adds softness that balances the structure of the buns above. Fast to make, easy to fix mid-day if one bun loosens, and it photographs well enough to justify the occasional extra few minutes.

Face shape tip: Best for oval and long face shapes, the width at the crown balances a longer face. Use smaller buns on round faces to avoid adding too much width at the top.
15. Waterfall Braid
8–10 minutes | Ages 3+
A waterfall braid is a variation on the French braid where every other dropped strand gets released instead of incorporated. Those released strands cascade down the side of the head as you work across that’s the waterfall effect. On long toddler hair, the falling sections look clear and defined because there’s enough length for each strand to really fall. The style is more forgiving than a standard French braid: loose strands are part of the design, so sections that aren’t perfectly even still look intentional. Keep the braid relaxed and the released sections natural rather than combed flat.
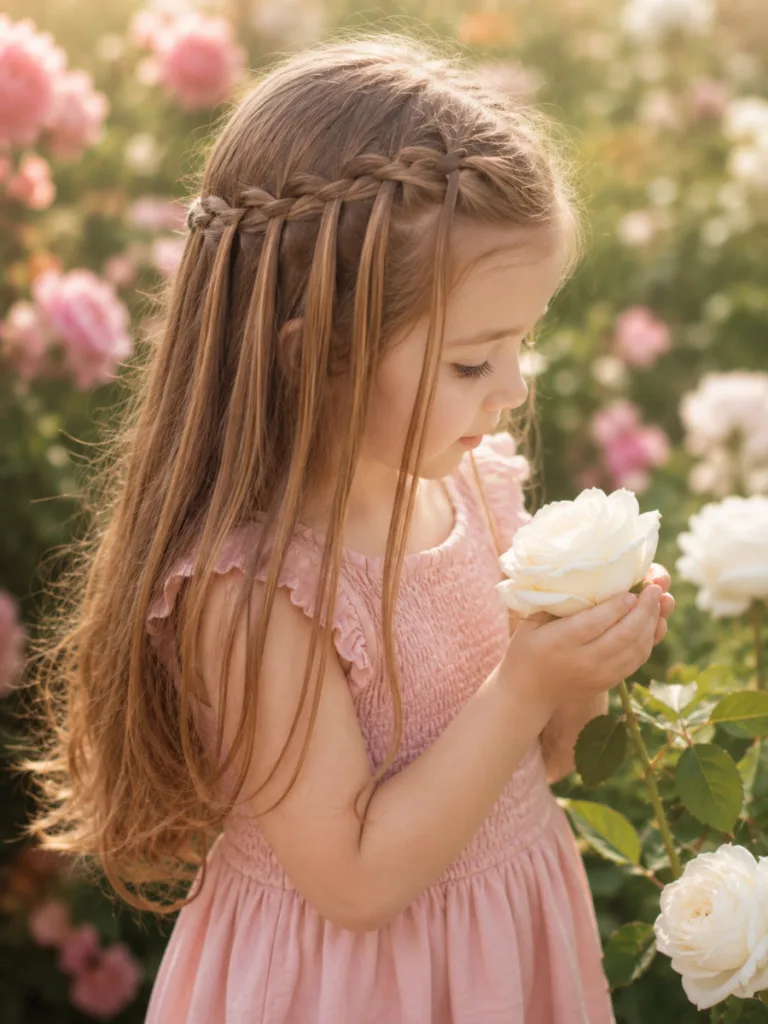
Keep the braid loose and relaxed; the flowing, undone quality is what gives this style its effect.
Face shape tip: Flatters heart and oval faces; the side placement and cascading strands draw the eye along the cheekbones, adding soft movement that suits a wider forehead.
16. Braided Bun
6–8 minutes | Ages 2+
Work the hair into a single loose braid down the back of the head, then coil the braid on itself and pin it flat at the nape or the crown. The braid adds texture to what would otherwise be a plain bun, and because the coiled braid sits flat rather than poking out, it stays put longer than a standard twisted bun. The position changes the feel: crown placement reads more formal, and nape reads more relaxed. Either way, it holds through a school day or an afternoon party without needing much attention.
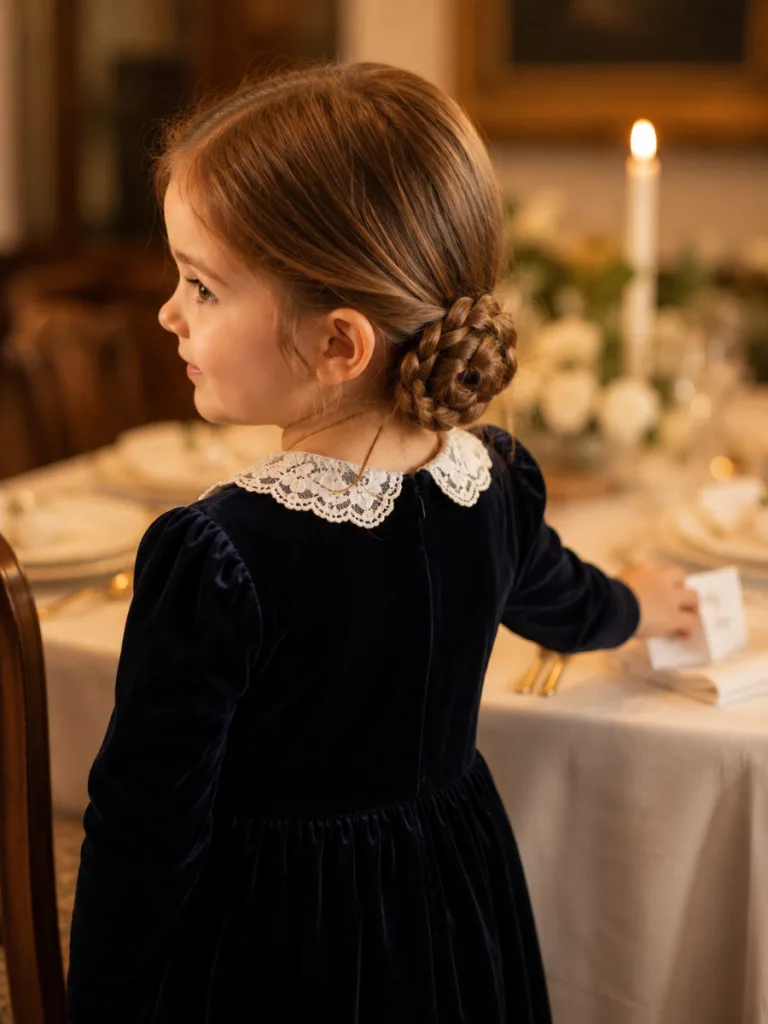
Face shape tip: Works on all face shapes crown placement suits oval faces best, while nape placement is more flattering for round or heart-shaped faces where you want to avoid adding height.
17. Bow Bun
5–7 minutes | Ages 2+
Secure a high ponytail at the crown, then loop the hair and split it to form two wings of a bow shape, threading the remaining tail through the center to lock everything in place. The finished result is a bow made entirely from your toddler’s own hair — no clips or accessories needed to hold the shape. It’s a style that gets noticed, which makes it well-suited to birthdays, holiday photos, or any occasion where you want the hair to actually show up in the pictures. Works best on toddlers with enough hair length and density to hold the bow shape.
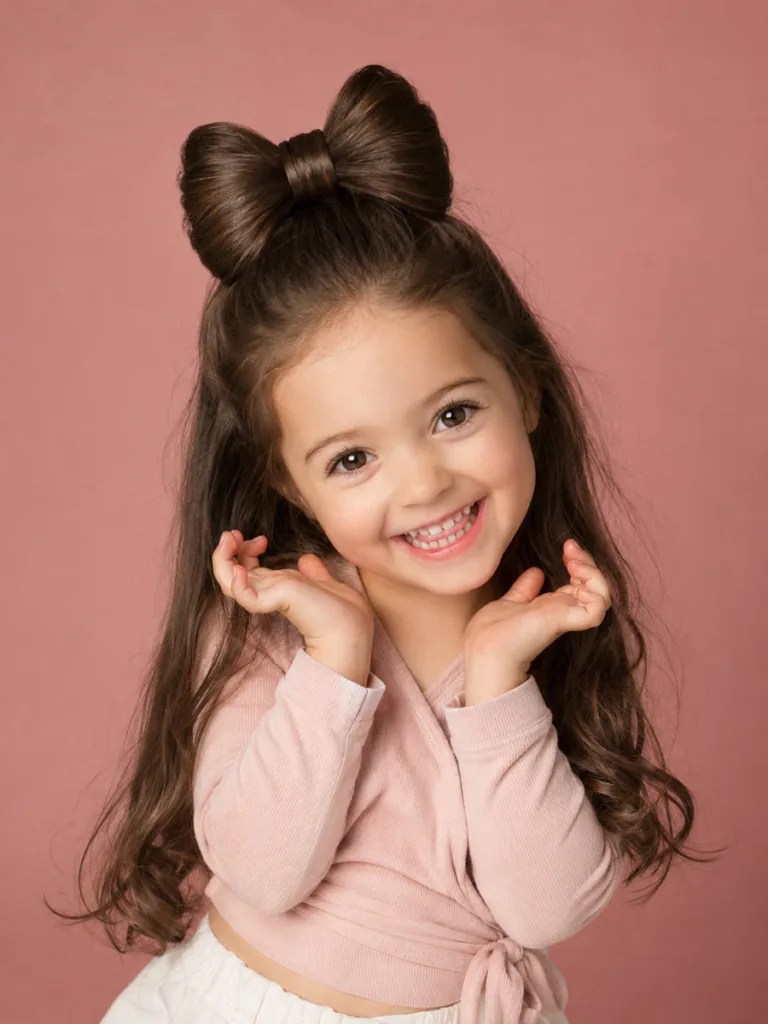
Secure each loop firmly before threading the tail through; this prevents the bow from collapsing as the day goes on.
Face shape tip: Best for long and oval faces. The width and height of the bow at the crown add visual balance for longer face shapes. On round faces, keep the bow smaller to avoid adding too much width at the top.
Everyday Toddler Hairstyles For Long Hair (When Patience Runs Thin)
These are the styles designed specifically for the toddler who will not cooperate.
18. Single Clip-Back
30 seconds | Ages 12 months+
One claw clip or barrette at the crown gathers just the front section of hair and holds it off the face while the rest stays loose and natural below. No elastic, no scalp tension, 30 seconds from start to finish. This is the move for mornings when your toddler has already walked away twice and you still need to get out the door. A decorative clip makes the whole thing look intentional rather than last-minute. Best for toddlers 12 months and up who aren’t ready to tolerate anything that touches the back of their head.
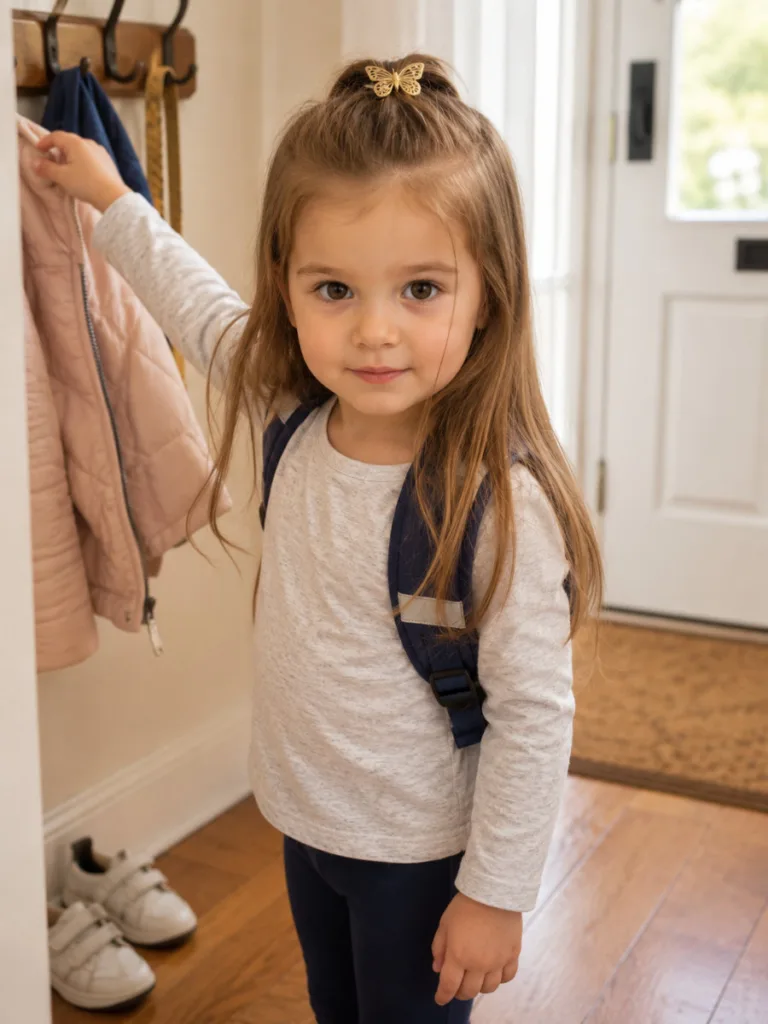
Face shape tip: Works on all face shapes. Position the clip slightly off-center for heart-shaped faces to add asymmetry or dead-center for round and oval faces for a clean, balanced look.
19. Low Side Ponytail With Ribbon
2 minutes | Ages 18 months+
Gather all the hair to one side at a low, relaxed position and secure it with an elastic, then tie a satin ribbon or bow directly over it. The ribbon is what separates this from a plain low ponytail. It adds just enough detail to make the style look considered, and it takes about 10 extra seconds. The low-side placement is also practical: nothing pressing against the back of the head during naps, car rides, or high chair time. A grosgrain ribbon holds better than satin on fine or slippery hair.
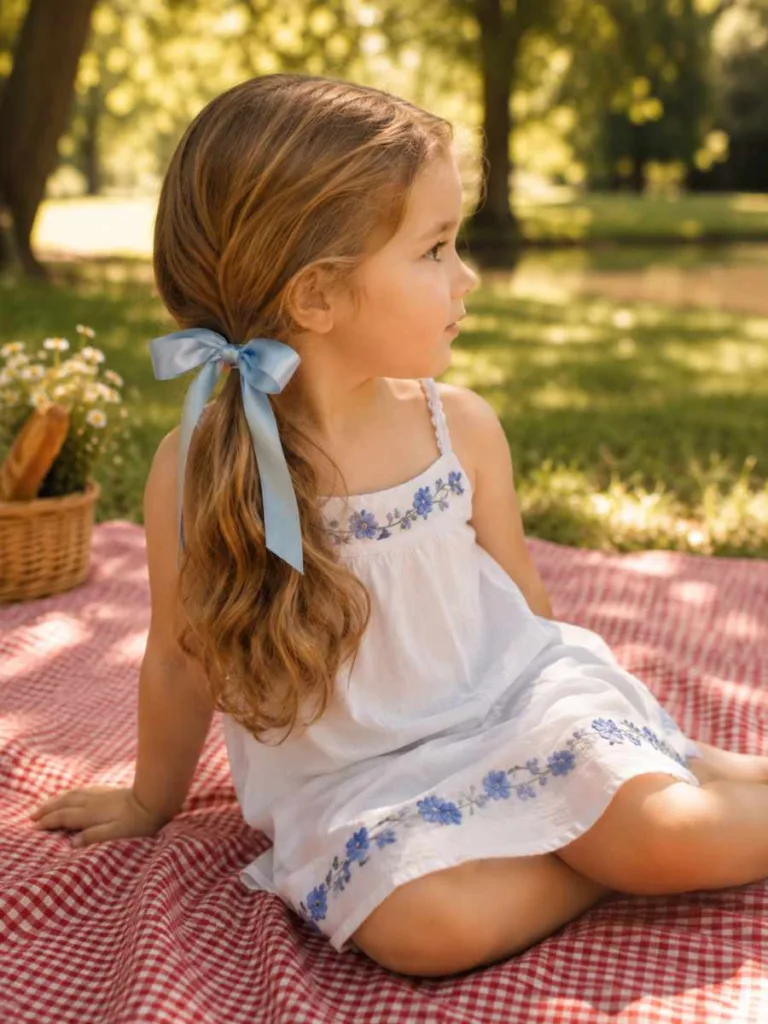
Face shape tip: Flattering on round and oval faces, the low side placement and asymmetry add the appearance of length and soften a round face without adding width.
20. Stacked Ponytails
3–4 minutes | Ages 2+
Stacked ponytails also called a triple ponytail or segmented ponytail divide the hair into two or three horizontal sections from the crown downward. Each section gets its own elastic, with the lower sections incorporating the tail of the one above to create a cascading, layered look down the back. The practical case for this style is weight distribution: multiple small elastics spread the pull of long hair more evenly, making it noticeably more comfortable than a single high ponytail for toddlers with sensitive scalps. Three sections looks better than two on longer hair and takes maybe 30 seconds more.
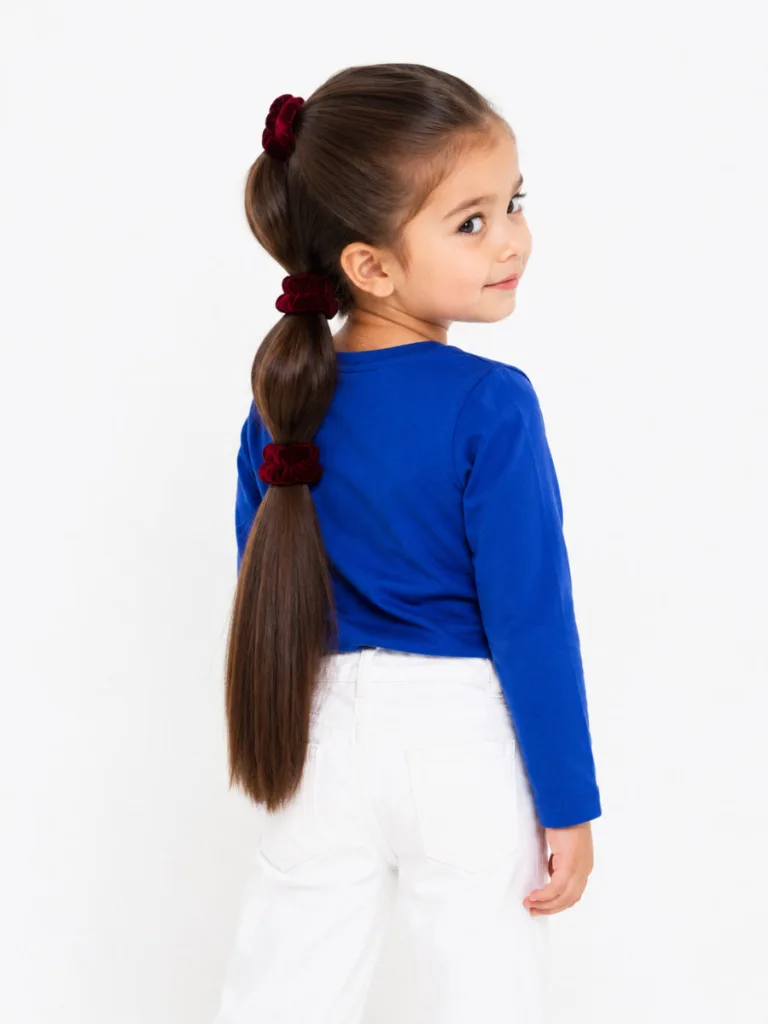
Use three sections rather than two for longer toddler hair more sections means more visual impact and better weight distribution.
Face shape tip: Great for round faces the vertical, segmented sections draw the eye upward and downward simultaneously, creating the illusion of a longer face shape.
Tips For Styling Long Toddler Hair Without Tears
| Tip | Why It Helps |
| Work fast | Toddlers have a 2–4 minute styling window before they’re done. Have everything within arm’s reach before you start. |
| Detangle first | Use a wide-tooth comb or wet brush with detangling spray, always starting at the ends never root to tip on fine baby hair. |
| Keep tension gentle | If you can fit two fingers under the elastic, it’s the right tightness. Tight styles cause breakage and headaches. |
| Use the right elastics | Snag-free, seamless elastics are non-negotiable for fine toddler hair. Regular bands snap and break delicate strands. |
| Distract strategically | A special toy they only get during hair time, or a two-minute song, buys just enough cooperation to finish the style. |
| Protect hair at nap time | A loose low braid or soft bun prevents the tangled disaster that forms after two hours on a pillow. Worth the 60 seconds. |
Frequently Asked Questions About Toddler Hairstyles For Long Hair
At what age can toddlers start wearing braids?
Simple three-strand braids are gentle enough for toddlers as young as 18 months, as long as the tension stays loose. French and Dutch braids work best at age two and a half or three, when a toddler can sit still for slightly longer.
How do I keep my toddler’s fine hair from slipping out of elastics?
Use snag-free, seamless elastics specifically designed for fine hair. You can also lightly mist the hair with water before styling to give it a little more grip. Avoid heavy products they weigh down fine baby hair.
What products are safe for toddler hair?
Look for sulfate-free, fragrance-free detangling sprays designed for children. Baby Bum, Shea Moisture Kids, and Fairy Tales are popular options. Avoid anything with harsh alcohols or heavy silicones on fine baby hair.
How do I detangle long toddler hair without causing pain?
Use a detangling product and let it sit for two to three minutes before combing. Always start at the very ends of the hair and work upward in small sections, holding the hair above where you’re combing so the root doesn’t pull. Go slowly and praise generously.
My toddler cries every time I do her hair. What should I do?
Try switching your timing — many toddlers are calmer after a snack or right after a nap. Keep sessions under five minutes by choosing simpler styles for daily wear. A consistent “hair time” routine where they know what to expect can also reduce resistance over time.
Can toddlers sleep with their hair in a style?
For overnight, opt for a very loose, low braid or a soft scrunchie bun at the nape of the neck. Tight styles can cause discomfort and breakage. Remove any clips or hard accessories before bed.
What are the best hairstyles for toddlers with fine hair?
The best hairstyles for toddlers with fine hair are styles that don’t rely on tight tension to hold low pigtails, two front twists, a messy bun, or a half-up clip all work well. Use snag-free elastics, mist the hair lightly with water before styling, and avoid heavy products that weigh fine strands down. The bubble ponytail is also a strong choice because the multiple elastics give fine hair more grip points than a single elastic does.
The Bottom Line
You don’t need salon-level skill or an hour in the bathroom. Snag-free elastics, a wide-tooth comb, and a detangling spray cover most of what makes toddler hair hard, and even a two-minute style looks intentional when the right tools are involved.
Start with the simplest looks: the single clip-back, the quick ponytail, and the bubble ponytail. Add more styles as your toddler gets more comfortable sitting still for longer. Hair time doesn’t have to be a battle every morning, and the more consistent the routine, the easier it gets.
Save this for those “What do I do with her hair?!” mornings you’ll be glad you have it bookmarked!
For more helpful articles related to haircut ideas, please visit blushhairflow.