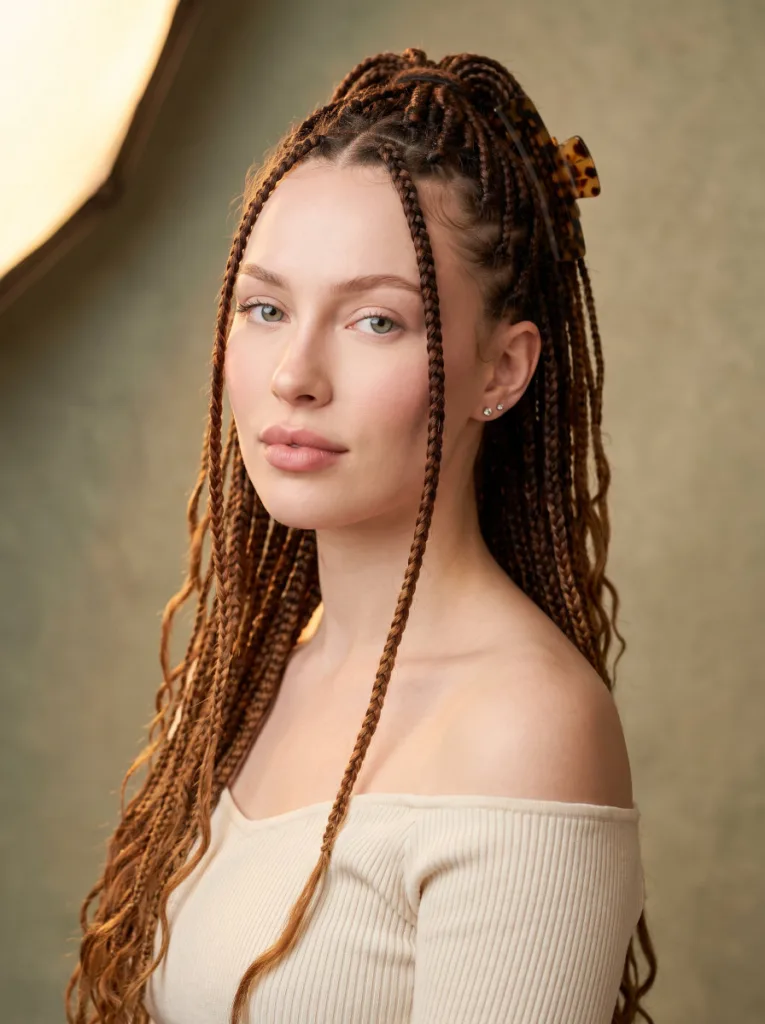
13 Claw Clip Updo Hairstyle Ideas For Every Occasion
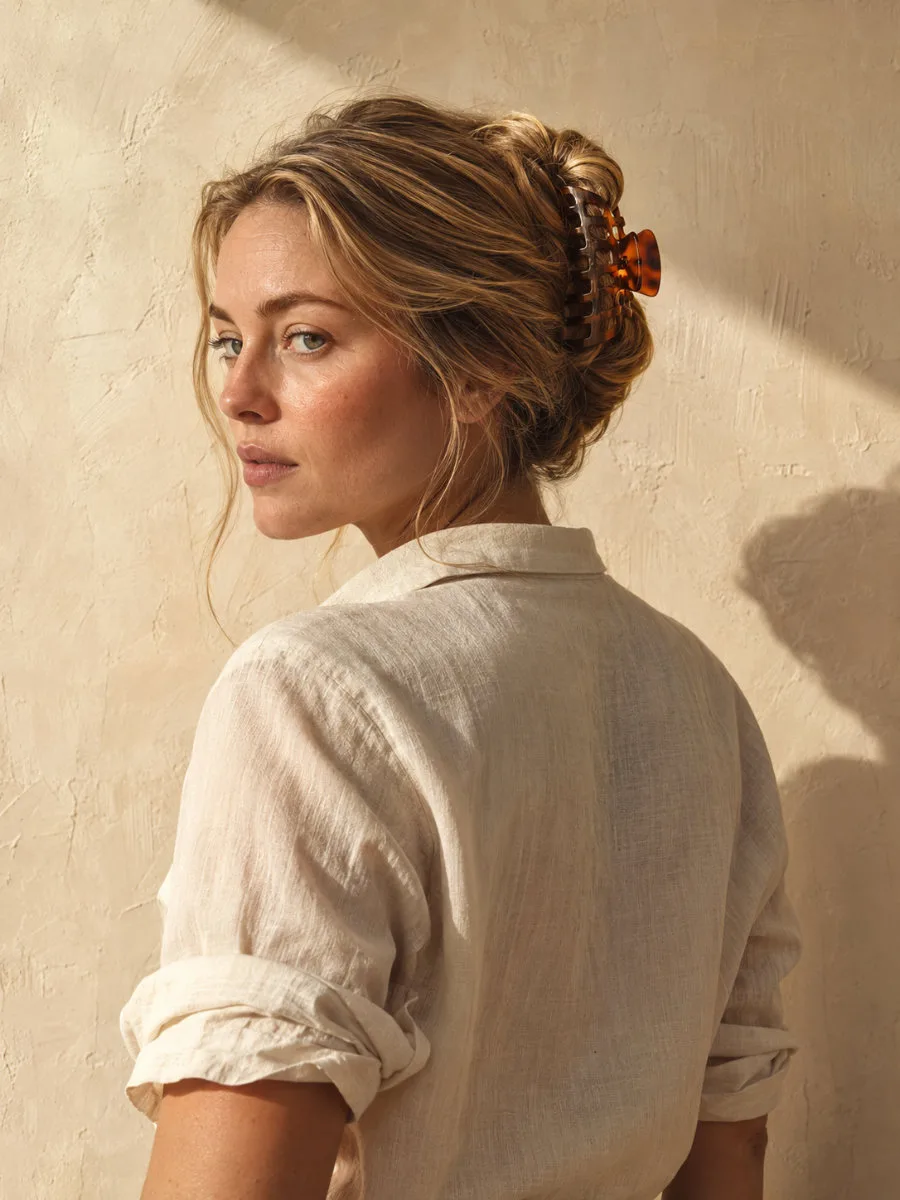
Why does everyone else’s claw clip updo look effortless while yours keeps slipping out by noon? Nine times out of ten, it comes down to two things: the wrong clip size and skipping texture prep.
The claw clip updo hairstyle is reached for more than almost any other style right now, but it only works when the technique matches your hair type. Claw clips hold without creasing, release without tangling, and create a finish that takes much longer to fake with a curling iron. Consider this your complete claw clip updo tutorial: whether your hair is fine and straight, thick and curly, or somewhere in between, there is a clip and a method that works for it. These 13 styles run from a two-minute morning rush to a polished wedding look, with step-by-step instructions for each one.
Why The Claw Clip Updo Hairstyle Is Having A Major Moment
The claw clip never really went away. It got a serious upgrade. What started as a 90s staple is now a fixture in the routines of stylists, models, and everyday women who want great hair without the damage.
Traditional elastics snap strands and leave creases. Heat styling causes breakage over months of repeated use. Claw clips hold your hair without pulling at the roots and release without a single knot or kink. That alone is reason enough.
The other reason is the look itself. The undone, effortless finish that claw clips create fits almost every current aesthetic: clean girl, coastal, and old money. It photographs well and takes almost no time. That combination is hard to beat.
How To Choose The Right Claw Clip For Your Updo Hairstyle
Before you style, you need the right tool. The wrong clip makes even good technique fall apart within an hour.
Think of your hair in three categories: fine and straight, medium and layered, and thick or curly. Each needs a different clip size and grip style.
Claw Clip Styles For Fine Hair
Fine hair slips easily. You want a clip with tight, close-set teeth and a strong spring. Smaller clips, around 2 to 3 inches, give you more control over a smaller bundle of hair. Look for matte finishes rather than shiny acetate; the texture creates friction and helps fine hair stay put.
Claw Clip Styles For Medium Or Layered Hair
Medium hair is the most forgiving. A standard 3- to 4-inch clip handles most styles. Curved or banana-shaped clips tend to hug the head better than flat rectangular ones, which means your style holds more securely throughout the day.
Claw Clip Styles For Thick Or Curly Hair
Thick and curly hair needs a clip that can handle real volume. Go for jumbo clips, 4 inches or larger, with wide-spaced teeth and a reinforced hinge. The spring mechanism matters most here. A weak spring on a high-volume style will pop open by noon.
Clip material matters too. Tortoiseshell acetate is durable and classic. Resin clips in bold colors or floral shapes are trending right now. Crystal-embellished clips work well for special occasions.
13 Claw Clip Updo Hairstyle Ideas To Try Right Now
These 13 claw clip updo hairstyle ideas cover everything from a two-minute morning twist to a polished look that holds through a full wedding reception. Each style is built for a different hair type, occasion, and skill level. Most claw clip hairstyles for long hair here work best when your hair reaches at least shoulder length, but shorter-hair options are noted where applicable. Every style includes an easy updo with a claw clip technique you can follow step by step, plus a Best for, Time, and Vibe tag so you can pick the right look in seconds.
1. The Classic Twist And Clip Hairstyle
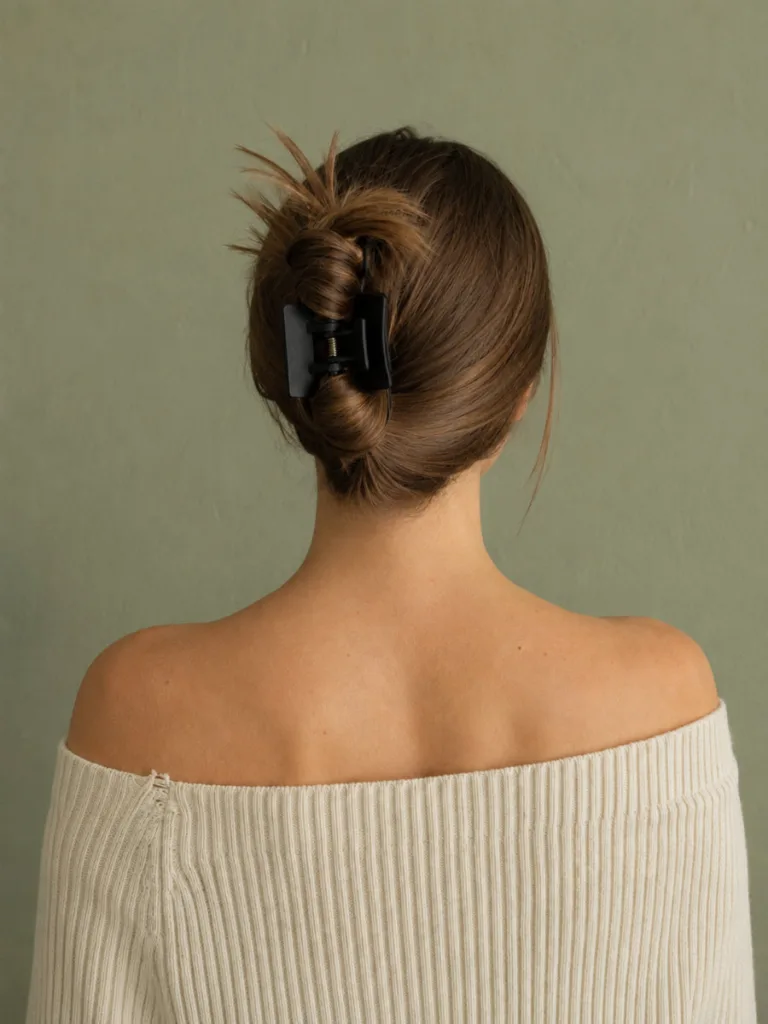
Best for: Medium to long hair | Time: Under 2 minutes | Vibe: Everyday effortless This twist and clip hairstyle is the foundation every other style in this list builds on. If you have never used a claw clip before, start here; the technique is forgiving, the result looks deliberate even when you are rushing out the door, and the whole thing takes less than two minutes from start to finish. The key is gathering all your hair low at the nape first, then letting the twist do the structural work instead of fighting the clip into position. It works on fine, medium, and thick hair alike. Day-two or day-three hair holds this style far better than freshly washed strands, since the natural texture gives the clip something to grip.
- Gather your hair at the nape of your neck as if pulling it into a low ponytail.
- Twist the length upward with your fingers.
- Fold the twist flat against the back of your head.
- Clamp the claw clip over the center of the twist.
- Leave the ends loose and slightly fanned for a relaxed finish.
2. The High French Twist
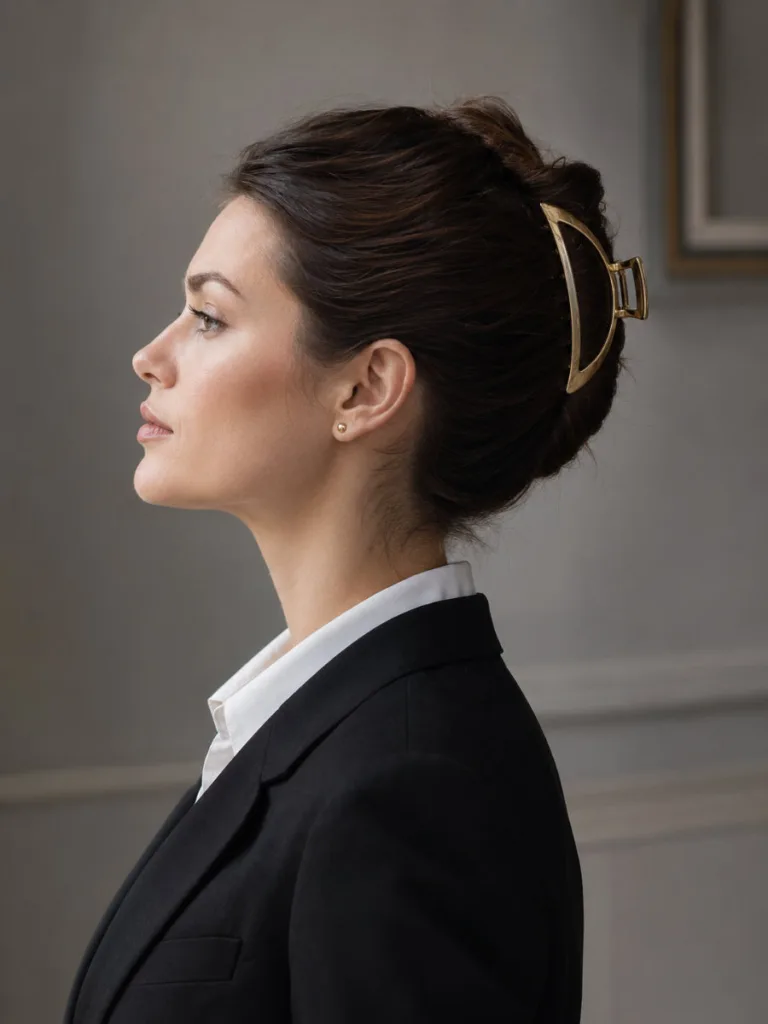
Best for: Medium to long hair | Time: 3–4 minutes | Vibe: Polished, office-ready The high French twist is the most structured style on this list and one of the most rewarding once the motion clicks. It reads polished enough for a job interview or a formal dinner, but the technique is faster than it looks three to four minutes once you have practiced it a couple of times. The trick is in the upward slide: most people try to roll the hair from the top down, when the correct motion is to push the base of the twist upward first to build the vertical shape and then lock the clip at the crown. A large, wide-jaw claw clip is essential here; anything smaller will not hold the structure through a full day.
- Hold all your hair at the back of your head at ear height.
- Twist the ponytail tightly counterclockwise, bringing it up the right side toward the crown.
- Slide the bottom of the twist upward to create a vertical shape.
- Secure with a large claw clip at the top.
- Tuck loose ends under or fan them out for a softer finish.
3. The Half-Up Claw Clip
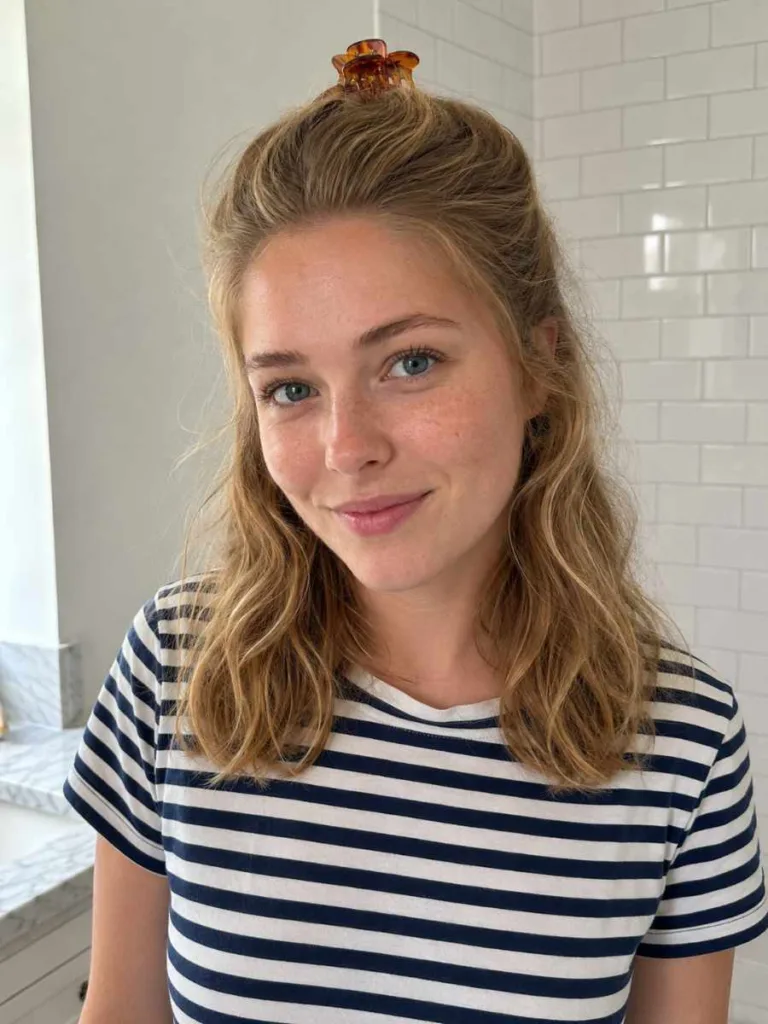
Best for: All hair lengths | Time: Under 2 minutes | Vibe: Casual chic The half-up claw clip is the most universally wearable style in this lineup. It works on bobs, lobs, shoulder-length hair, and hair that reaches mid-back and it takes the same amount of time regardless of length. The style sits in a sweet spot between done and undone: your length stays visible and your face is framed, but the top section is neatly held back and out of the way. It pairs well with virtually any outfit, from a linen shirt to a blazer to a casual tee. For a more polished version, smooth the top section before clipping. For something more relaxed, leave it loose and let the natural texture show.
- Starting at your temples, gather the top two-thirds of your hair back toward the crown.
- Twist lightly or leave it smooth both works.
- Clip at the back of the crown.
- Let the bottom half fall loose.
4. The Low Claw Clip Bun
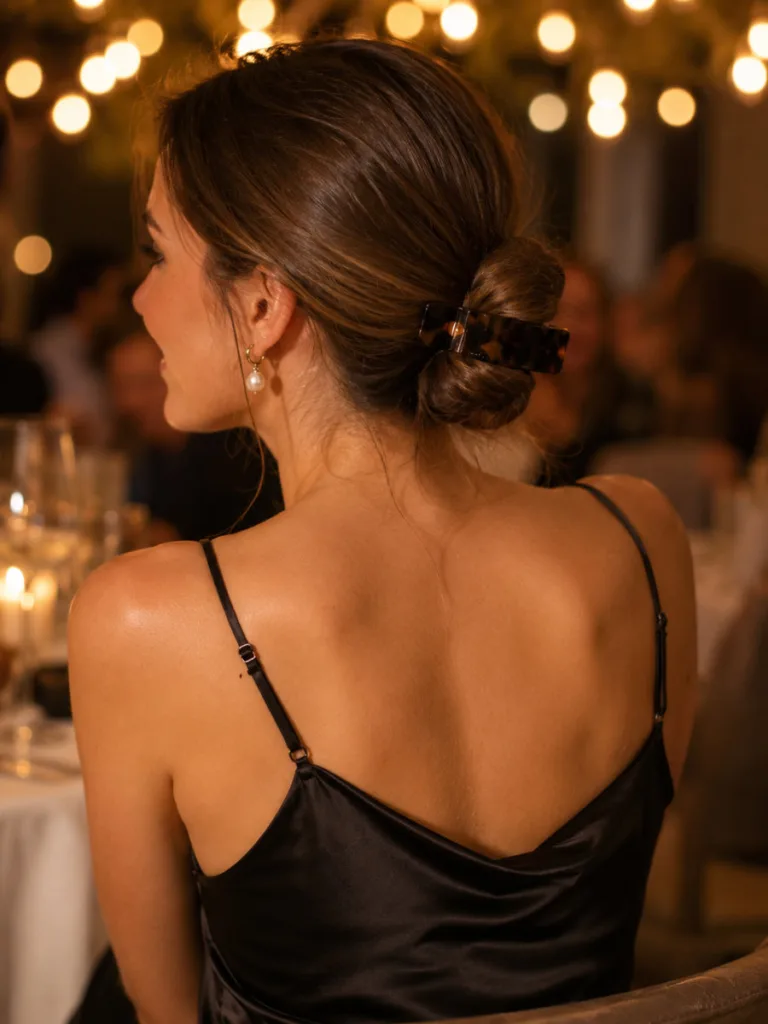
Best for: Medium to long hair | Time: 3 minutes | Vibe: Elegant, date-night ready This claw clip bun sits at the nape and reads more polished than a high bun without any extra effort. The low placement changes the entire feel of the style — it lands closer to a chignon than a casual updo, which is why it works so well for date nights, client meetings, or events where you want to look put-together without spending time on it. The wrap-and-clip technique is the same as a basic bun, but the position does the heavy lifting. Smooth hair benefits most from this style, though a light application of pomade or edge control on textured or curly hair brings the surface together quickly and keeps it looking intentional rather than rushed.
- Gather your hair into a low ponytail at the nape of your neck.
- Twist the length into a bun shape, wrapping it around itself.
- Secure the bun horizontally with a wide-jaw claw clip, clamping through the center.
- Smooth the surface with a small amount of pomade or edge control for a cleaner finish.
5. The Messy Ballerina Bun
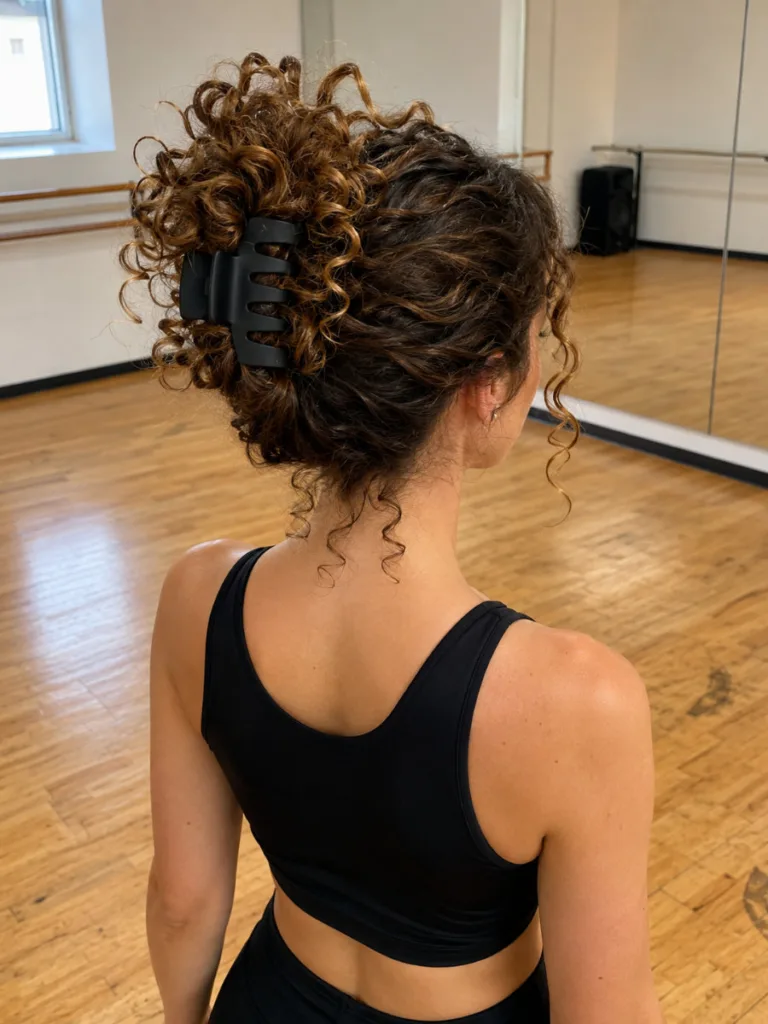
Best for: Thick and curly hair | Time: 2 minutes | Vibe: Undone but intentional The messy ballerina bun is the style that benefits most from imperfection; the looser you leave it, the better it looks. This is the ideal choice for thick and curly hair types that can struggle with more structured styles, because the volume and natural texture that typically make updos difficult actually make this one look fuller and more intentional. The clip does not need to hold every strand; the point is to anchor the bulk while letting the rest move freely. Pulling a few face-framing pieces forward after clipping takes about five seconds and transforms the whole look from gym-ready to casually polished. Avoid brushing before styling — natural texture is the foundation here.
- Pull your hair into a medium-high ponytail.
- Twist it loosely and wrap into a bun shape.
- Secure with a large clip, but leave several pieces loose around the bun.
- Pull a few face-framing strands free at the front.
6. The Side-Swept Clip
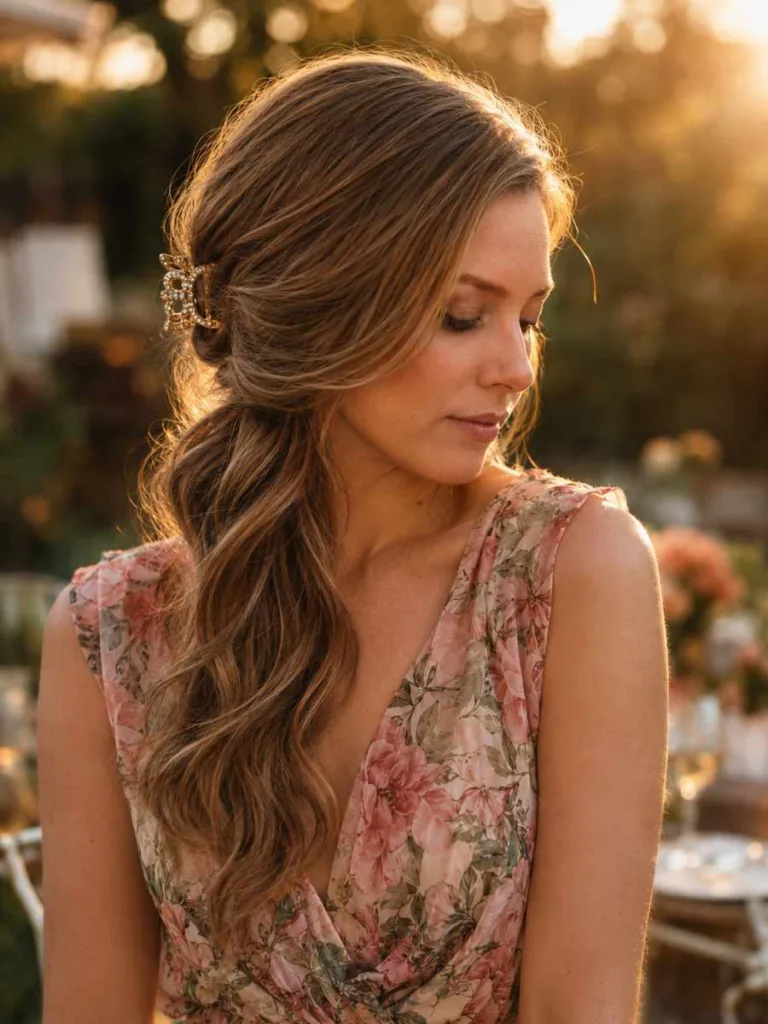
Best for: Medium to long hair | Time: 2 minutes | Vibe: Romantic, wedding-worthy The side-swept clip is one of the most romantic styles you can do with a single claw clip and no other tools. The deep side part and the asymmetric silhouette, with everything gathered to one side, a full curtain of hair falling across one shoulder, create a look that feels deliberate and slightly dramatic without requiring any technique beyond a light twist and a single clip. It photographs exceptionally well, which is why it shows up at weddings and events so often. For the best result, use a decorative clip that is crystal-embellished, pearl-accented, or a bold architectural shape since the clip itself becomes a visible design element rather than something hidden in the hair.
- Create a deep side part.
- Sweep all your hair to one side.
- Gather the bulk at the nape of your neck on the heavy side, twist lightly, and clip.
- Leave a curtain of hair to fall across one shoulder.
7. The Double Twist (Bubble Clip)
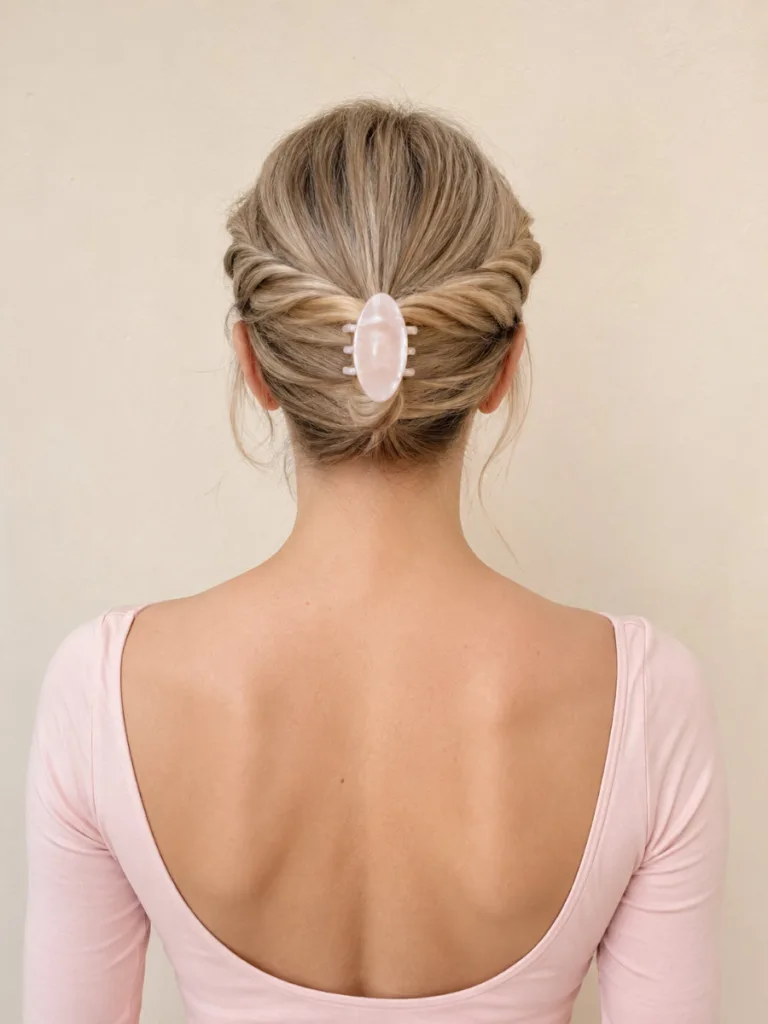
Best for: Wavy or textured hair | Time: 3 minutes | Vibe: Balletcore, editorial The double twist creates a style that looks far more considered than the four-step process behind it. By twisting each side of the hair separately and joining them at the back with a single clip, you get a structured, slightly editorial look that reads differently from a standard twist there is more visual texture, more symmetry, and a built-in shape that does not rely on a perfectly executed technique. It suits wavy and textured hair particularly well because the natural movement of the hair gives the two twists definition. The name bubble clip comes from the rounded, lifted shape the combined sections create when joined and clipped. Opt for a larger clip here; it needs to hold both sections securely.
- Divide your hair into two sections, one on each side of your head.
- Twist each section toward the back.
- Bring both twists together at the center.
- Secure with one clip holding everything in place.
8. The Reverse Ponytail
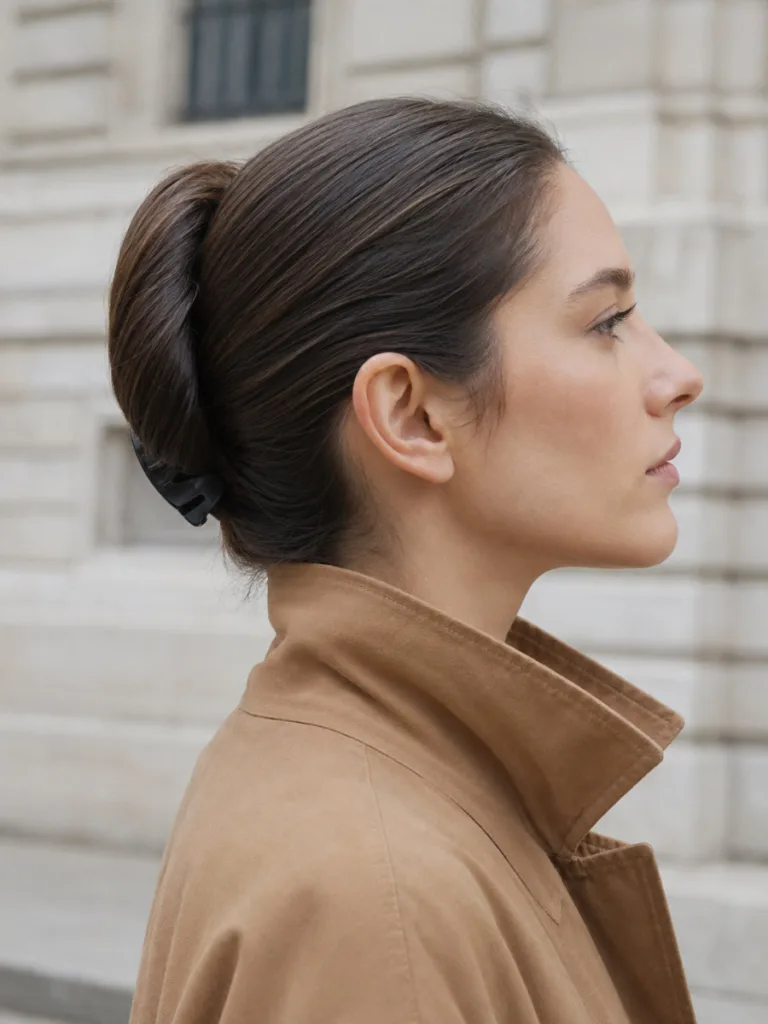
Best for: Long hair | Time: 3–4 minutes | Vibe: Structured, elevated The reverse ponytail is the style people ask about most when they see it — it has the silhouette of something a professional did, but the steps are straightforward once you understand what you are building. The key mechanic is wrapping the ponytail length downward and back around the elastic base, then securing the claw clip underneath rather than on top. The result is a gathered crown with the length tucked inward and held structured from the front and profile, clean from the back. Long hair works best here, ideally past shoulder-blade length so there is enough to wrap fully. This is also one of the styles where the elastic is not just optional but actually helps anchor the base before the clip goes in.
- Pull your hair into a high ponytail and secure with an elastic temporarily.
- Take the length and wrap it downward around the elastic.
- Secure the claw clip underneath the base of the ponytail, pointing down.
- Remove the elastic if you can, or leave it hidden underneath.
9. The Slicked-Back Updo
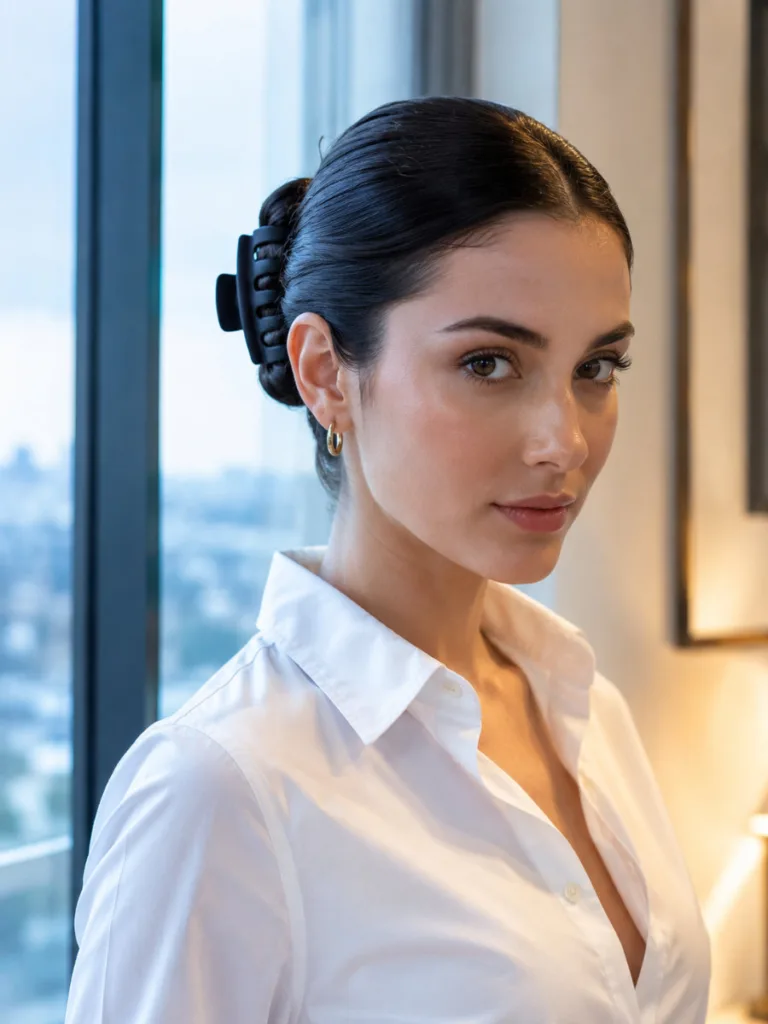
Best for: Thick or coily hair | Time: 4 minutes | Vibe: Sharp, clean, modern The slicked-back updo is one of the sharpest looks a claw clip can produce, and it depends entirely on the prep rather than the clip placement. The gel or serum step is non-negotiable — without it, the smoothed surface reverts to texture within the hour. Work the product through the top and sides using a boar bristle brush, which distributes it evenly without leaving streaks or product buildup on the surface. The clip goes in last, holding a low twist at the nape after everything above it has been pulled flat and smooth. This style suits thick and coily hair particularly well because the product tames volume that other styles either can not control or have to accommodate.
- Apply a small amount of hair gel or serum to the top and sides of your hair.
- Use a boar bristle brush to smooth everything back tightly.
- Gather all your hair into a low twist and clip.
10. The Face-Framing Twist
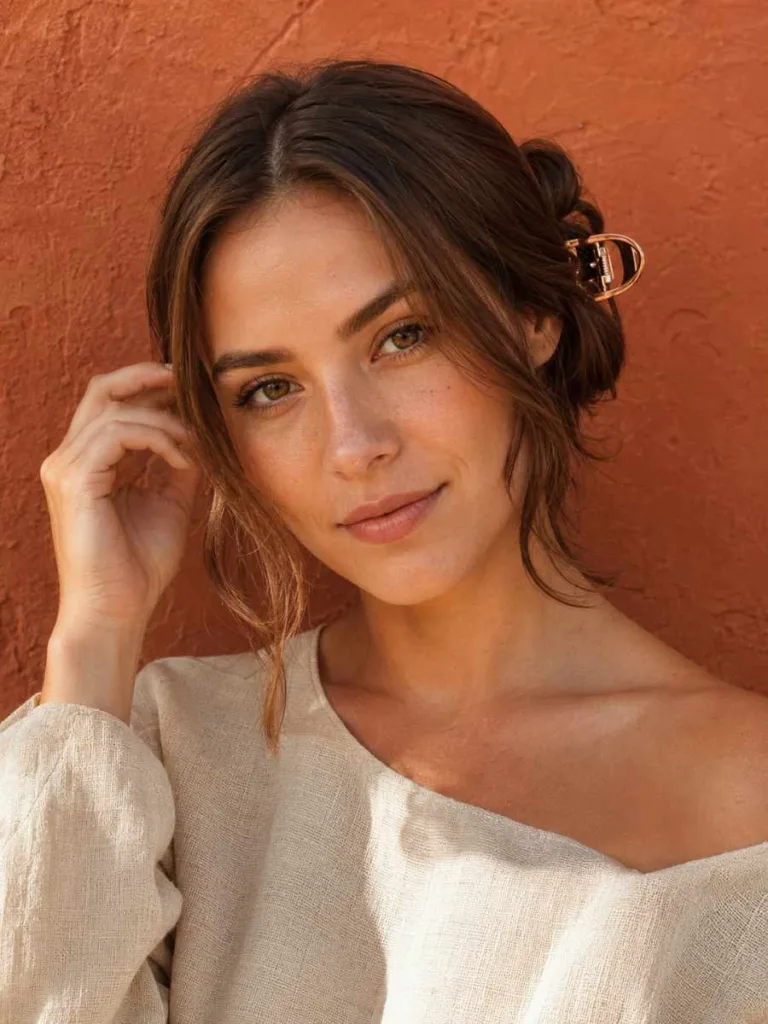
Best for: All lengths | Time: 2 minutes | Vibe: Flattering, softly romantic The face-framing twist is less about the updo itself and more about what you leave out. By releasing two sections at the front — one on each side, roughly from the temple — before clipping the rest of the hair back, you create a soft frame around the face that flatters jawlines, cheekbones, and foreheads. The back section clips into a low, relaxed twist in the same way as the classic style, but those two loose pieces in front change the entire impression of the look. This style works on every face shape and every hair length. The face-framing pieces can be left straight for a cleaner feel or curled lightly with a finger or wand for something warmer and more romantic.
- Leave your front two sections free, one on each side of your face.
- Clip all the remaining back hair in a low twist.
- Let the face-framing pieces fall loose, or curl them lightly for extra softness.
11. The Braided Half-Up Claw Clip Updo
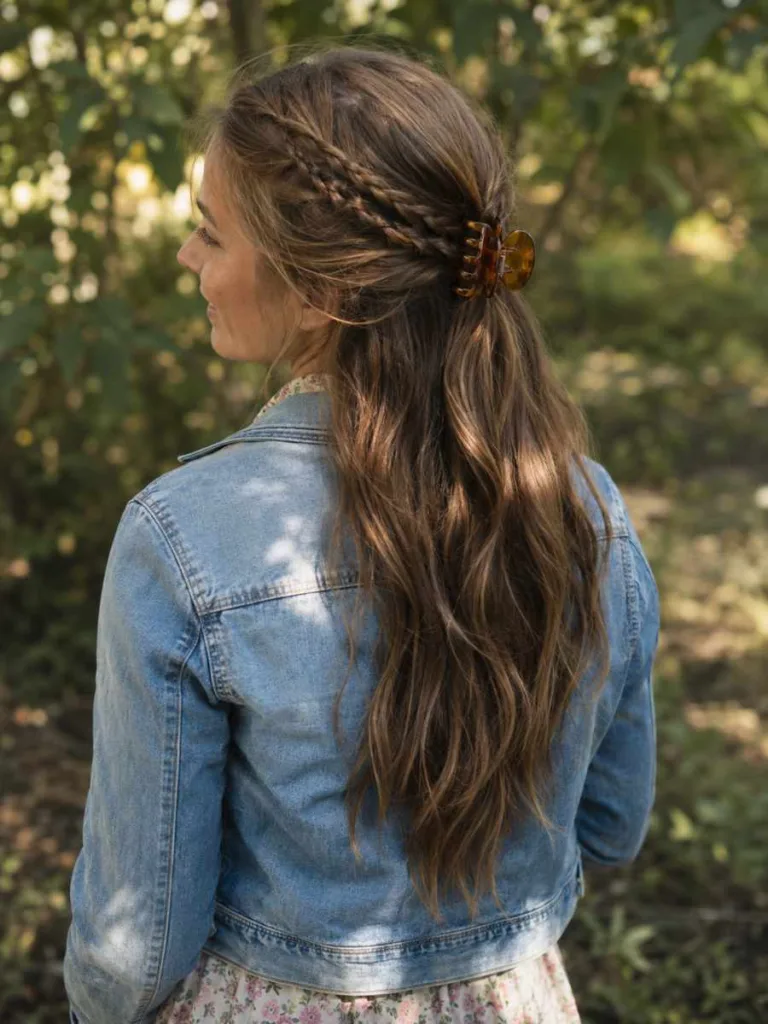
Best for: All hair lengths | Time: 4–5 minutes | Vibe: Boho, textured, elevated The braided half-up adds about ninety seconds to the standard half-up clip and looks as though it took twenty minutes more. Two small loose braids, one from each temple run back toward the crown and join the gathered section before the clip goes in. The braids frame the face, add visible texture on either side of the clip, and give the whole style an elevated, finished quality that a plain half-up does not have. This claw clip updo hairstyle works on all hair lengths, including shorter styles like lobs and medium-length hair. Keep the braids loose — a tight braid looks too formal for the relaxed half-up structure and is much harder to blend where it meets the clip.
- Take a small section of hair from each temple, about one inch wide on each side.
- Braid each section loosely toward the back of your head.
- Bring both braids together at the center and gather them with the rest of the top half of your hair.
- Clip everything securely at the crown, letting the braids show on either side of the clip.
- Let the bottom half of your hair fall loose.
12. The Rope Twist Claw Clip Updo
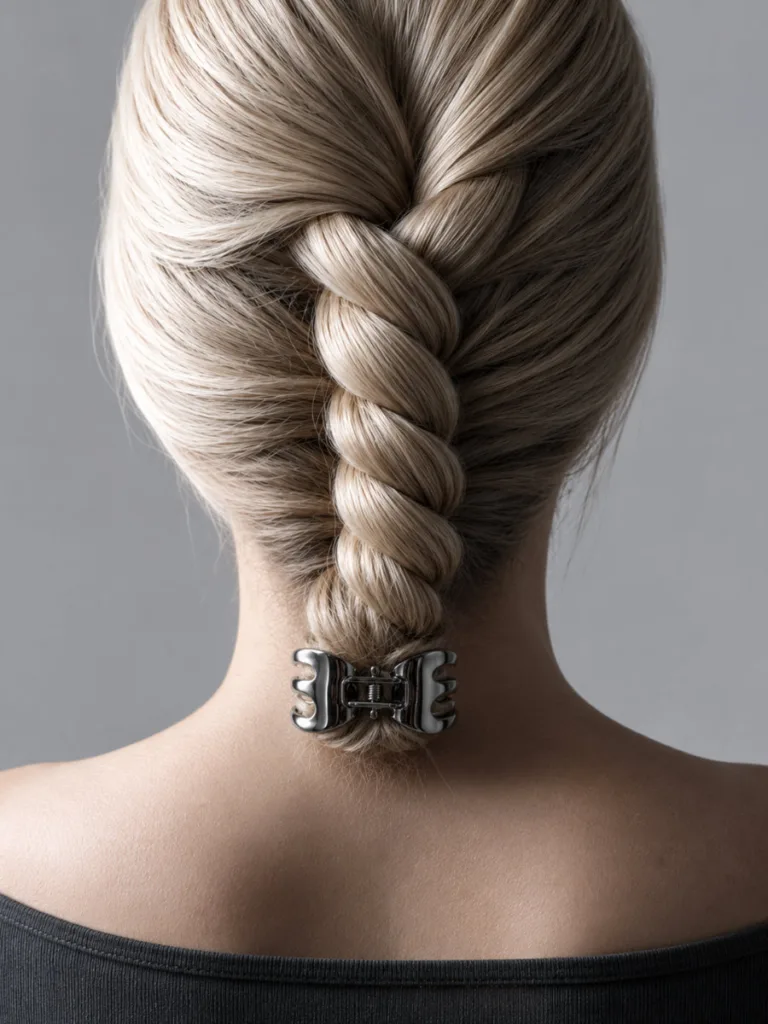
Best for: Straight to wavy hair | Time: 3 minutes | Vibe: Sleek, unexpected, modern The rope twist solves the most common claw clip problem: straight, slippery hair that refuses to stay in a standard twist. By twisting each section in the same direction and then wrapping them around each other in the opposite direction, the two sections interlock and hold each other in place the structure is mechanically more secure than a single twist because the two parts work against each other’s natural tendency to unwind. The result is a sleek, textured updo that looks significantly more intentional than the steps suggest, with a visible rope pattern running up the nape. Use a wide-jaw clip with strong spring tension at the nape to hold the interlocked structure in place without it loosening through the day.
- Gather your hair at the back as if forming a low ponytail.
- Split the ponytail into two equal sections.
- Twist each section in the same direction, both clockwise, for example.
- Wrap the two twisted sections around each other in the opposite direction to form a rope twist.
- Fold the twisted rope twist upward and secure with a claw clip at the nape.
13. The Knotted Claw Clip Updo
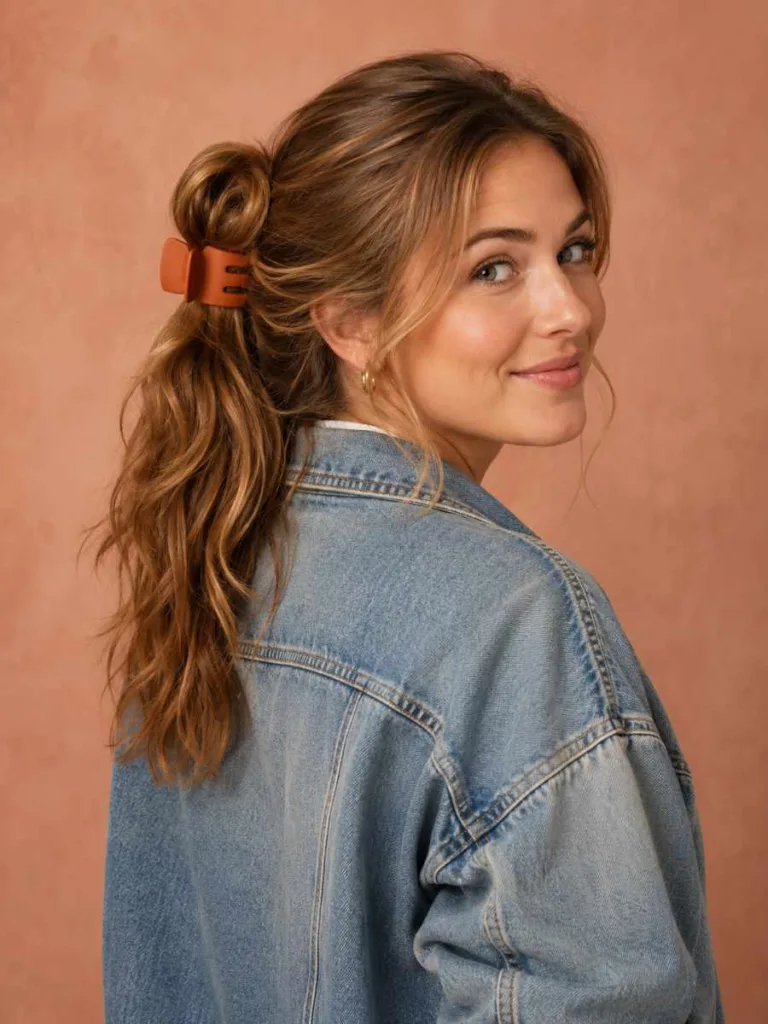
Best for: Medium to long hair | Time: 2–3 minutes | Vibe: Effortless, sculptural The knotted claw clip updo creates one of the most sculptural silhouettes on this list using the simplest possible technique: a half-knot, the same motion as starting to tie a shoelace. The loop of the knot is the visual centerpiece, slightly three-dimensional and completely different in shape from a bun or a twist. Hair with natural body or a loose wave holds the knot shape best, but a light pass of texturizing spray gives any hair type enough grip to make it work. The clip goes in at the base of the knot, not through the loop this keeps the shape intact and gives the structure enough support to hold all day.
- Gather your hair into a mid-height ponytail.
- Tie the ponytail into a loose knot as if starting to tie a shoelace.
- Do not pull the ends all the way through; leave a loop.
- Tuck any loose ends under the knot.
- Secure the knot in place with a claw clip, clamping through the base.
How To Make Your Claw Clip Updo Last All Day
A style that collapses by noon is not worth the effort. These four things make the biggest difference.
Start With The Right Texture
Freshly washed, smooth hair gives the clip almost nothing to grip. Add a texturizing spray or dry shampoo before styling. Day-two or day-three hair works even better the natural oils create friction that keeps the clip from slipping.
Pro tip: If your hair is freshly washed, scrunch in a small amount of mousse before styling. It mimics the texture of second-day hair.
Use The Correct Clip Size
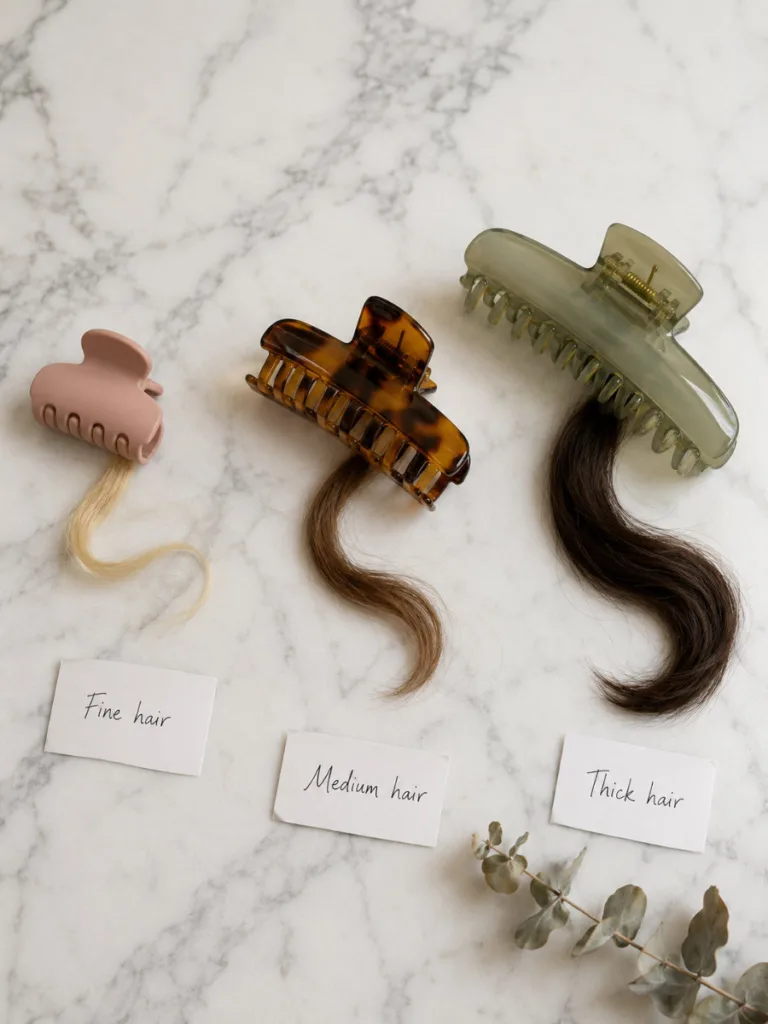
A clip that is too large will not clamp tightly enough. One that is too small pops open or digs into your head. Match the clip to your hair density rather than your style preference; it is the single biggest factor in how long the style holds.
Set With Hairspray
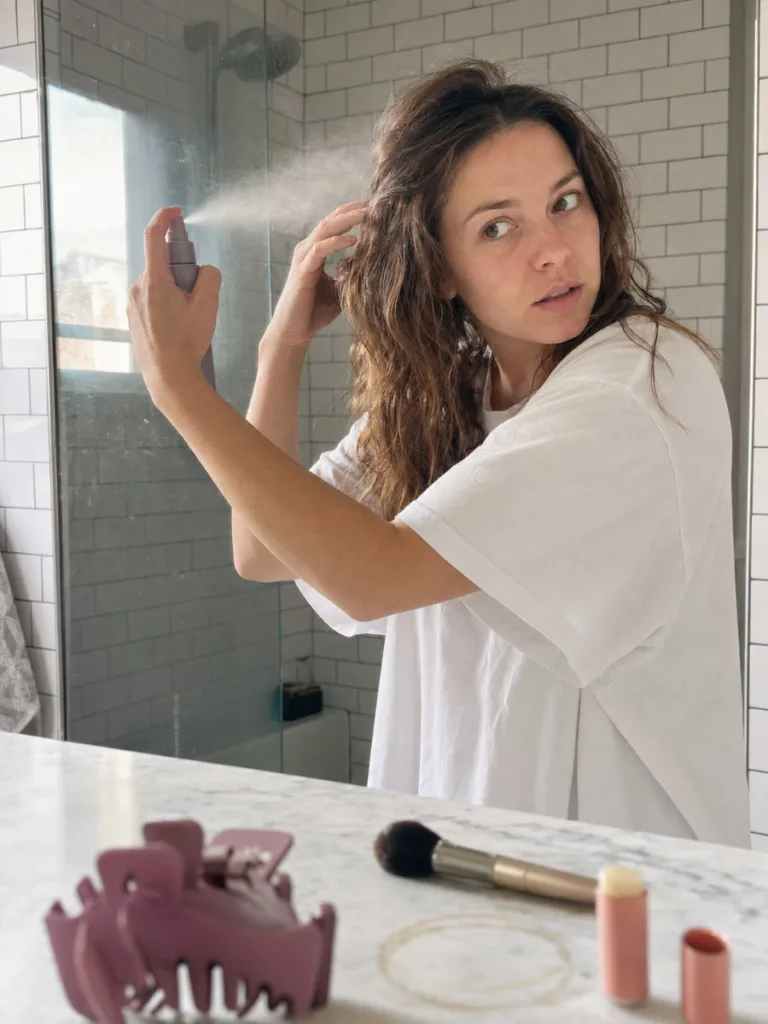
Once your style is in place, a light mist of flexible-hold hairspray locks flyaway down and keeps the shape through a full day of movement. It does not need to make your hair feel stiff.
Try The Double-Clip Method
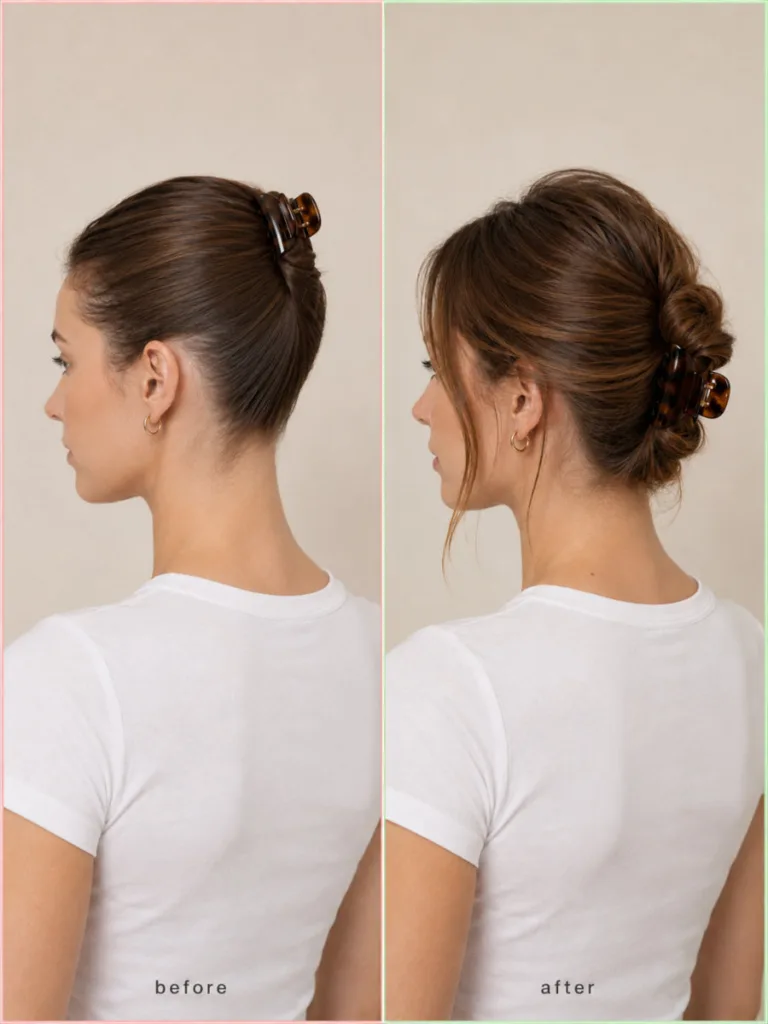
For very thick or slippery hair, use two clips instead of one. Clip the lower half first, fold the upper section over it, and add a second clip on top. The result holds through long days and light activity.
Claw Clip Updo Hairstyle Ideas By Occasion
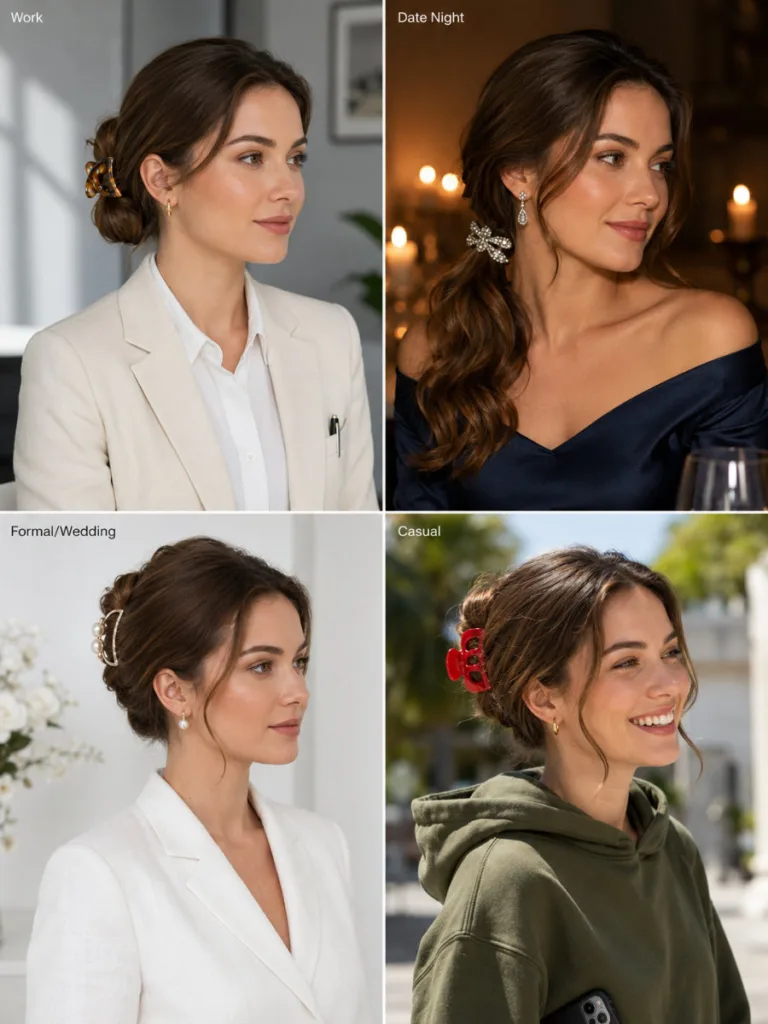
Not every claw clip look fits every moment. Here is a quick guide to which styles to reach for depending on where you are headed.
| Occasion | Best styles | Clip to use |
| Work / Office | Low bun, High French twist, Slicked-back updo | Gold or tortoiseshell |
| Date Night | Side-swept clip, Face-framing twist | Crystal or embellished |
| Wedding / Formal | High French twist, Reverse ponytail, Slicked-back updo | Metallic or structured |
| Casual / Errands | Classic twist, Messy bun, Half-up clip | Any — match your outfit |
Best Claw Clip Updo Hairstyle For Work
The low bun, high French twist, or slicked-back updo all hold up through long meetings and look deliberate rather than rushed. Pair with a gold or tortoiseshell clip for a professional look that still feels current.
Romantic Claw Clip Updo For Date Night
The side-swept clip and face-framing twist are romantic, slightly undone, and flattering on most face shapes. A crystal or embellished clip does most of the styling work here.
Formal claw clip updo for weddings and events
The high French twist and reverse ponytail are the most formal options. For a sharp result, pair the slicked-back updo with a metallic clip. For something softer, the double twist with a decorative clip works well.
Quick claw clip updo for casual days
The classic twist, messy bun, and half-up clip are the fastest options. Under two minutes each, and all of them look good with almost anything.
Common claw clip updo hairstyle mistakes to avoid
Most claw clip problems come from the same handful of errors.
- Using a clip that is too small. When a clip does not span enough of the twisted hair, it slips constantly. Size up before assuming your hair is the problem.
- Skipping texture prep. Freshly washed, smooth hair has nothing for the clip to grip. Add a texturizing product first.
- Clipping too close to the root. The clip should hold your hair, not pull your scalp. Position it slightly lower, through the body of the twist, or you will have a headache by afternoon.
- Skipping face-framing pieces. A few loose strands at the temples soften the look. Without them, even a well-executed updo can look too tight.
- Not loosening the crown. After clipping, gently tug the hair at the crown upward. It takes two seconds and adds volume that the clip alone does not create.
Frequently Asked Questions About Claw Clip Updo Hairstyles
What is the easiest claw clip updo for beginners?
The classic twist updo is the place to start. Gather your hair into a low ponytail, twist it upward, and clip. Under two minutes and works on most hair types.
Can you do a claw clip updo on short hair?
Yes. A half-up claw clip works on shorter hair, including bobs and lobs. Gather the top section and clip at the crown — the rest stays down.
How do I stop my claw clip from slipping out?
Use a texturizing spray or dry shampoo before styling, make sure the clip size matches your hair volume, and finish with a light mist of hairspray.
Are claw clip updos good for fine hair?
Yes, with the right clip. Choose a smaller clip with tight, close-set teeth and a matte finish for grip. Backcomb the crown slightly before clipping to give the clip more to hold onto.
What size claw clip do I need for thick hair?
Go for a jumbo claw clip, 4 inches or larger, with wide-spaced teeth and a strong spring. A weak spring will not hold the weight of a thick updo for long.
Can I wear a claw clip updo to a formal event?
Yes. The high French twist and reverse ponytail both work for weddings and formal occasions. A clip with embellishments or a metallic finish pulls the look together.
Conclusion
The claw clip updo hairstyle gives you a lot of options for very little effort. Pick one style from this list and try it before your next wash day. Once the basic technique clicks, the rest come quickly. Bookmark this post so you have all 13 looks in one place when you need them.
For more helpful articles related to haircut ideas, please visit blushhairflow.