22 Clean Girl Hairstyles to Look Polished Every Day
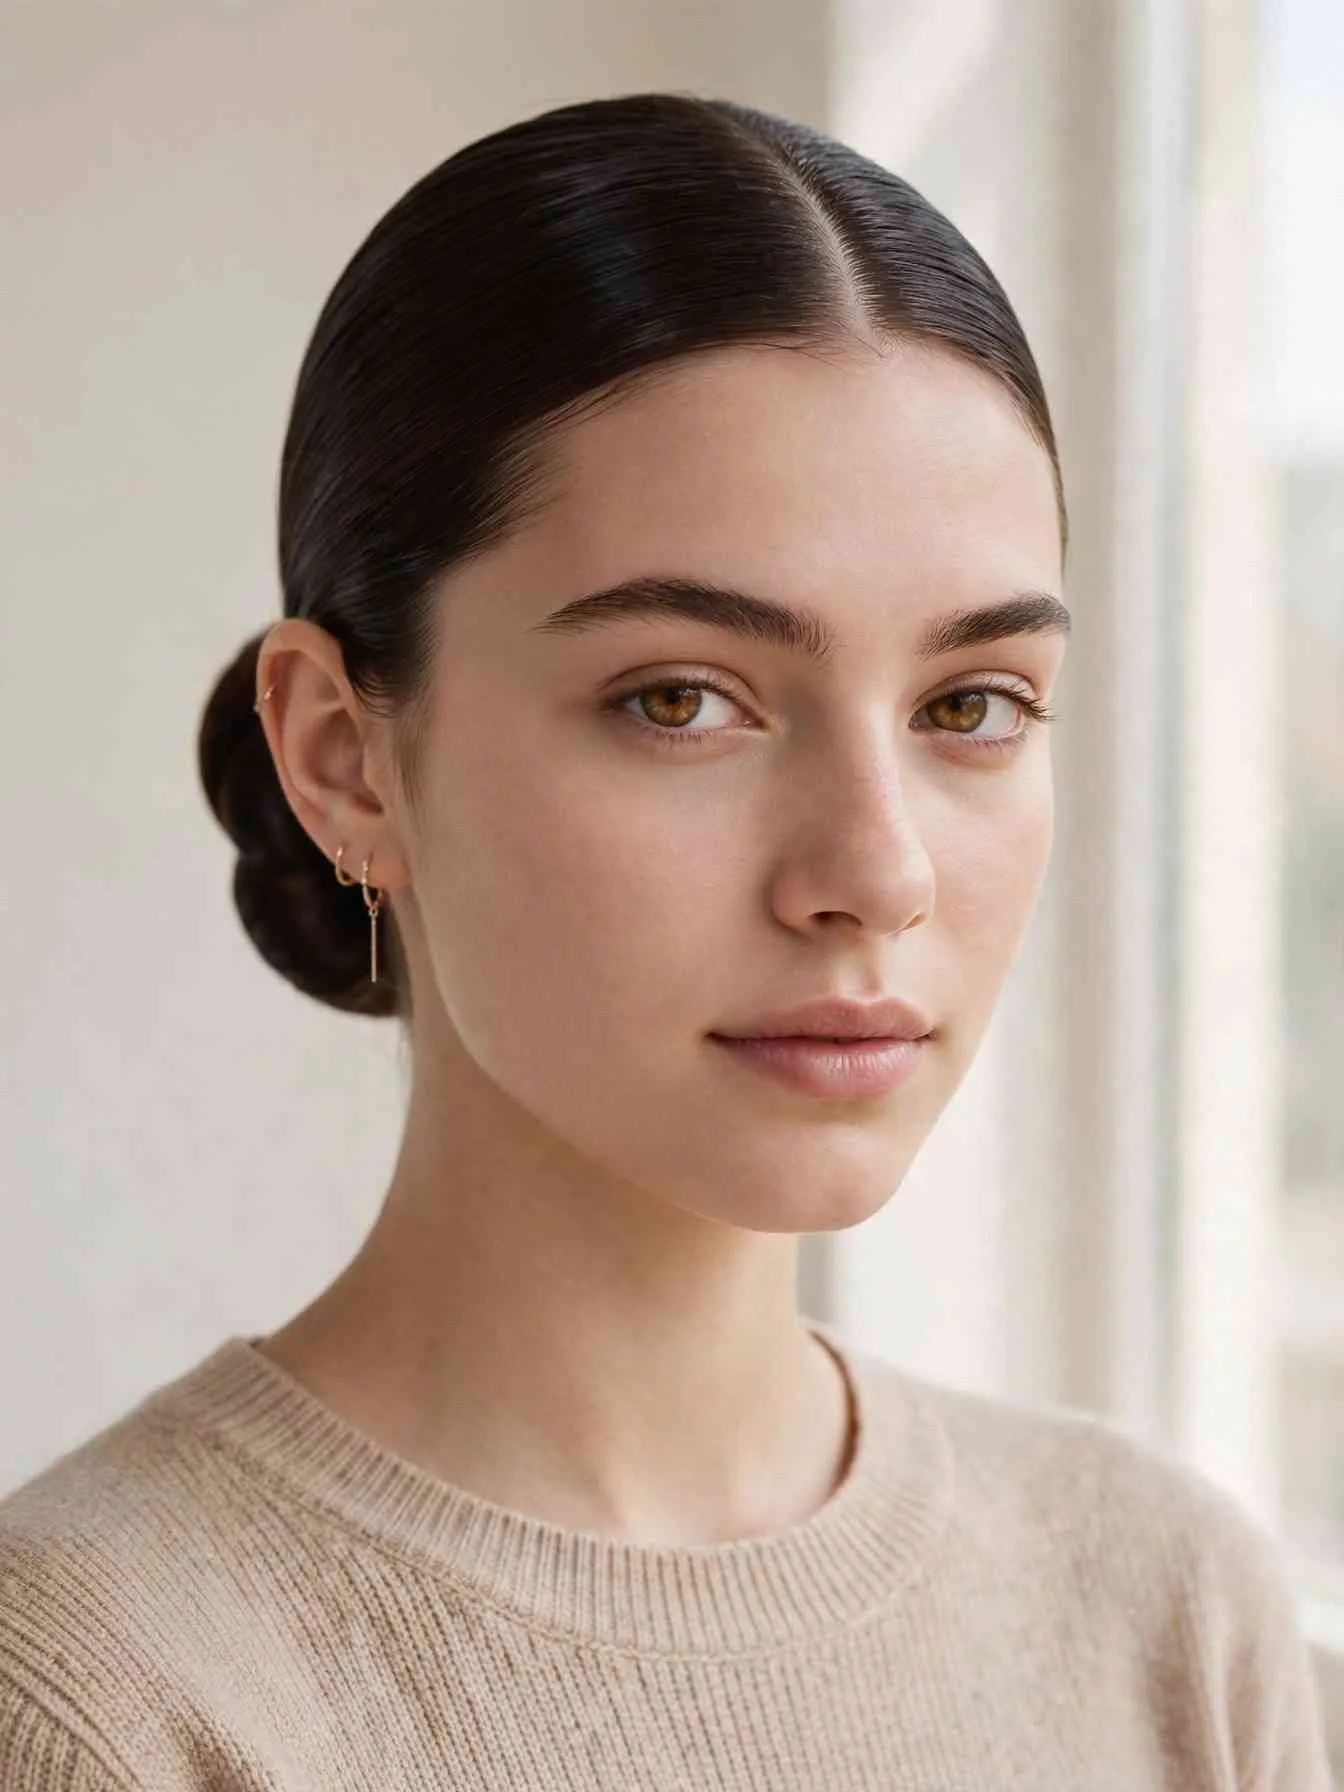
Clean girl hairstyles promise something rare: hair that reads polished, expensive, and completely unbothered in under ten minutes. The look skips the curling iron marathon. It skips the forty-product shelf. It asks for smooth roots, controlled flyaways, and one decisive shape.
The payoff is real. These clean girl hairstyles photograph well on video calls. A sleek ponytail survives a commute, a workout, and a long workday. And the whole aesthetic costs less than one salon blowout if you own a decent brush and a reliable gel.
This guide covers twenty-two clean girl hairstyles, organized by technique family. Each one includes who it suits and the exact salon language to use. You will also find a five-product kit, flyaway fixes by texture, a traction-safety playbook, and honest costs.
What Makes Clean Girl Hairstyles Different
Clean girl hairstyles are polished, low-effort styles with smooth roots, controlled flyaways, and simple shapes.
Three rules separate clean girl hairstyles from ordinary neat hair. First, the hairline stays clean. Baby hairs get smoothed or laid, not left to frizz. Second, the silhouette stays simple. One bun, one pony, one smooth sheet of hair. Third, the finish stays soft-glossy, never helmet-hard. You should be able to move your head without the style cracking.
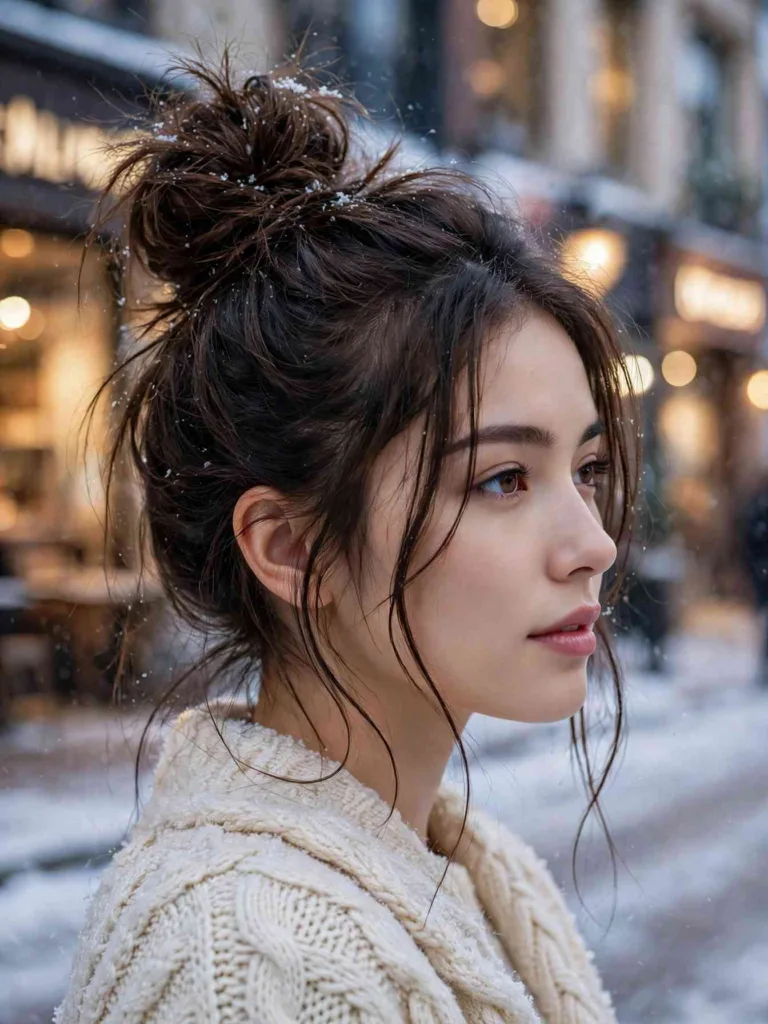
Sister aesthetics orbit nearby. Vanilla girl hairstyles lean cozy, with warm knits and soft waves. Clean girl leans sharper: middle parts, glassy lengths, and edges that look combed, not coated. Both share the same core belief. Restraint reads as confidence.
The Clean Girl Kit: 5 Products That Do the Heavy Lifting
You do not need a drawer of products. Five tools cover nearly every one of these clean girl hairstyles.
A boar-bristle brush presses the top layer smooth and moves natural oils down the shaft. It works best on dry or nearly dry hair. A rat-tail comb draws exact parts and sections small areas for braids. A medium-hold styling gel or edge-control wax locks the hairline without white flakes. Choose water-based formulas; they rinse out in one wash. A shine serum or lightweight hair oil adds the glassy finish on lengths and ends. Finally, a pack of snag-free elastics and a matte claw clip handle the actual hold. Fabric-covered ties reduce breakage on repeated wear.
Skip heavy pomades unless your hair is very coarse. They build up fast and dull the shine you are chasing.
Sleek Ponies
1. The Classic Slicked-Back Ponytail

Brush everything straight back from the hairline with the boar-bristle brush, smoothing as you go. Warm a pea-sized amount of gel between your palms and press it over the crown and sides. Gather at the occipital bone, roughly level with the tops of your ears. This placement flatters most faces and holds better than a very high pony. Secure with a snag-free elastic, then wrap a thin strand of hair around the base and pin it. Mist the hairline once with light-hold spray. The result reads sharp from every angle and takes about four minutes.
Best for: Straight to wavy hair; office days and video calls.
Ask your stylist for: A clean perimeter trim so the ends look blunt, not wispy.
2. The Low Ponytail With a Hair-Wrapped Base
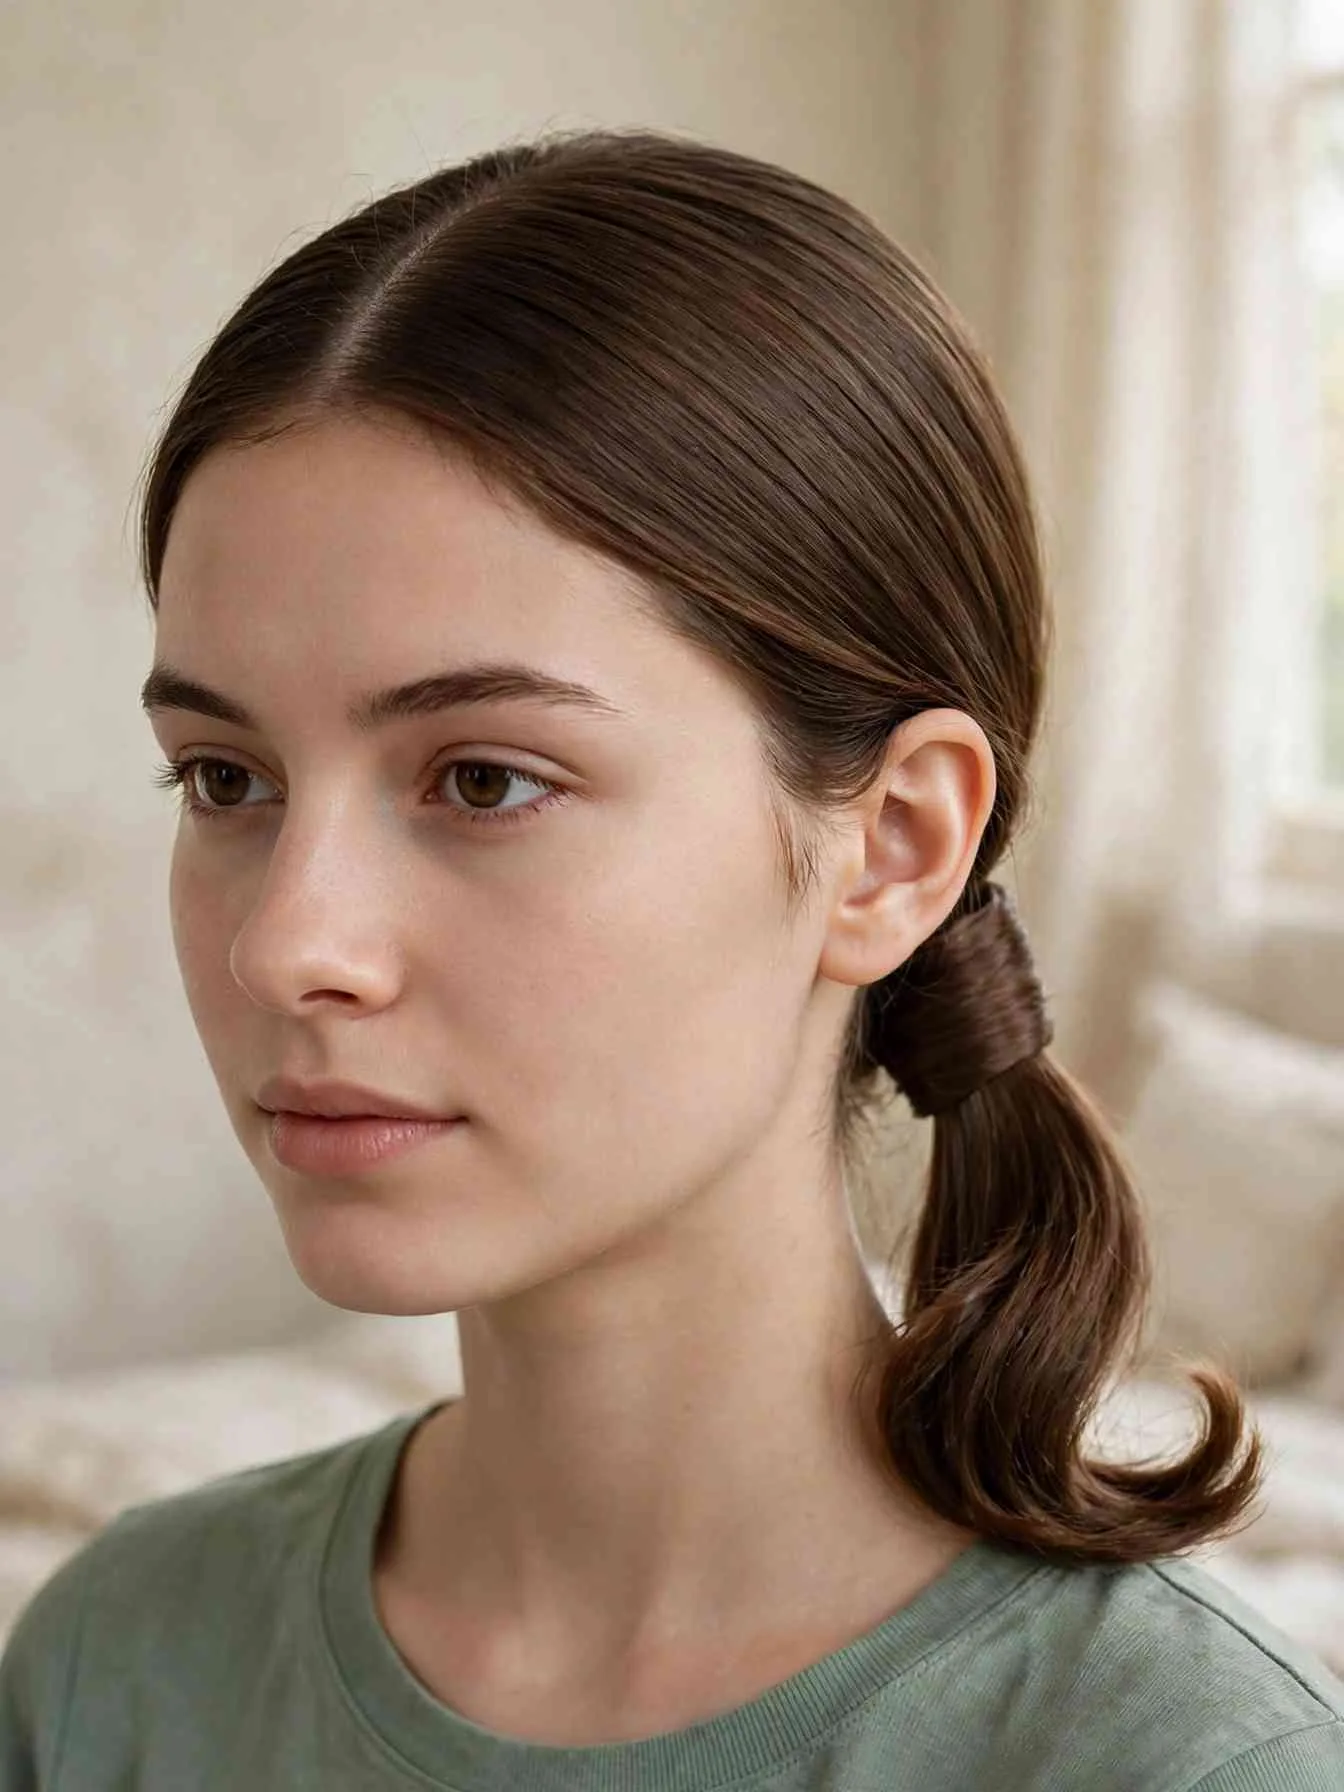
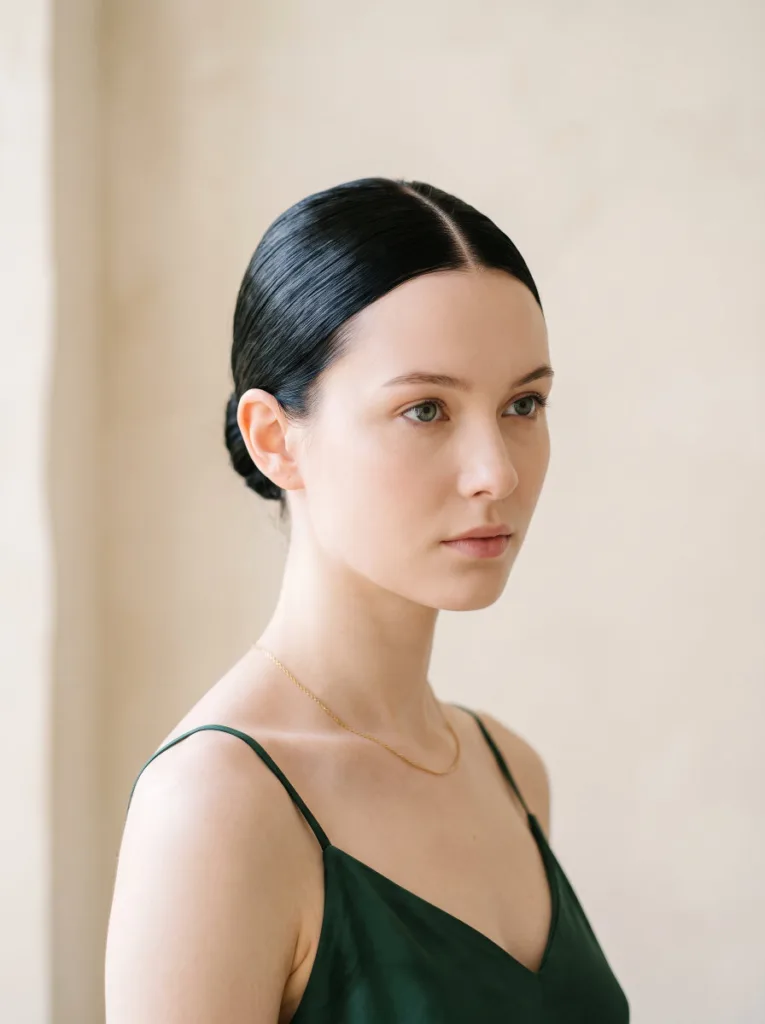
Part cleanly down the middle with the rat-tail comb. Smooth each side back and gather low at the nape. The middle part is the detail that moves this from gym pony to clean girl pony. Wrap a one-inch section of hair around the elastic, tuck the end under, and pin it flat. Press gel along the part line to keep it crisp. Leave the tail straight or add one soft bend at the very ends with a flat iron. This style photographs beautifully because the part gives the camera a clear focal line.
Best for: Medium to long hair; second-day hair.
Ask your stylist for: Face-framing layers cut to the chin so the front stays soft.
3. The High Snatched Ponytail
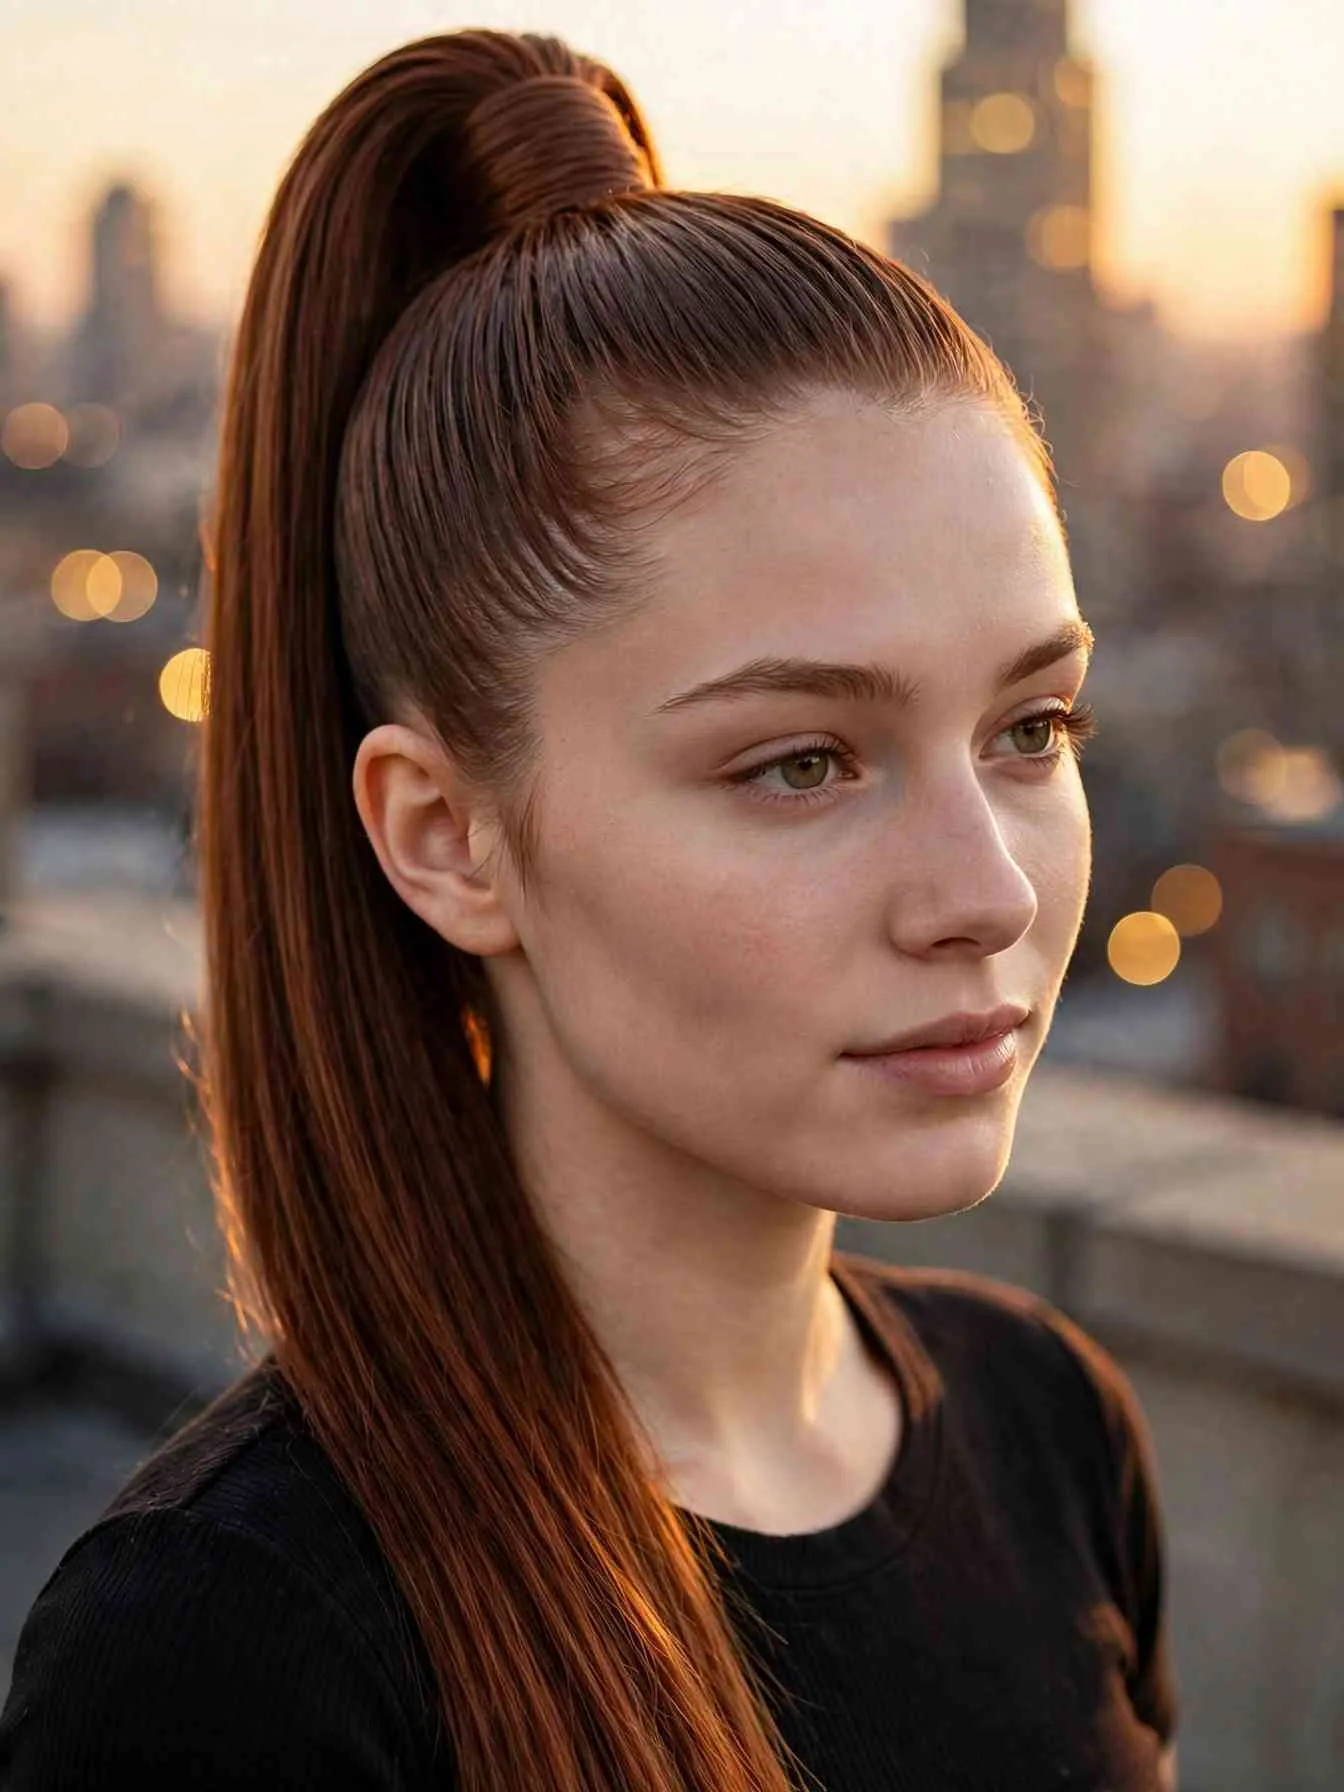
Flip your head upside down and brush everything toward the crown. This trick removes the bumps that ruin high ponies. Gather at the highest point of the crown and secure tightly. Smooth the hairline with edge-control wax, working in small sections. Take the tail over one shoulder and flat-iron it in two passes for a glassy finish. The high placement lifts the whole face visually. Keep the tension firm but not painful; a headache means it is too tight.
Best for: Long, thick hair; nights out and events.
Ask your stylist for: Long layers through the tail so it moves instead of hanging in one block.
4. The Middle-Part Low Ponytail

Draw a precise middle part from forehead to crown. Apply a light serum to the lengths before smoothing the sides back. Gather low and loose at the nape, letting the style sit softer than a slicked pony. The looseness is deliberate. It suits anyone who finds the full slick-back too severe. Tuck the sides behind the ears for the last step. This is the easiest entry point into clean girl styling, and it takes about two minutes.
Best for: Beginners; fine hair that dents under tight elastics.
Ask your stylist for: A blunt cut with no layers so the low tail looks full.
5. The Polished Bubble Ponytail
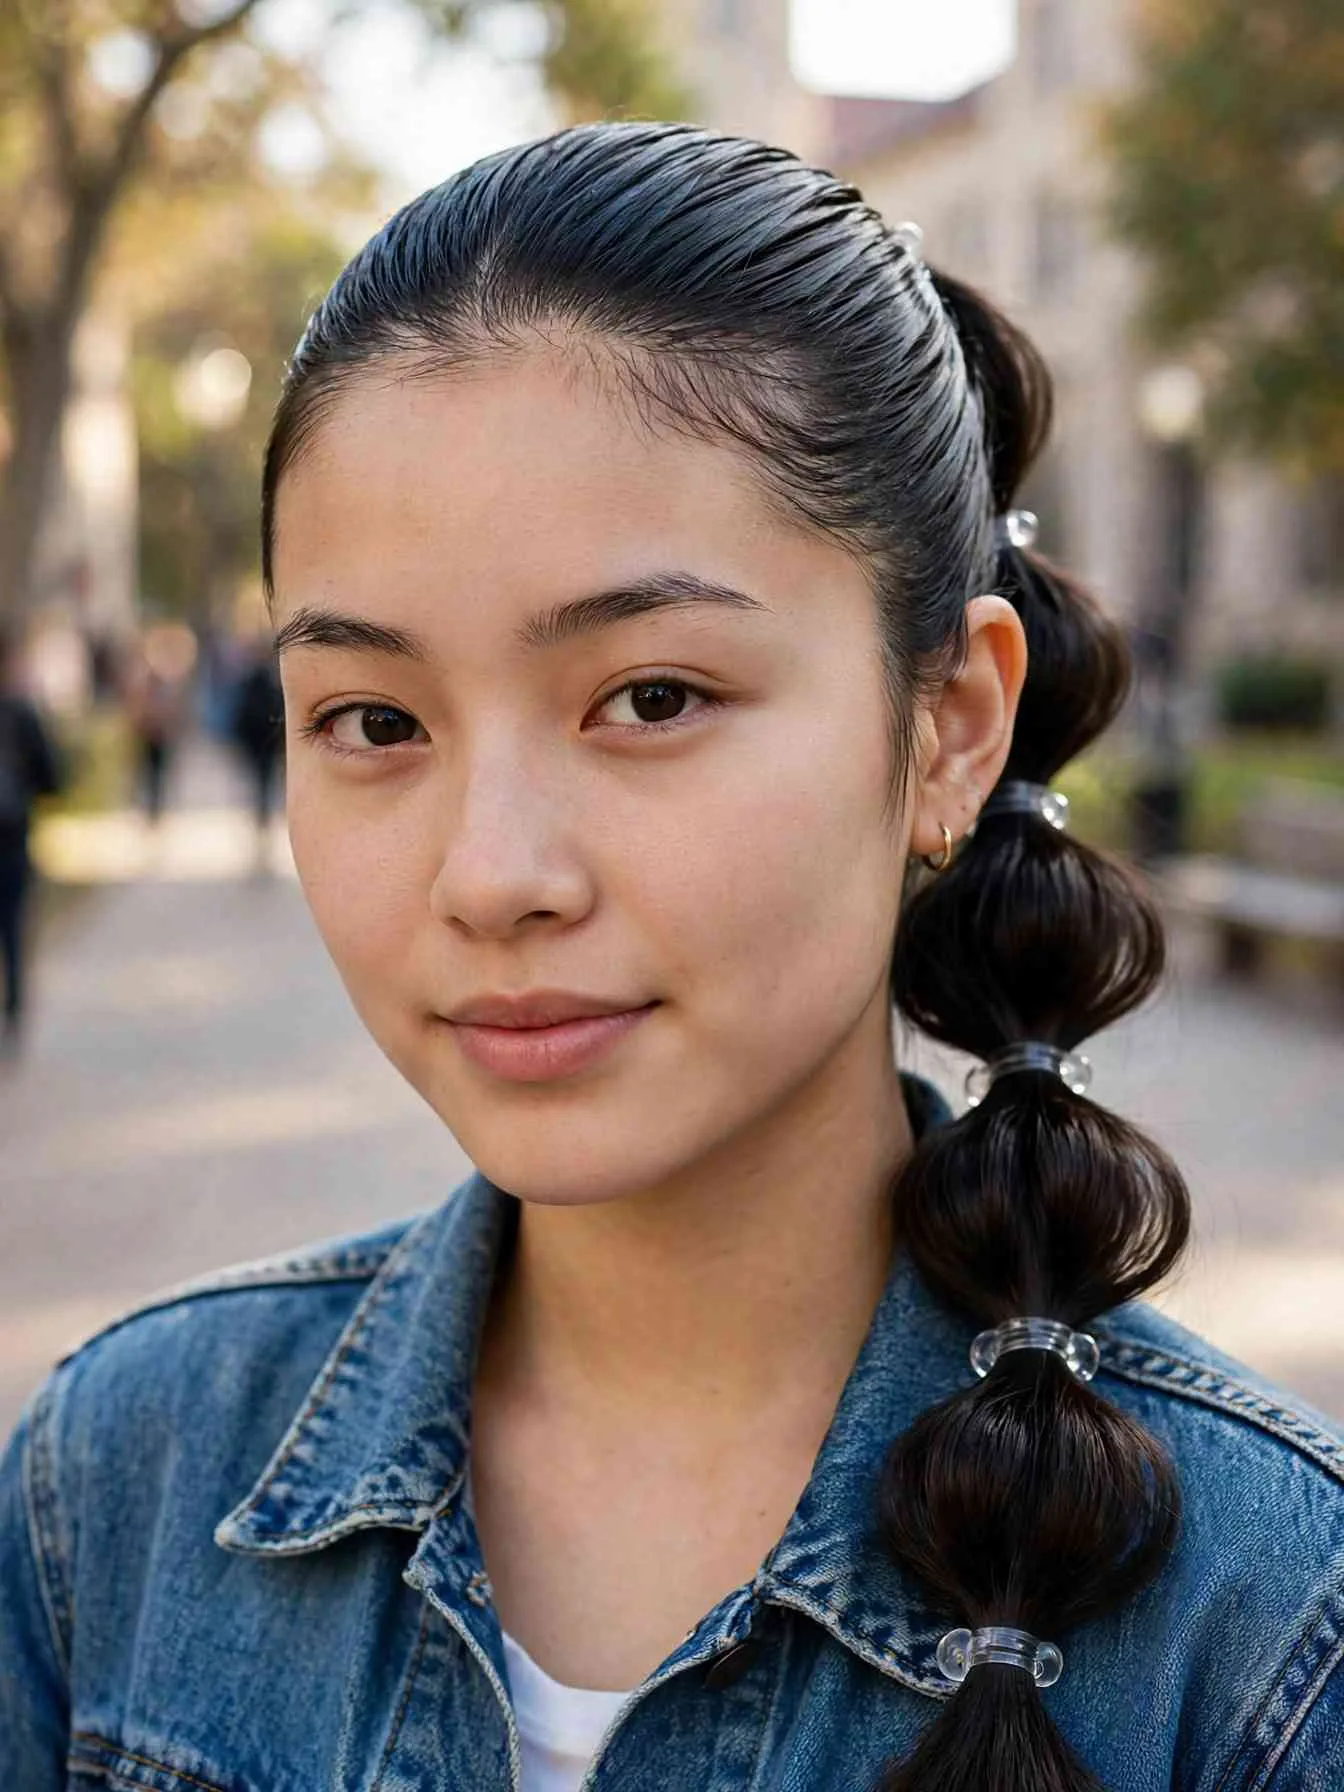
Start with the classic slicked-back pony from look one. Add clear mini elastics down the tail, spacing them two inches apart. Gently pancake each section by pulling the sides outward. The bubbles add volume without teasing. Smooth a drop of serum over each bubble to keep the finish glossy. This style reads playful but stays firmly in the clean girl camp because the roots stay slick and controlled.
Best for: Long hair; casual weekends and campus days.
Ask your stylist for: Even, one-length ends so the bubbles look uniform.
Sleek Buns
6. The Slick Back Bun
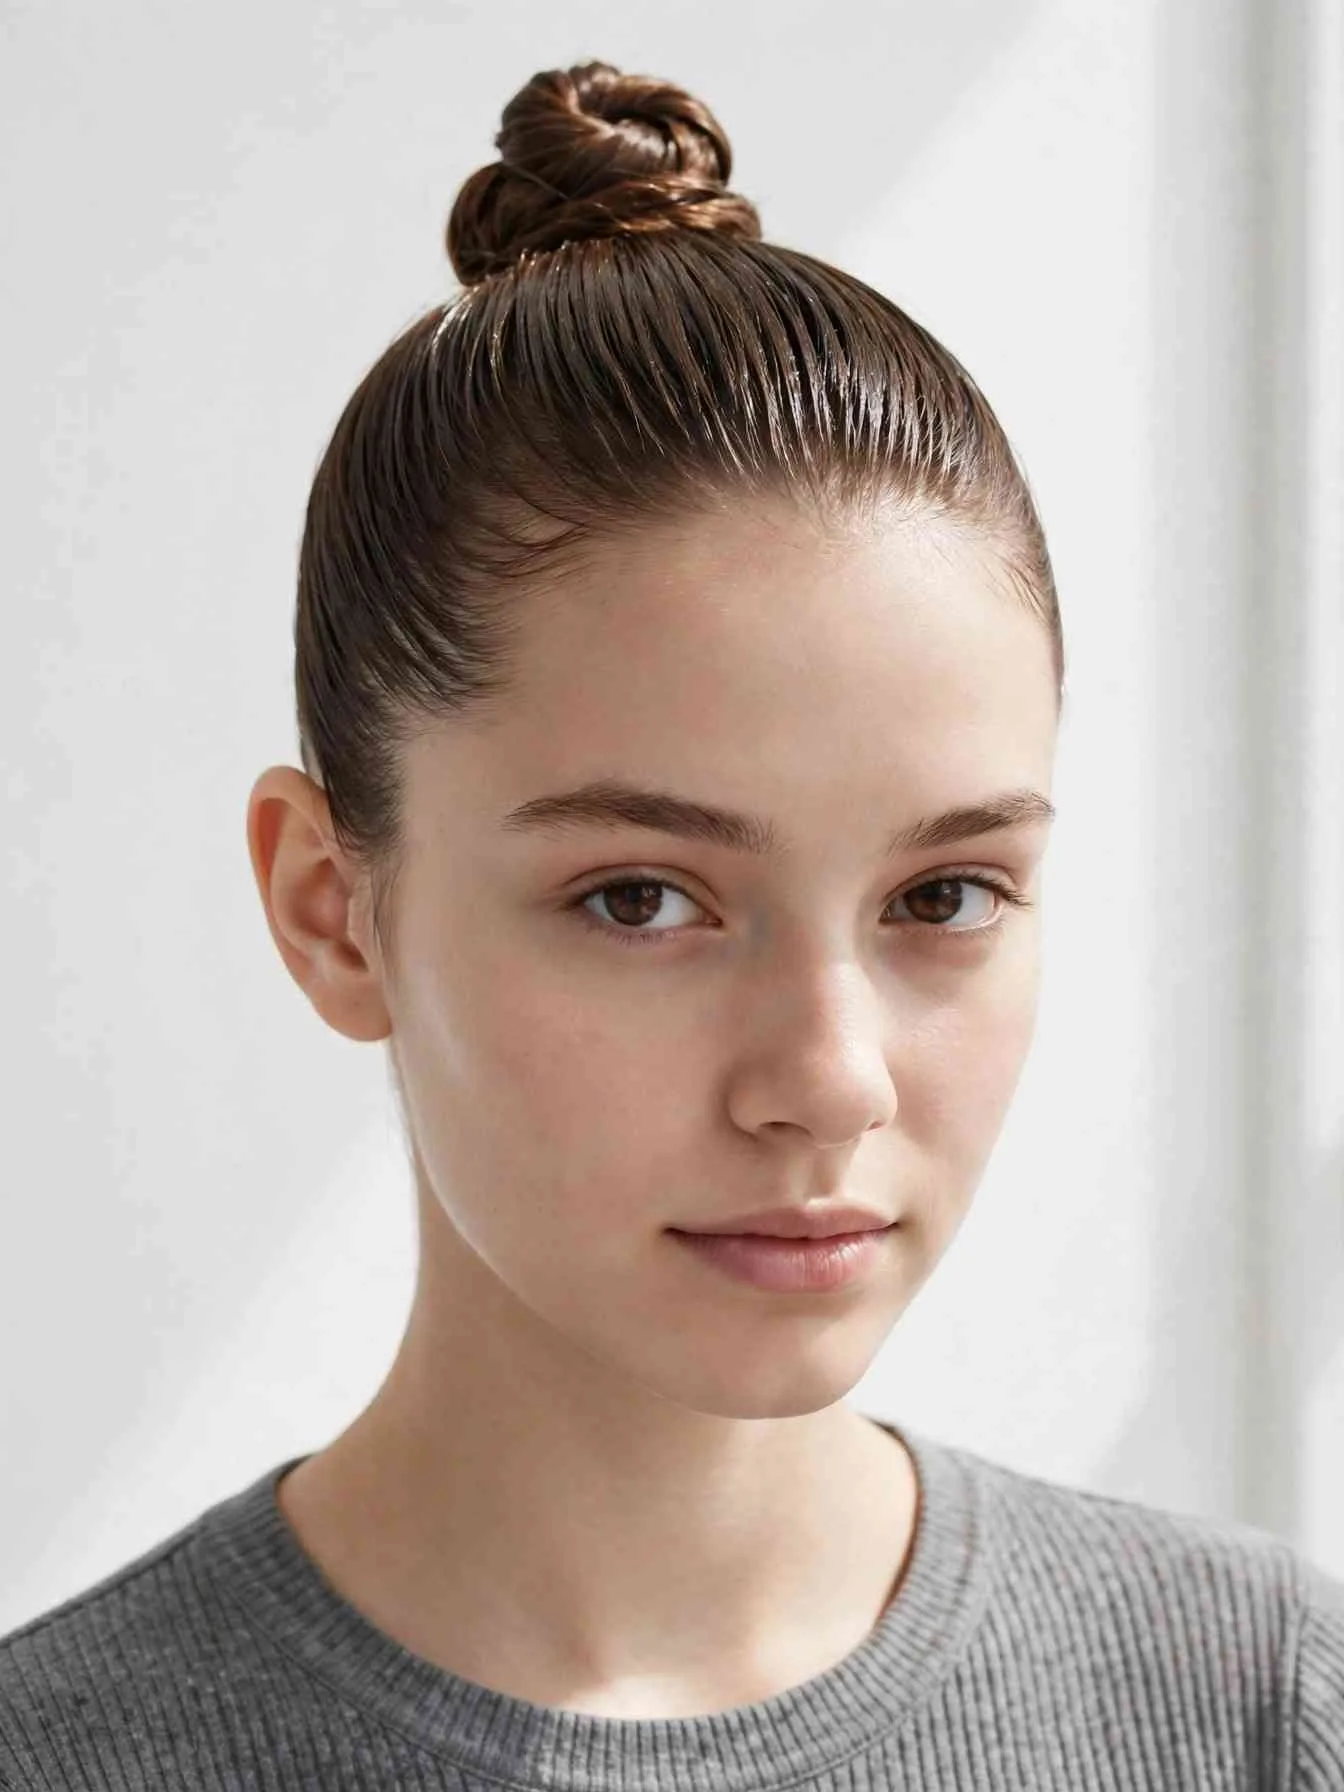
The slick back bun is the signature clean girl hairstyle. Brush hair straight back with gel worked through the crown. Twist the lengths into a tight coil and wrap them around the base. Pin in four places, like numbers on a clock face, for balanced hold. Press the hairline smooth with the edge-control wax. Keep the bun at the crown for a lifted feel or drop it to the nape for a softer read. Total time runs about five minutes once the motion becomes habit.
Best for: All hair types; the default clean girl style.
Ask your stylist for: A blunt perimeter so no wisps escape the coil.
7. The High Polished Top Knot
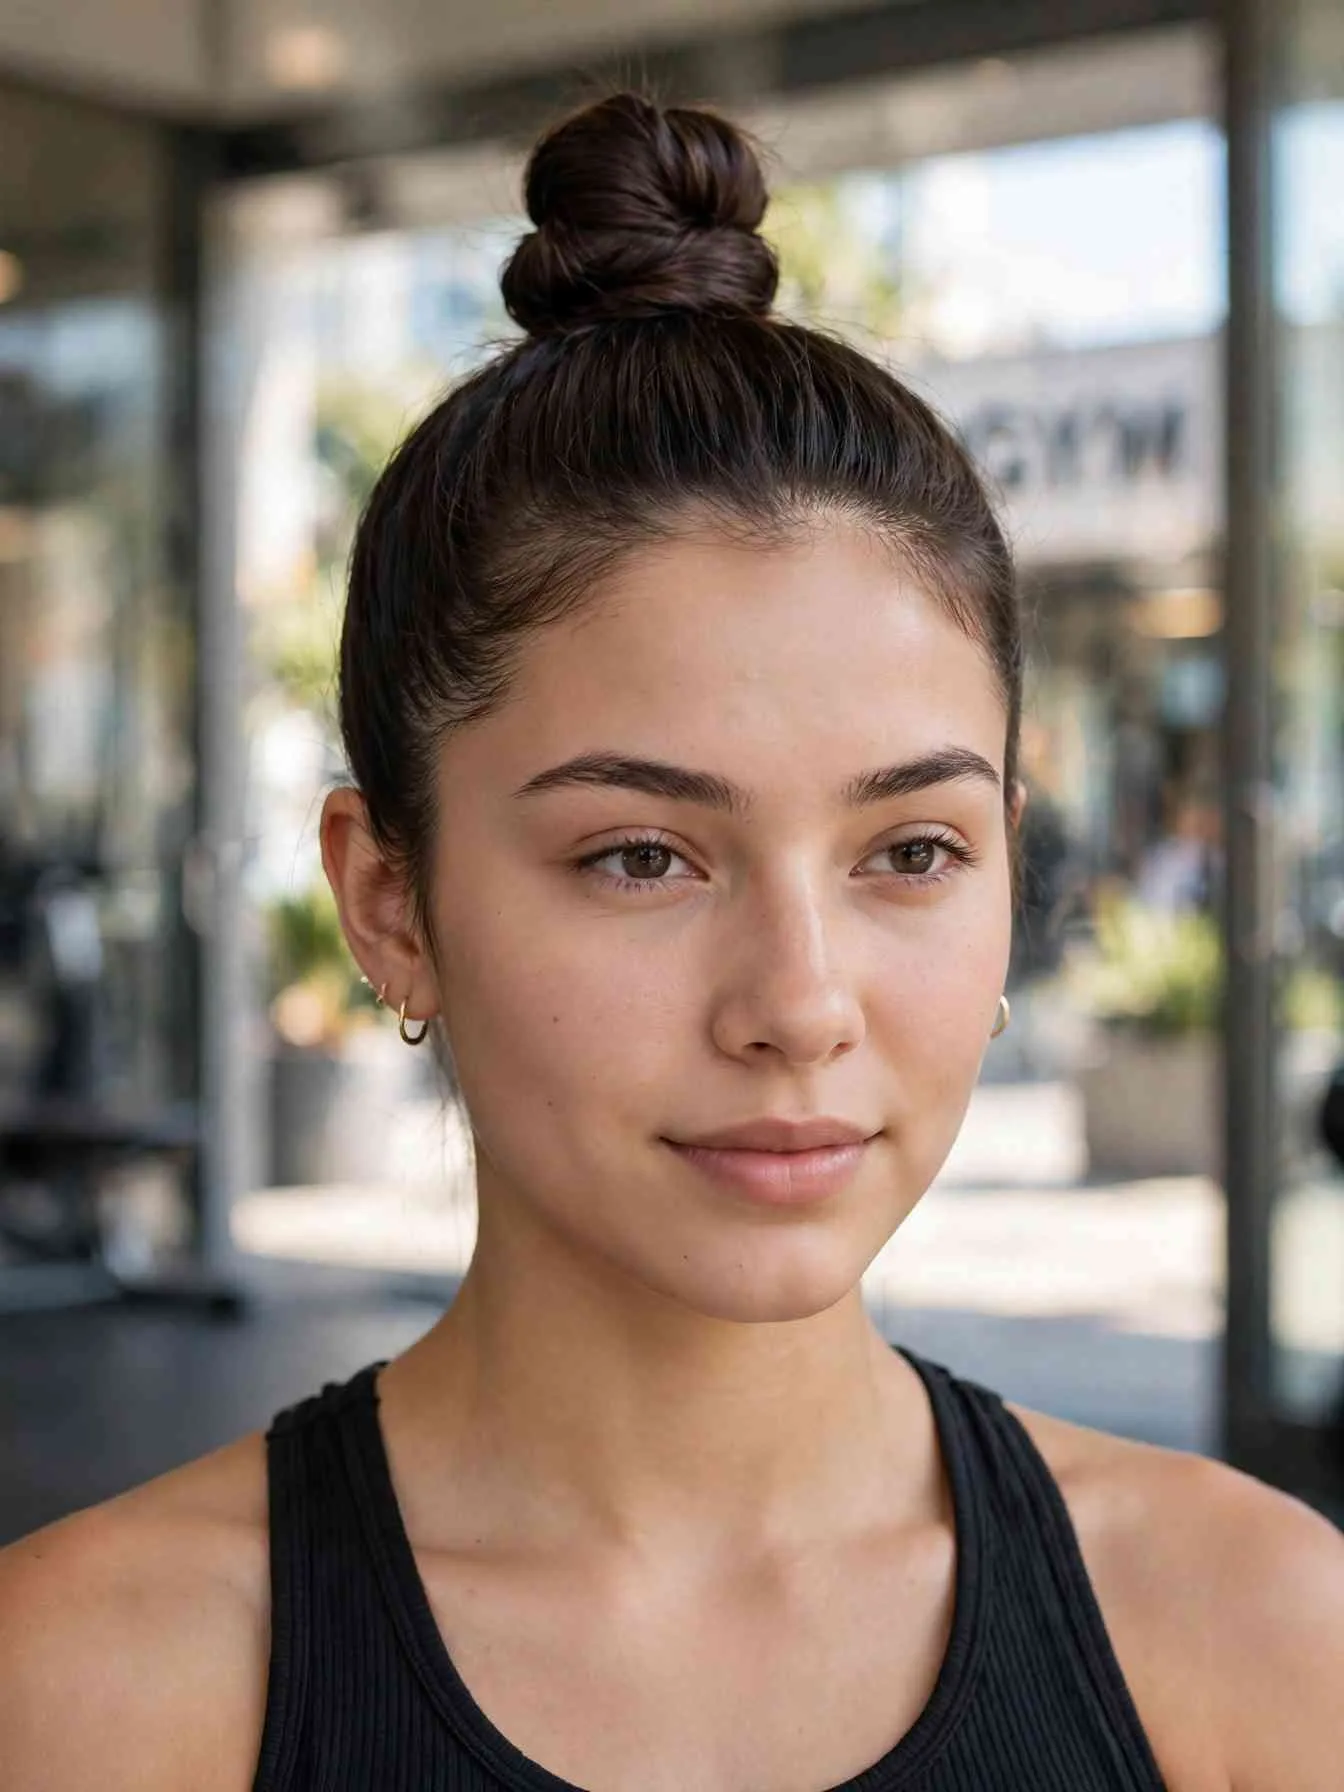
Gather everything to the very top of the head and secure. Twist the tail, wrap it around the base, and tuck the ends under. The knot should sit forward of the crown, almost at the top of the forehead line. Smooth flyaways with gel on a clean mascara spoolie for precision. This placement elongates the neck and shows off earrings. It also keeps every strand off the face, which makes it a strong gym-to-errands choice.
Best for: Thick or long hair; hot days and workouts.
Ask your stylist for: Texturizing only at the very ends so the wrap grips itself.
8. The Middle-Part Low Chignon
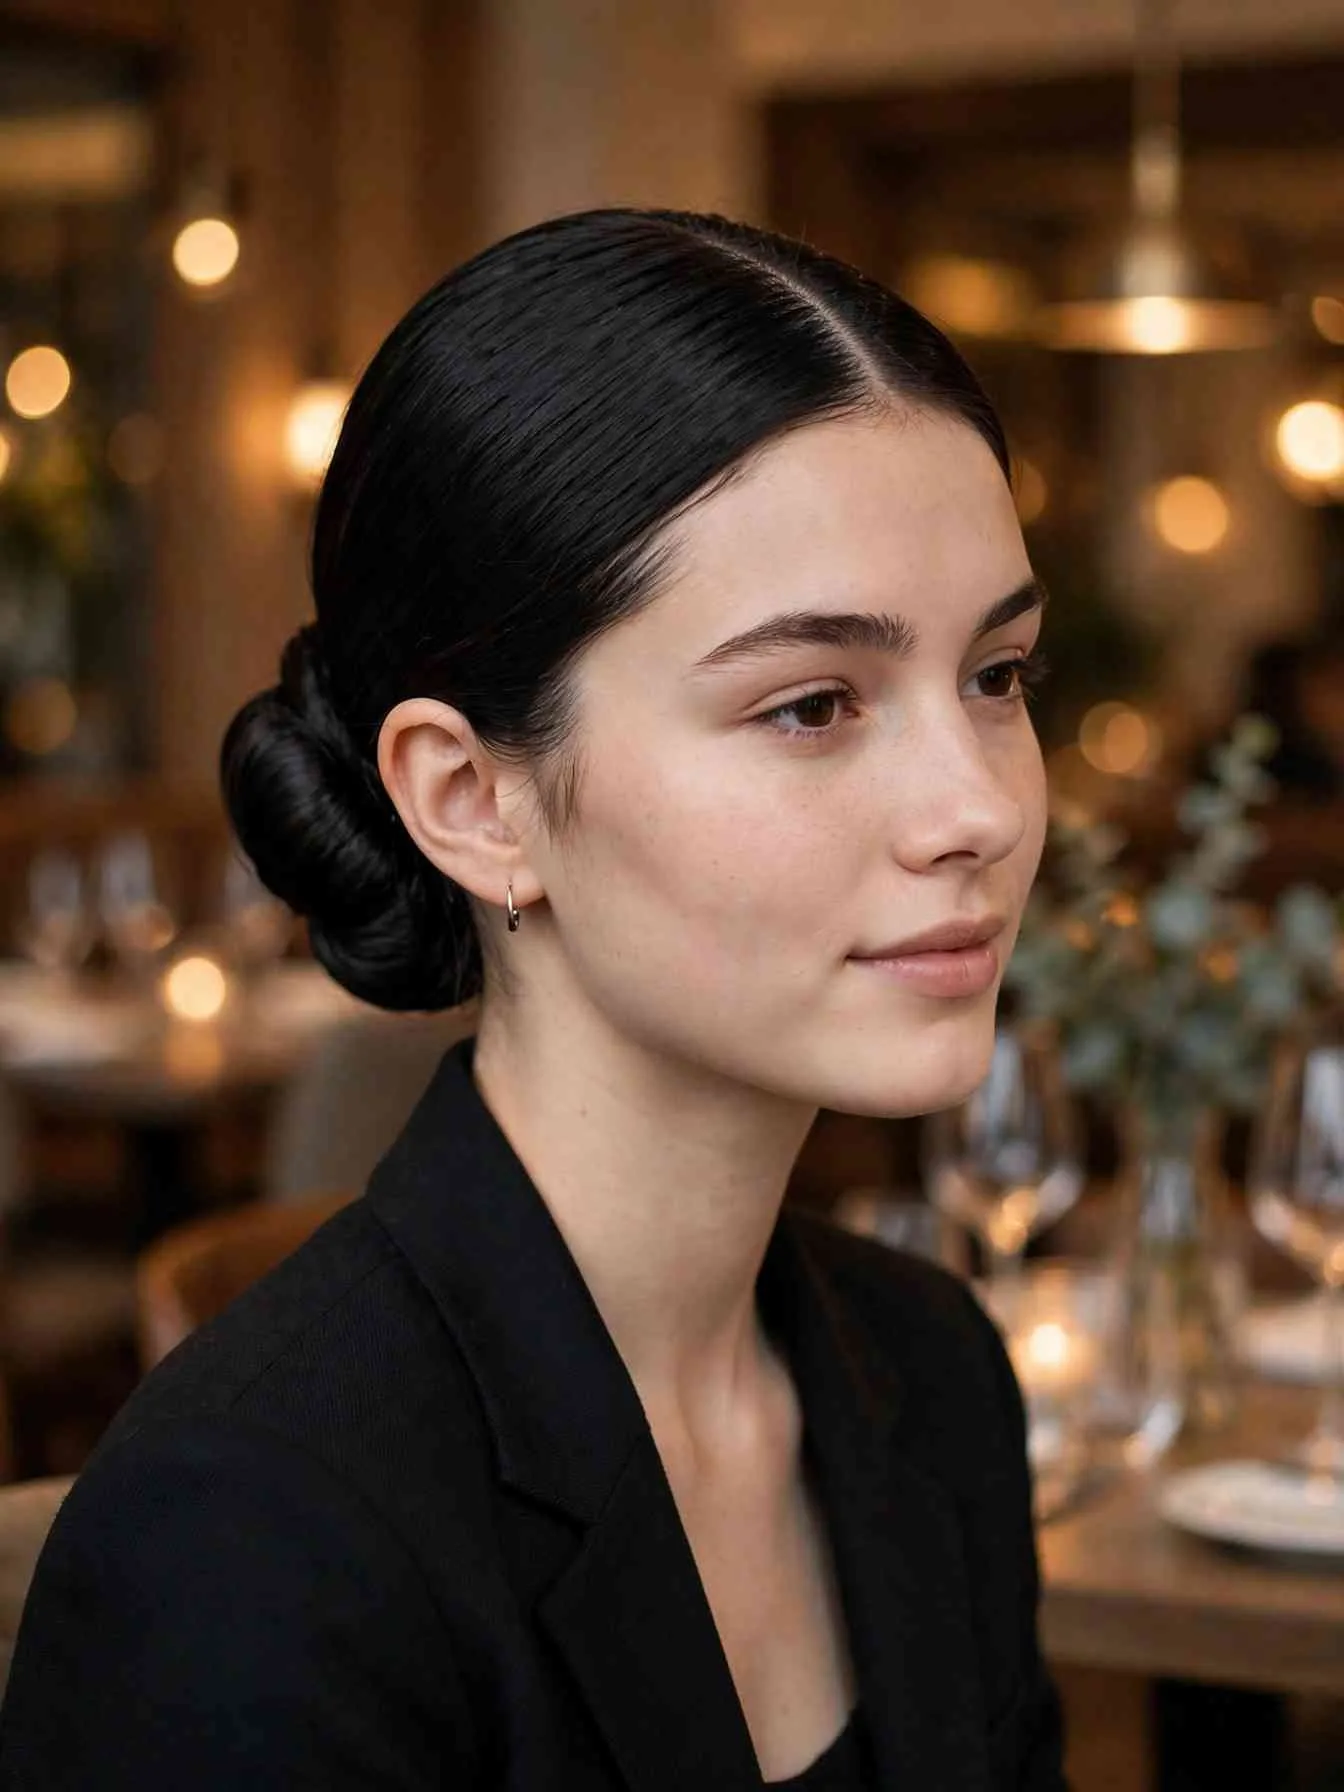
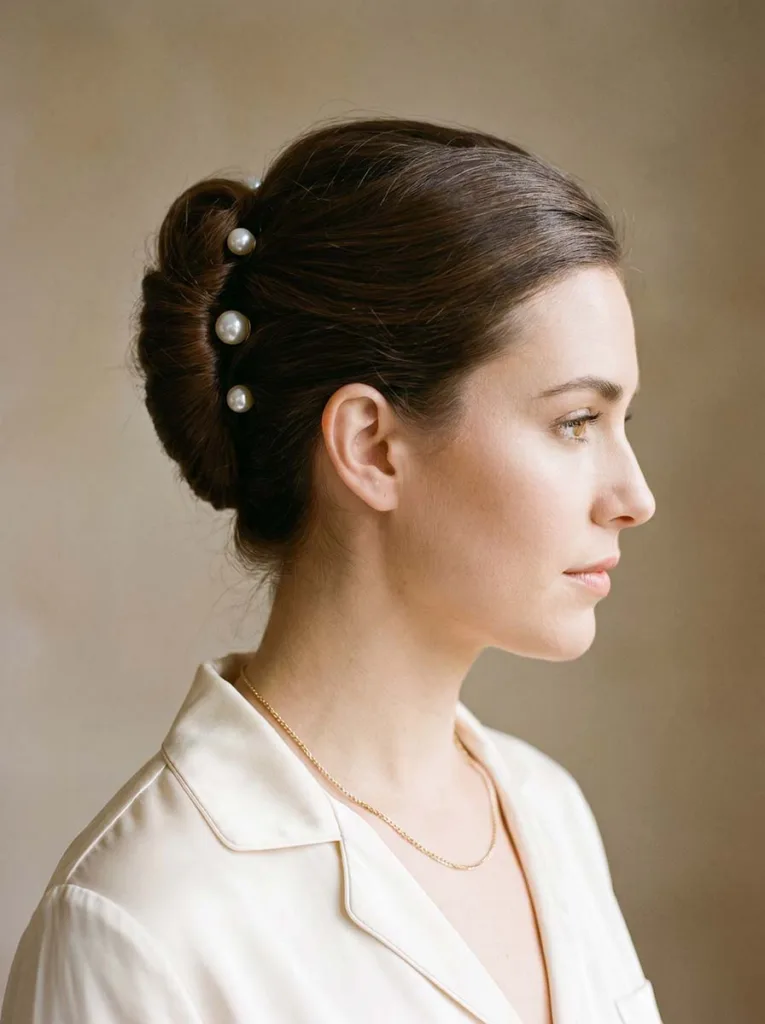
Draw a middle part, smooth both sides back, and gather at the nape. Twist the tail loosely and coil it flat against the head, pinning as you go. The flat coil is what separates a chignon from a bun. It sits close to the skull and reads elegant rather than sporty. Leave the part crisp and the hairline smooth. This style carries a blazer and a wedding guest dress with equal ease.
Best for: Medium-length hair; formal settings.
Ask your stylist for: Soft, face-framing pieces cut to cheekbone length.
9. The Sleek Twisted Side Bun
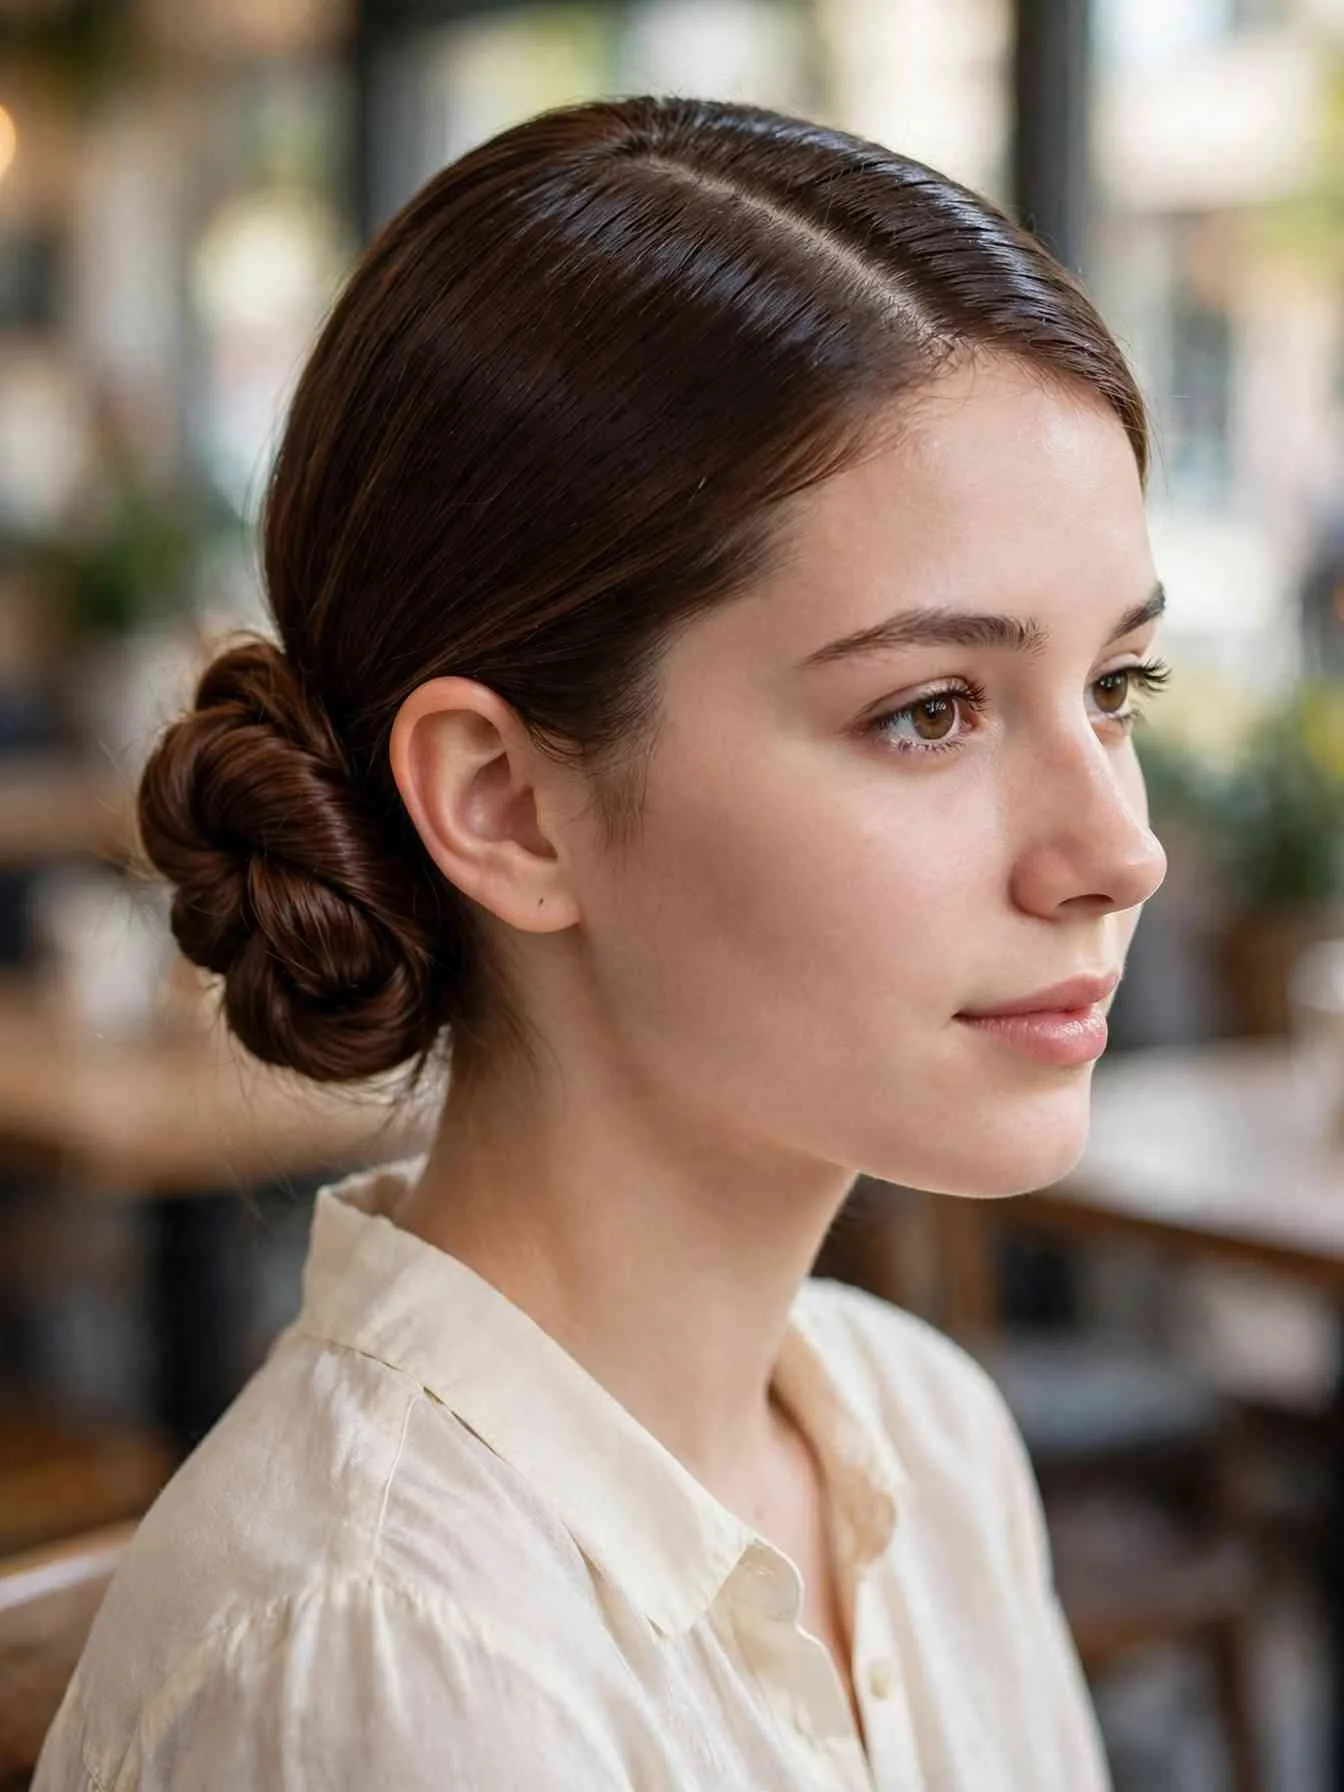
Part on the side and sweep everything to the opposite side at the nape. Twist the lengths away from the face before coiling. The side placement adds asymmetry, which photographs well and suits anyone bored of centered styles. Keep the twist snug so the coil holds its shape through the day. Smooth the part line with serum for a clean division. This bun takes the same five minutes as the classic but reads more styled.
Best for: Oval and round face shapes; date nights.
Ask your stylist for: A deep side part mapped to your natural growth pattern.
10. The Ballerina Donut Bun
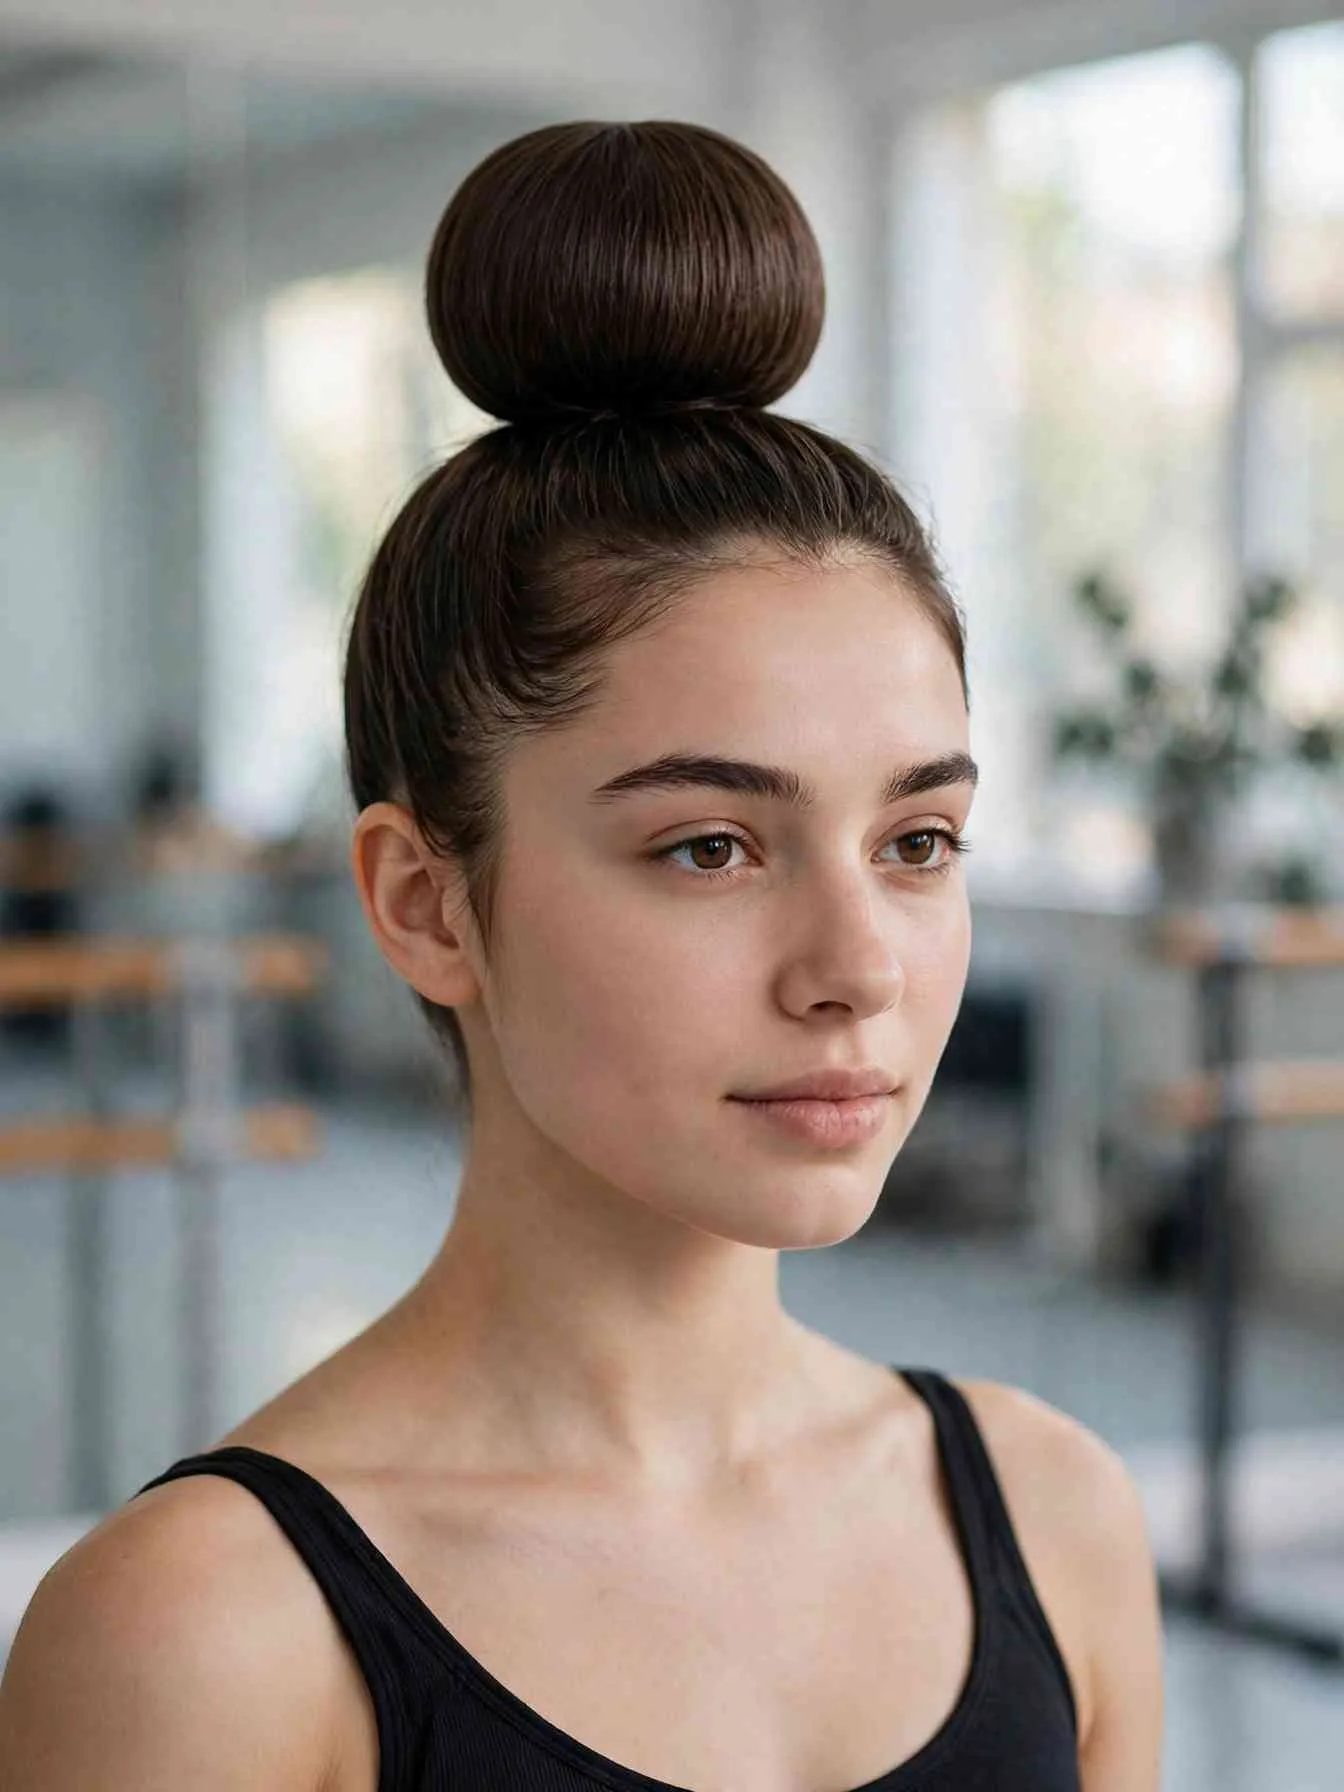
Pull hair into a high pony and slide a foam donut over the tail. Spread the hair evenly around the form. Secure it with an elastic, then wrap the remaining ends around the base. Pin the ends flat. The donut gives a perfectly round shape that hand-wrapping rarely achieves. Choose a donut close to your hair color so any gaps stay invisible. The result is the most polished bun in this guide.
Best for: Fine hair that needs help looking full; dance and performance days.
Ask your stylist for: One-length ends so the wrap covers the form evenly.
Sleek Braid Accents
11. Two Slicked Front Braids With a Low Pony
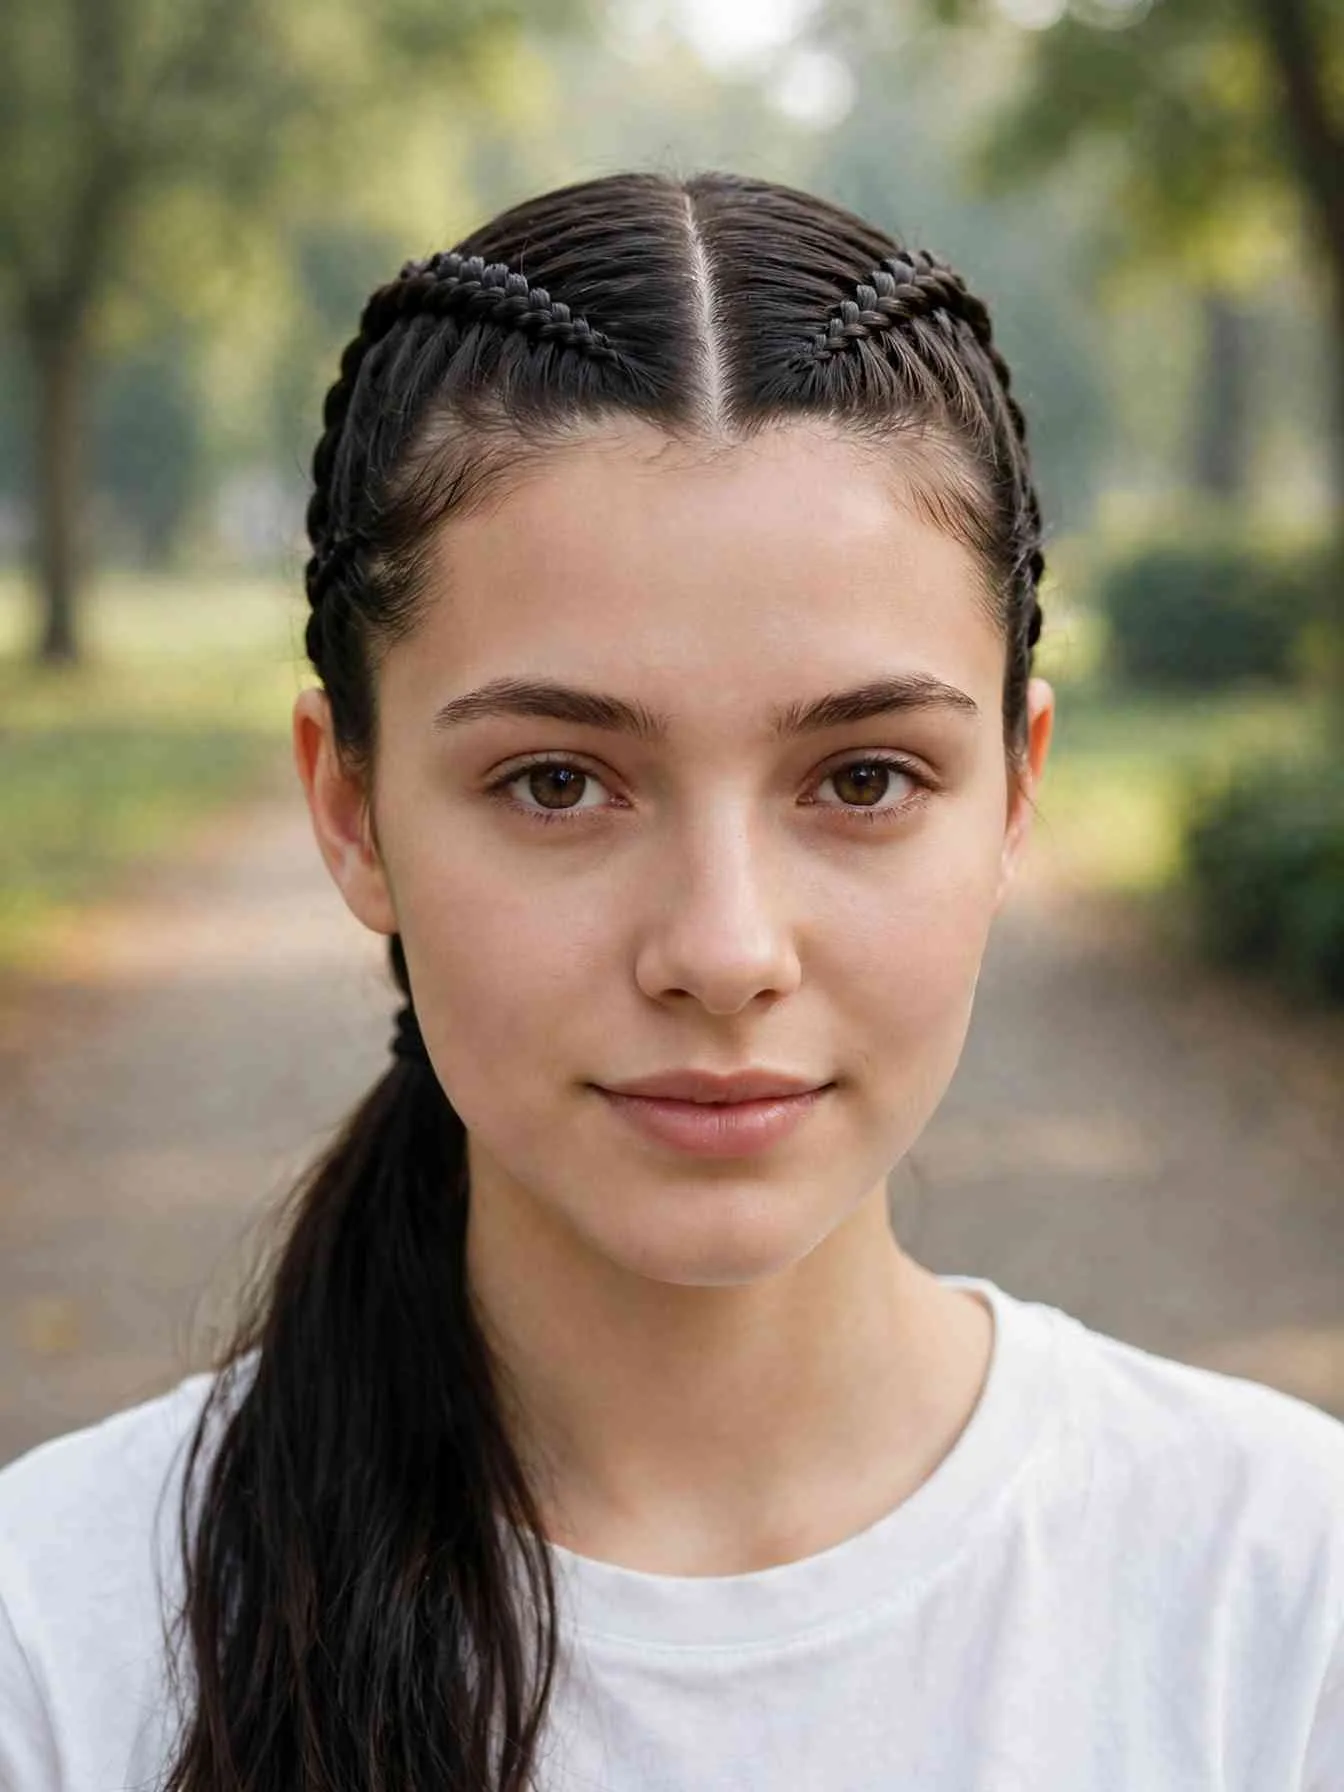
Draw a middle part and braid a tight two-inch section along each side of the part, working from the hairline back to the crown. Keep the braids flat against the scalp. Gather the braids plus all remaining hair into a low pony at the nape. The braids add structure to an otherwise simple style. Secure each braid end with a clear elastic before joining them into the pony so nothing slips. Smooth the part with gel.
Best for: Thick hair; humid days when loose styles frizz.
Ask your stylist for: Clean sectioning lines so the braids sit symmetrically.
12. The Slicked Dutch Braid Ponytail
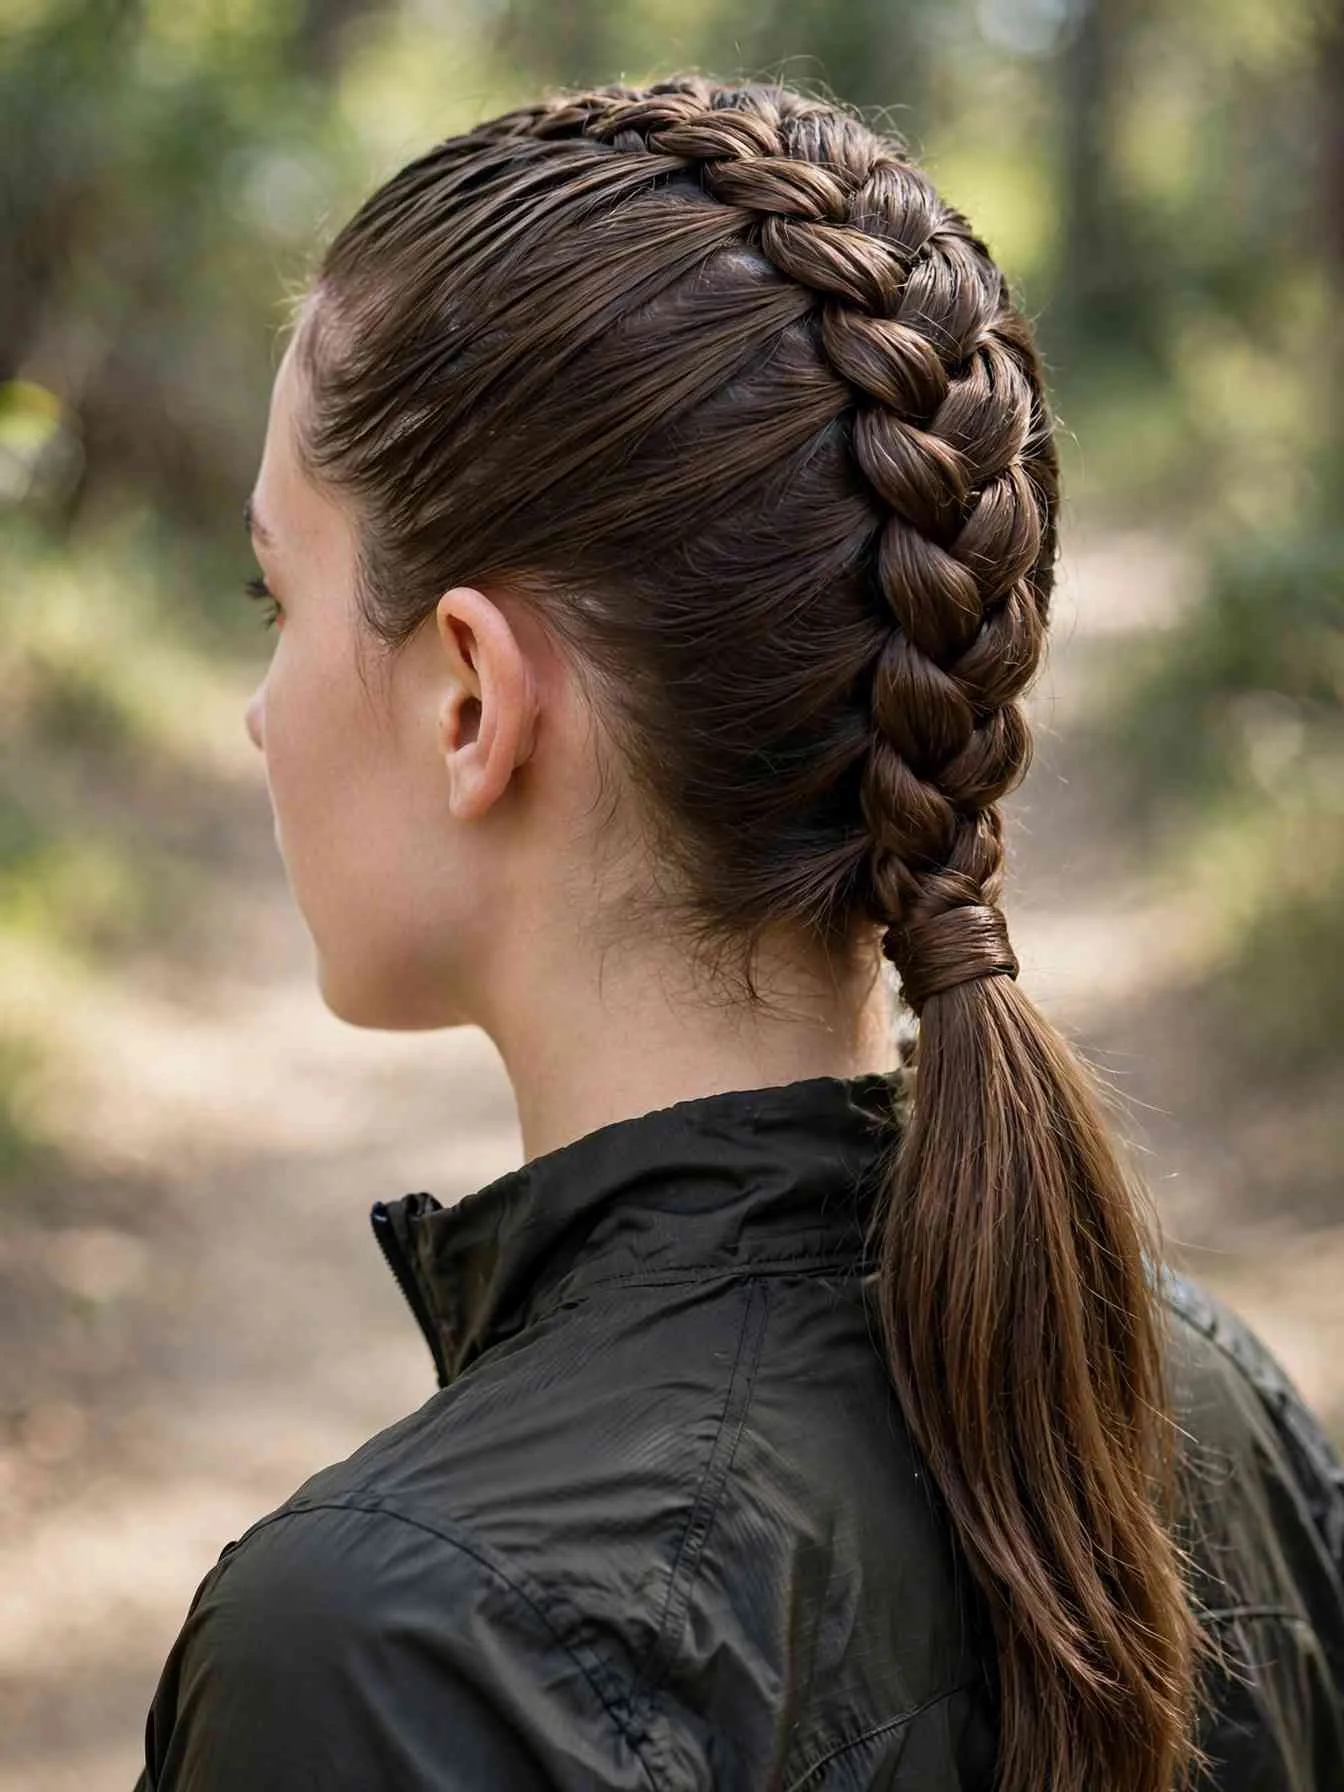
Brush everything back and Dutch-braid from the crown down to the nape, keeping the braid centered and snug. In a Dutch braid, each section crosses under the middle one, which makes the braid sit raised on the head. Secure at the nape and let the tail hang as a pony. Smooth the sides with gel as you braid to prevent bumps. This style holds through wind and long days better than any loose pony.
Best for: Active days; medium to long hair.
Ask your stylist for: Long layers that blend into the tail without poking out of the braid.
13. The Slicked French Braid Into a Low Bun
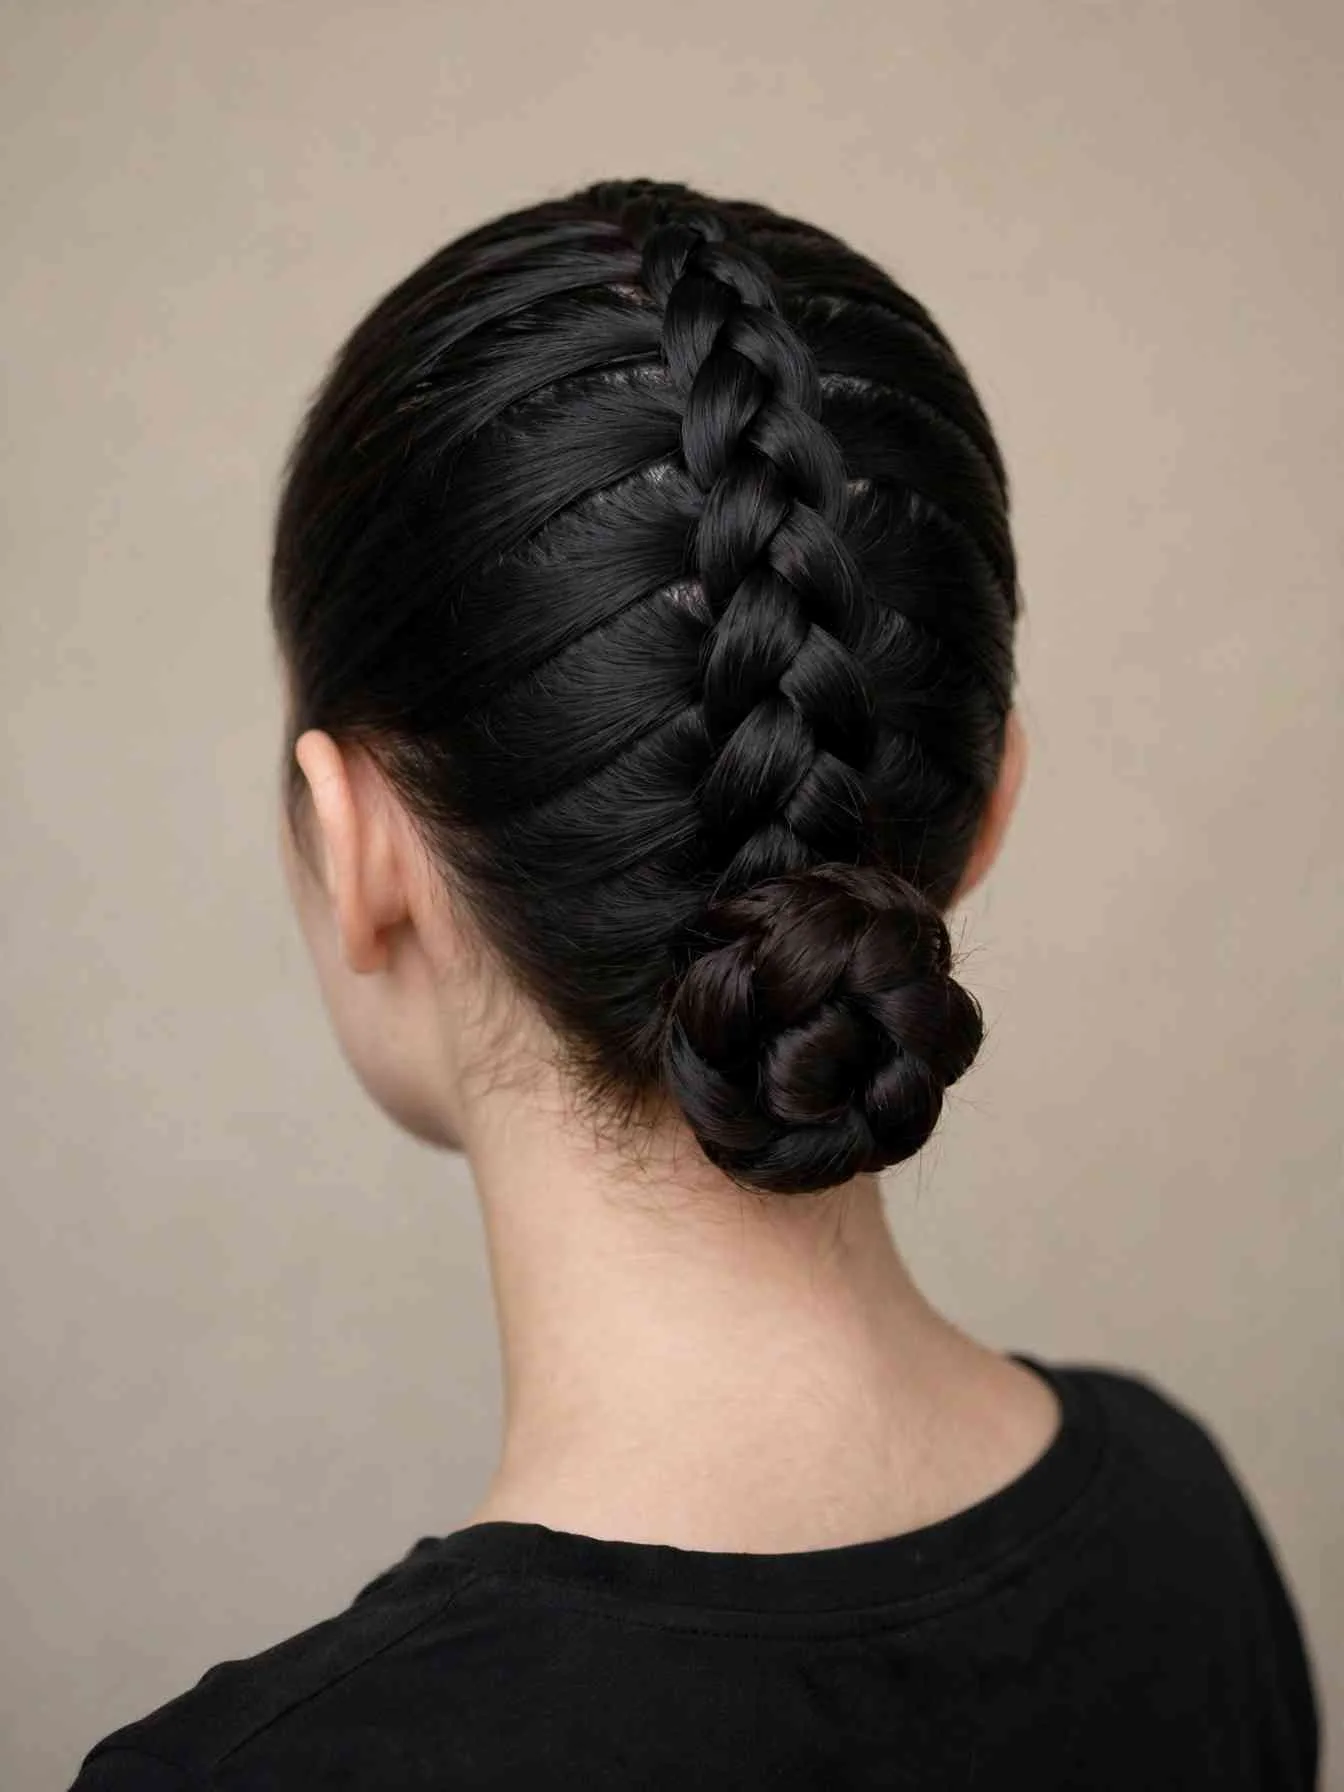
French-braid from the hairline straight back to the nape, adding hair evenly on both sides. Keep the tension consistent so the braid lies flat. Coil the tail into a low bun and pin it. The braid gives the bun a finished, deliberate look that a plain bun lacks. This is one of the longest-wearing styles in the guide. It survives second-day hair easily because the braid disguises root texture.
Best for: Greasy roots; long workdays and travel.
Ask your stylist for: Blunt ends so the bun coils without fraying.
14. The Sleek Fishtail Low Ponytail
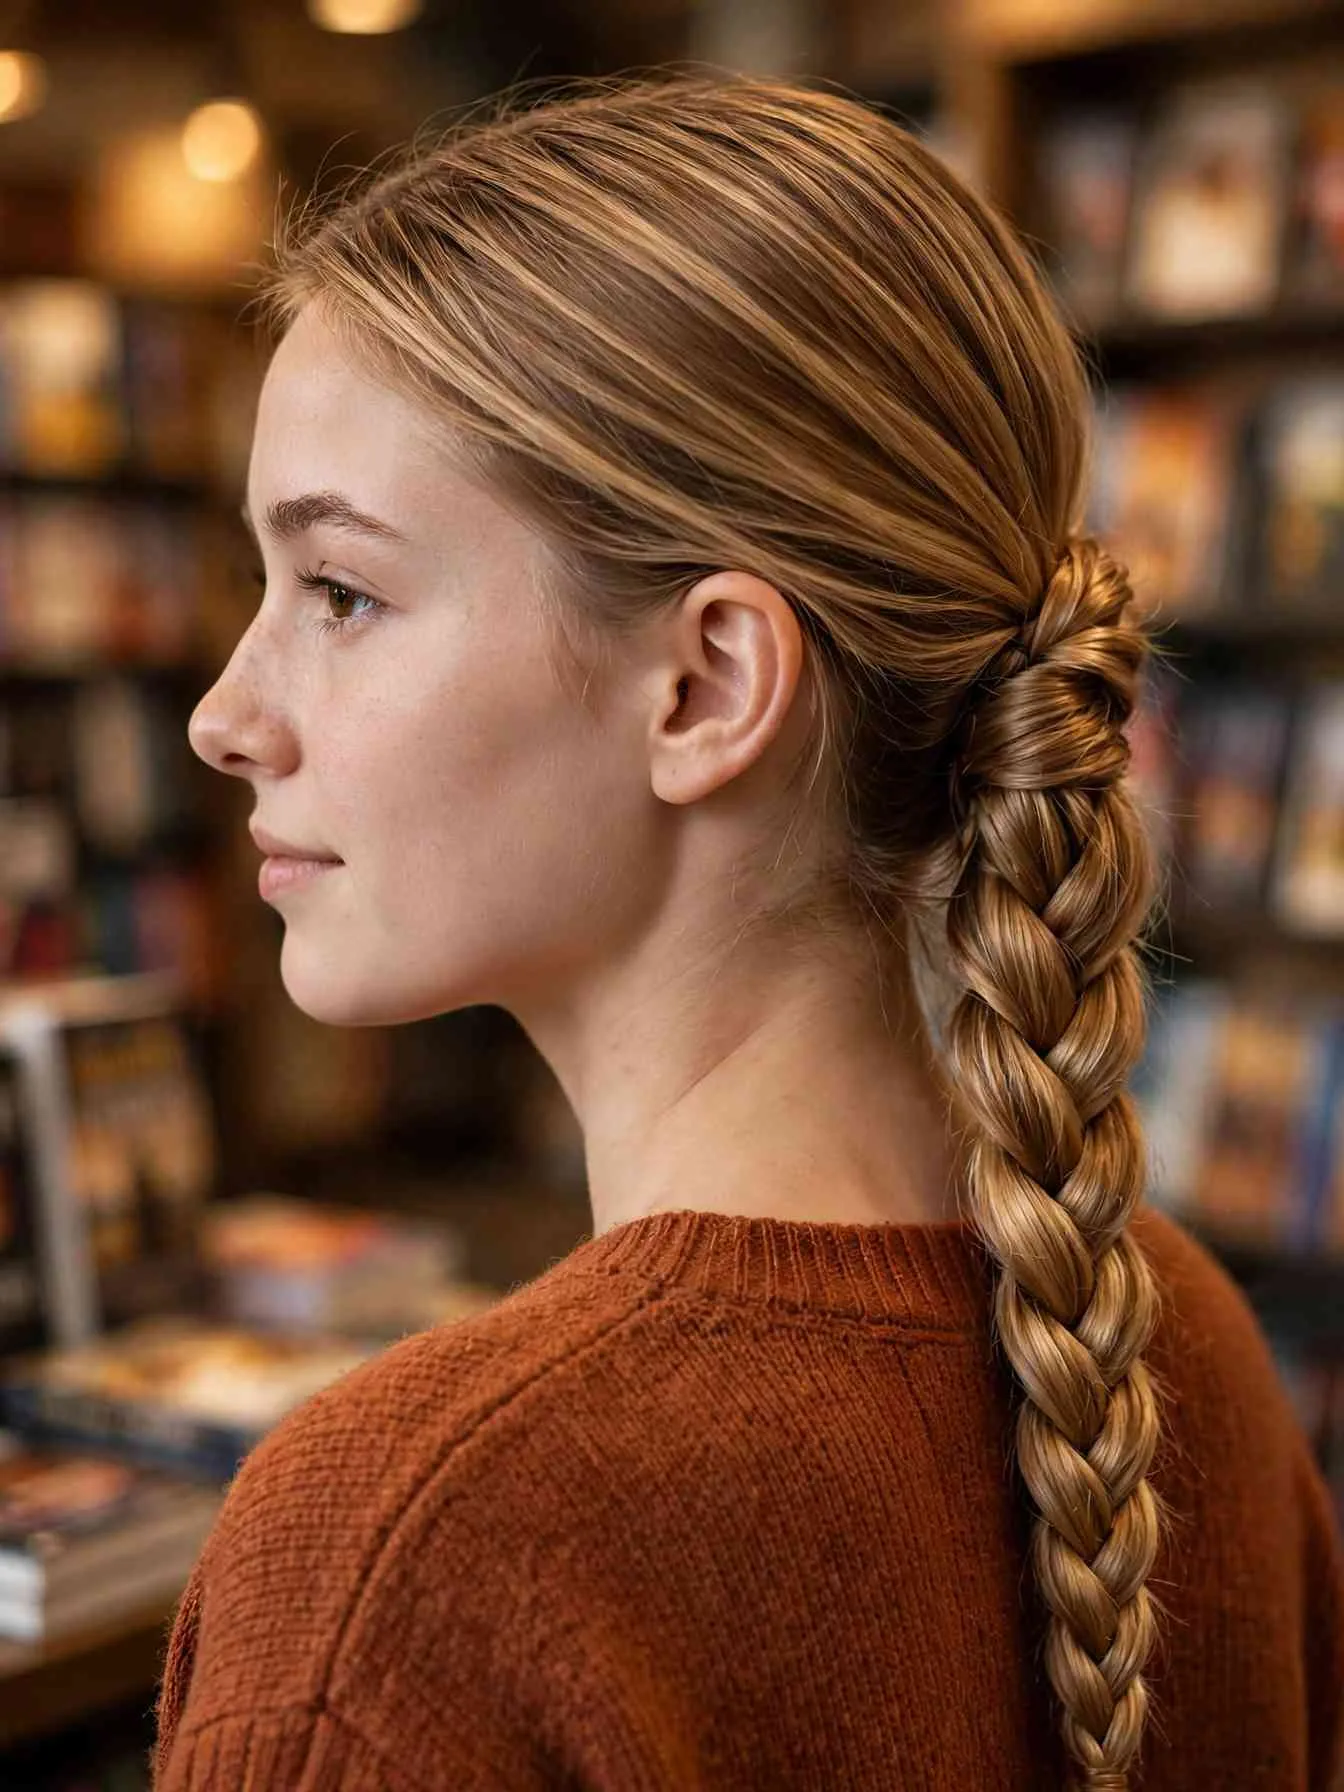
Gather hair into a low pony and secure it. Split the tail into two sections and fishtail-braid down. Cross thin pieces from the outside of each section to the inside of the other. Keep the pieces thin and even for the signature woven look. Pancake the braid lightly for fullness, then smooth serum over it. The fishtail reads intricate but takes under ten minutes once you learn the pattern. The low placement keeps it in clean girl territory.
Best for: Long hair; weekends and low-key events.
Ask your stylist for: One-length ends so the thin pieces stay even.
Smooth Lengths
15. Glass Straight Hair
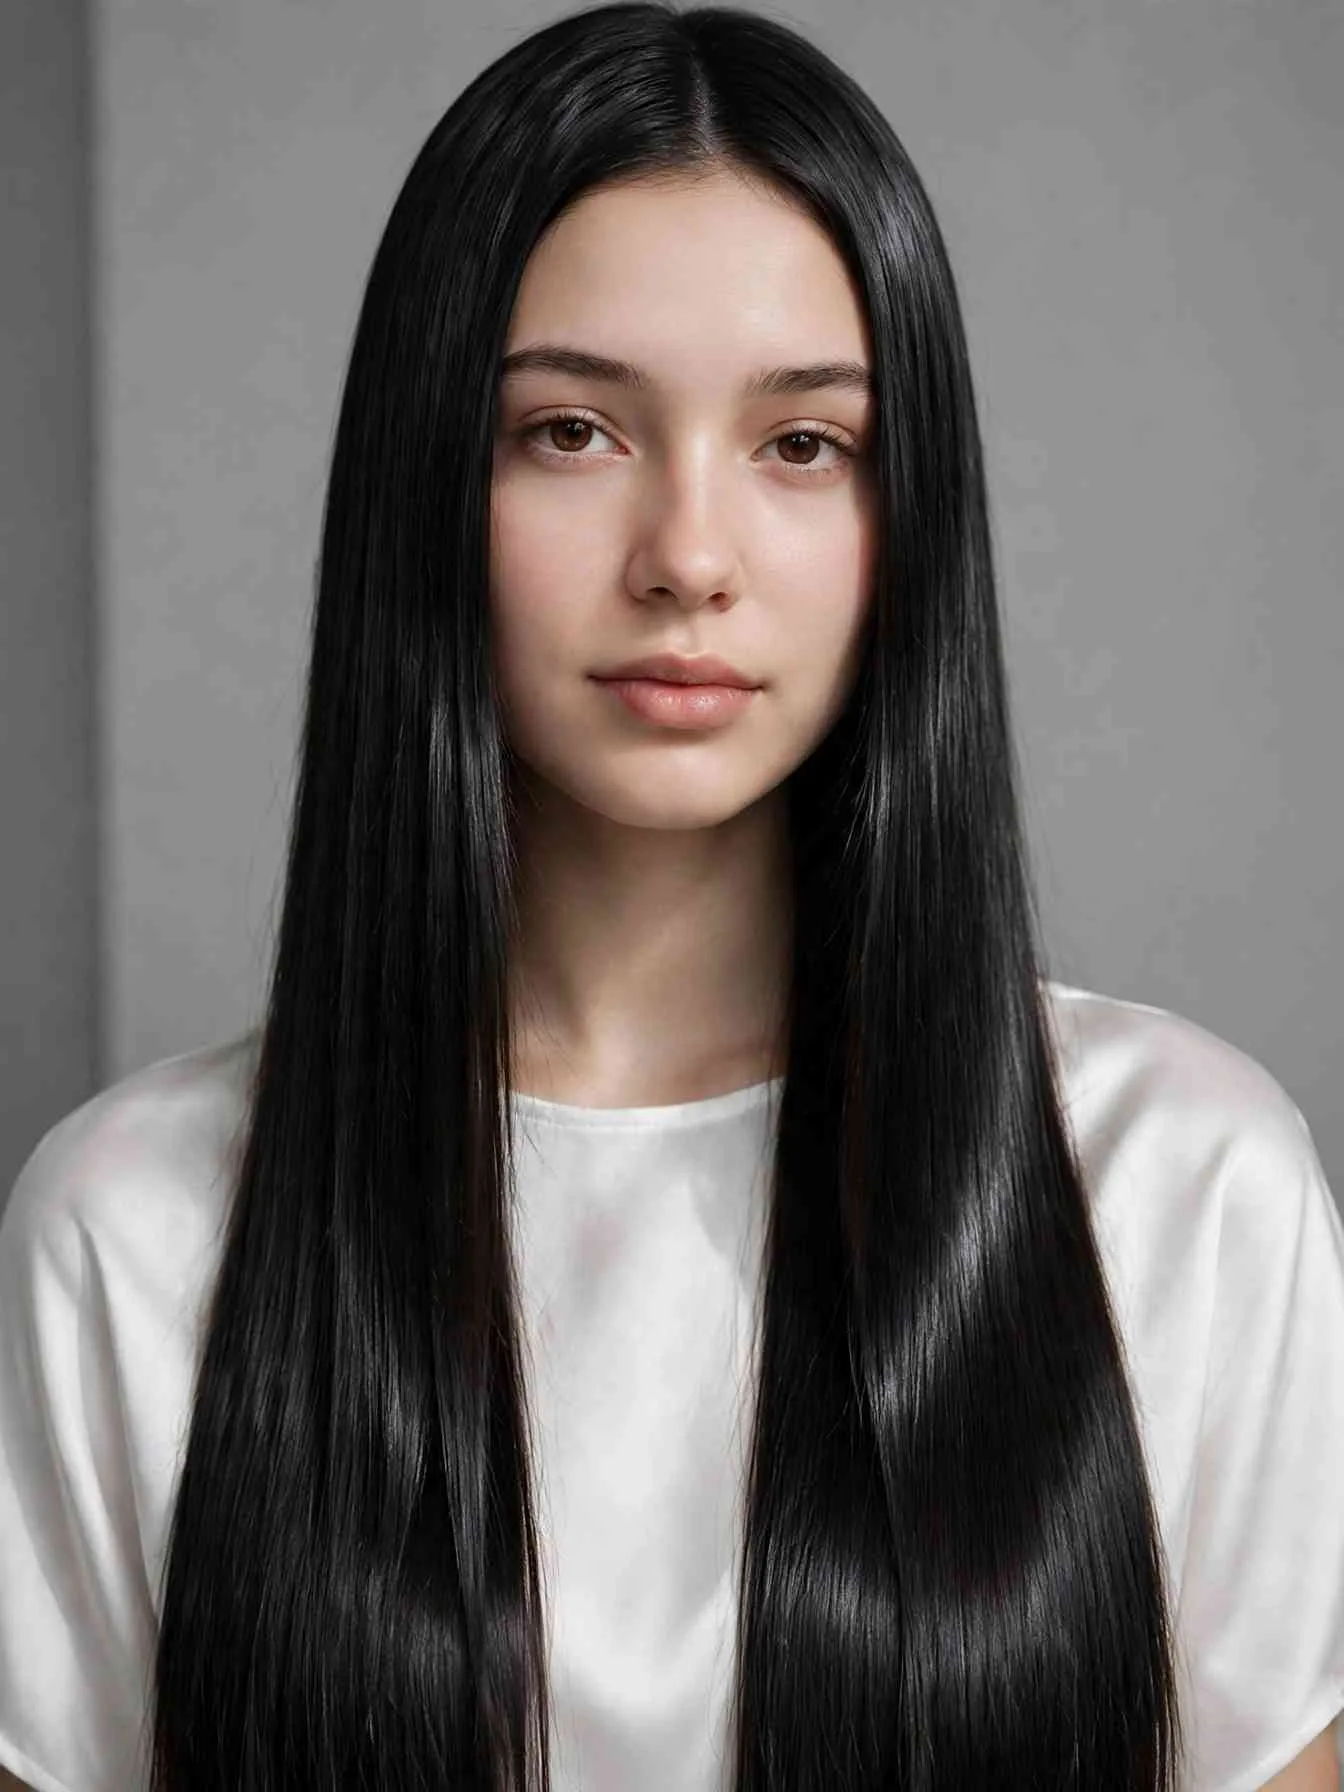
Wash, apply heat protectant, and blow-dry smooth with a paddle brush. Flat-iron in thin sections, moving slowly from roots to ends. The thin sections are the entire secret. Thick sections never get truly glassy. Finish with two drops of shine serum pressed through the mid-lengths. Tuck nothing behind the ears; let the sheet of hair fall clean. Glass hair is the simplest of these clean girl hairstyles and the hardest to fake. Healthy, trimmed ends make or break it.
Best for: Straight to wavy hair; anyone with freshly trimmed ends.
Ask your stylist for: A blunt cut with a clean perimeter and a glossing treatment.
16. The Tucked Straight Lob

Flat-iron a chin-to-collarbone lob until it falls perfectly straight. Tuck both sides neatly behind the ears. The tuck is the style. It shows the jawline, keeps hair off the face, and looks intentional rather than lazy. Smooth the crown with a boar-bristle brush first so no volume fights the flat silhouette. If your lob has layers, a feathered bob finish softens the same tucked look. Our guide to feathered bob styling ideas covers the layered version.
Best for: Short to medium hair; minimal morning routines.
Ask your stylist for: A blunt lob cut to sit right at the collarbone.
17. Sleek Lengths With a Middle Part and Curved Ends
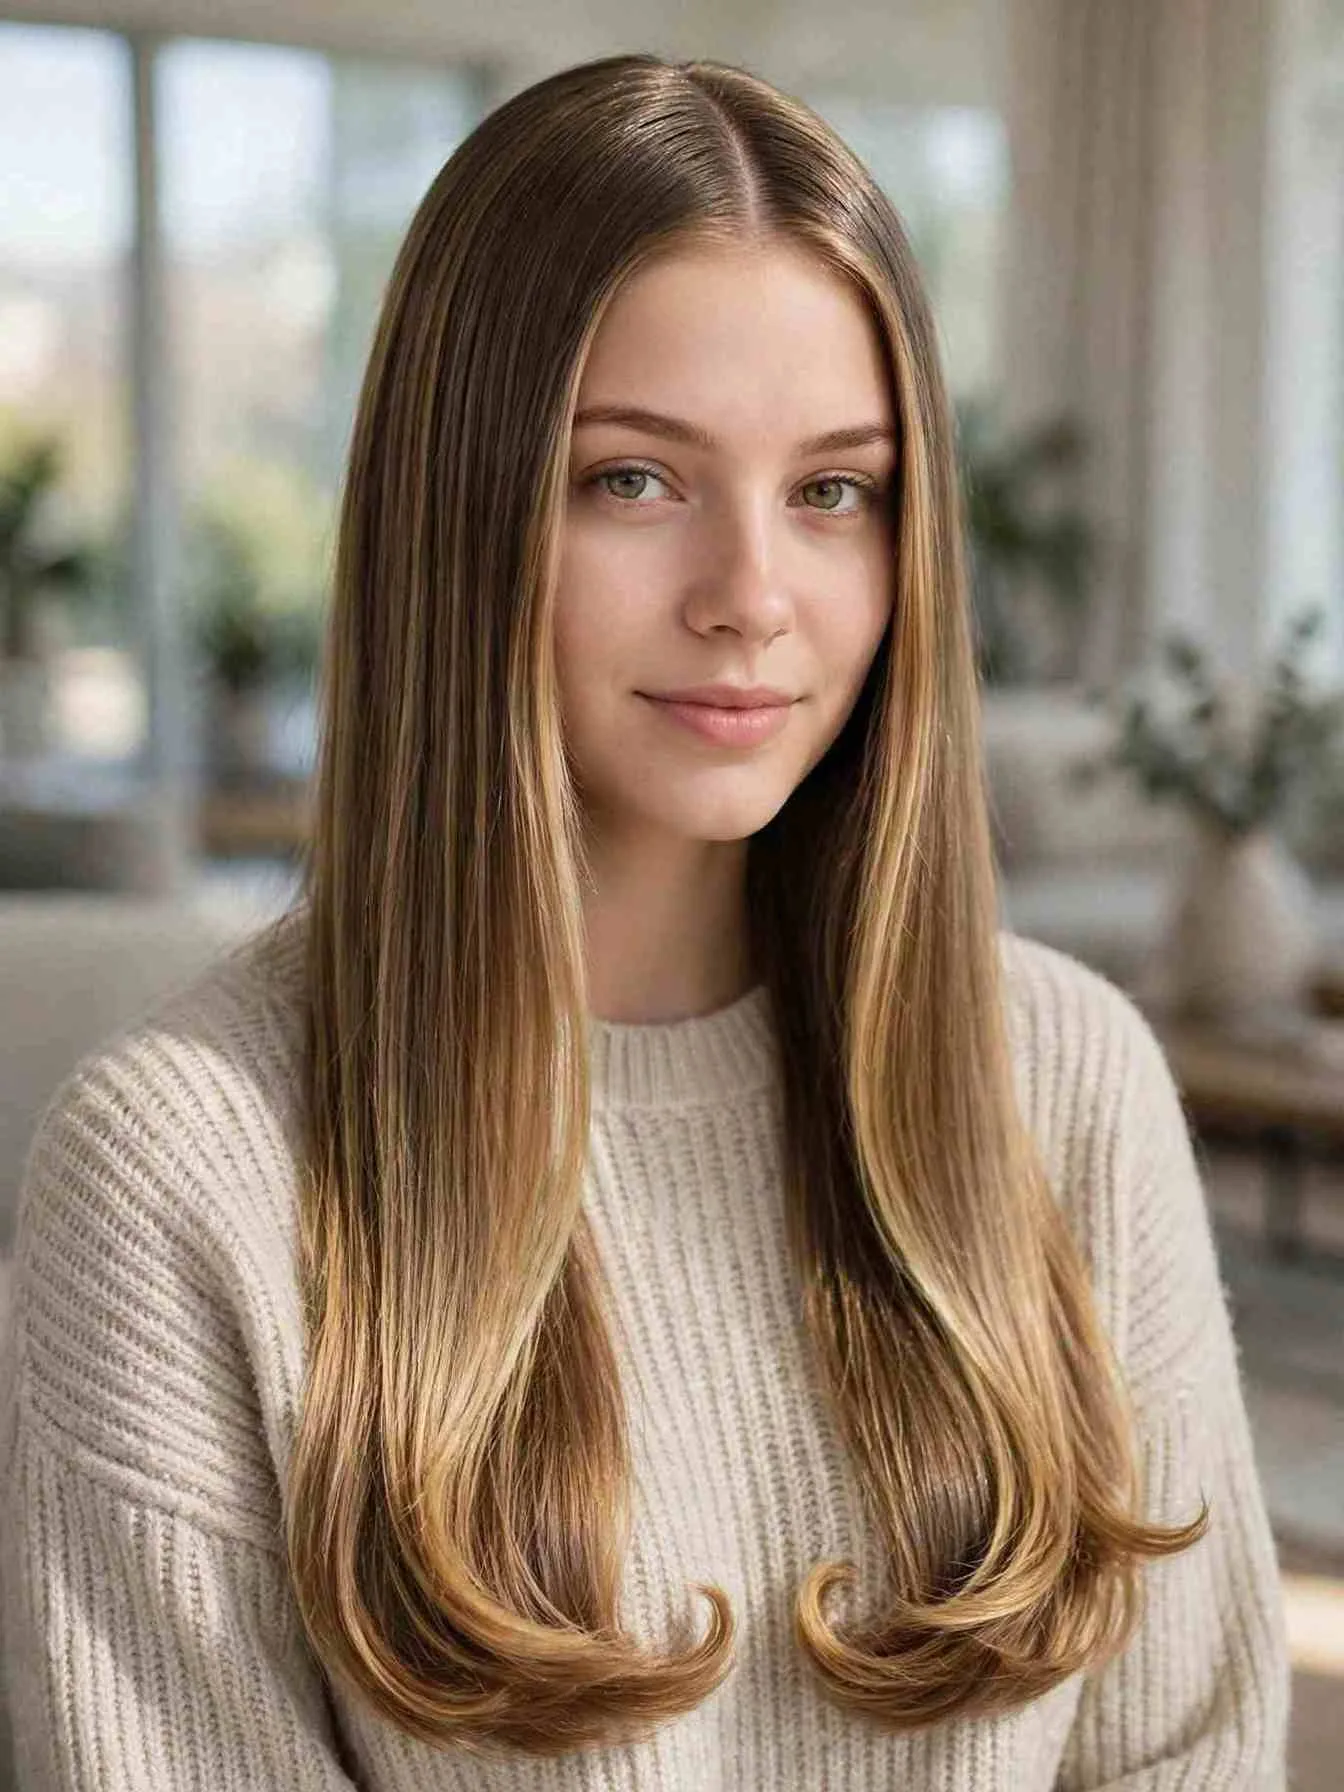
Draw a middle part and flat-iron the lengths straight. On the last two inches, curve the iron slightly inward. The inward curve keeps the ends from flipping out during the day. Smooth the part line with a touch of serum. This small curve is the difference between salon-straight and home-straight. It takes one extra minute and pays off in every photo.
Best for: Medium to long hair; anyone growing out layers.
Ask your stylist for: Long, blended layers that curve inward naturally.
18. The Slicked-Back Wet Look
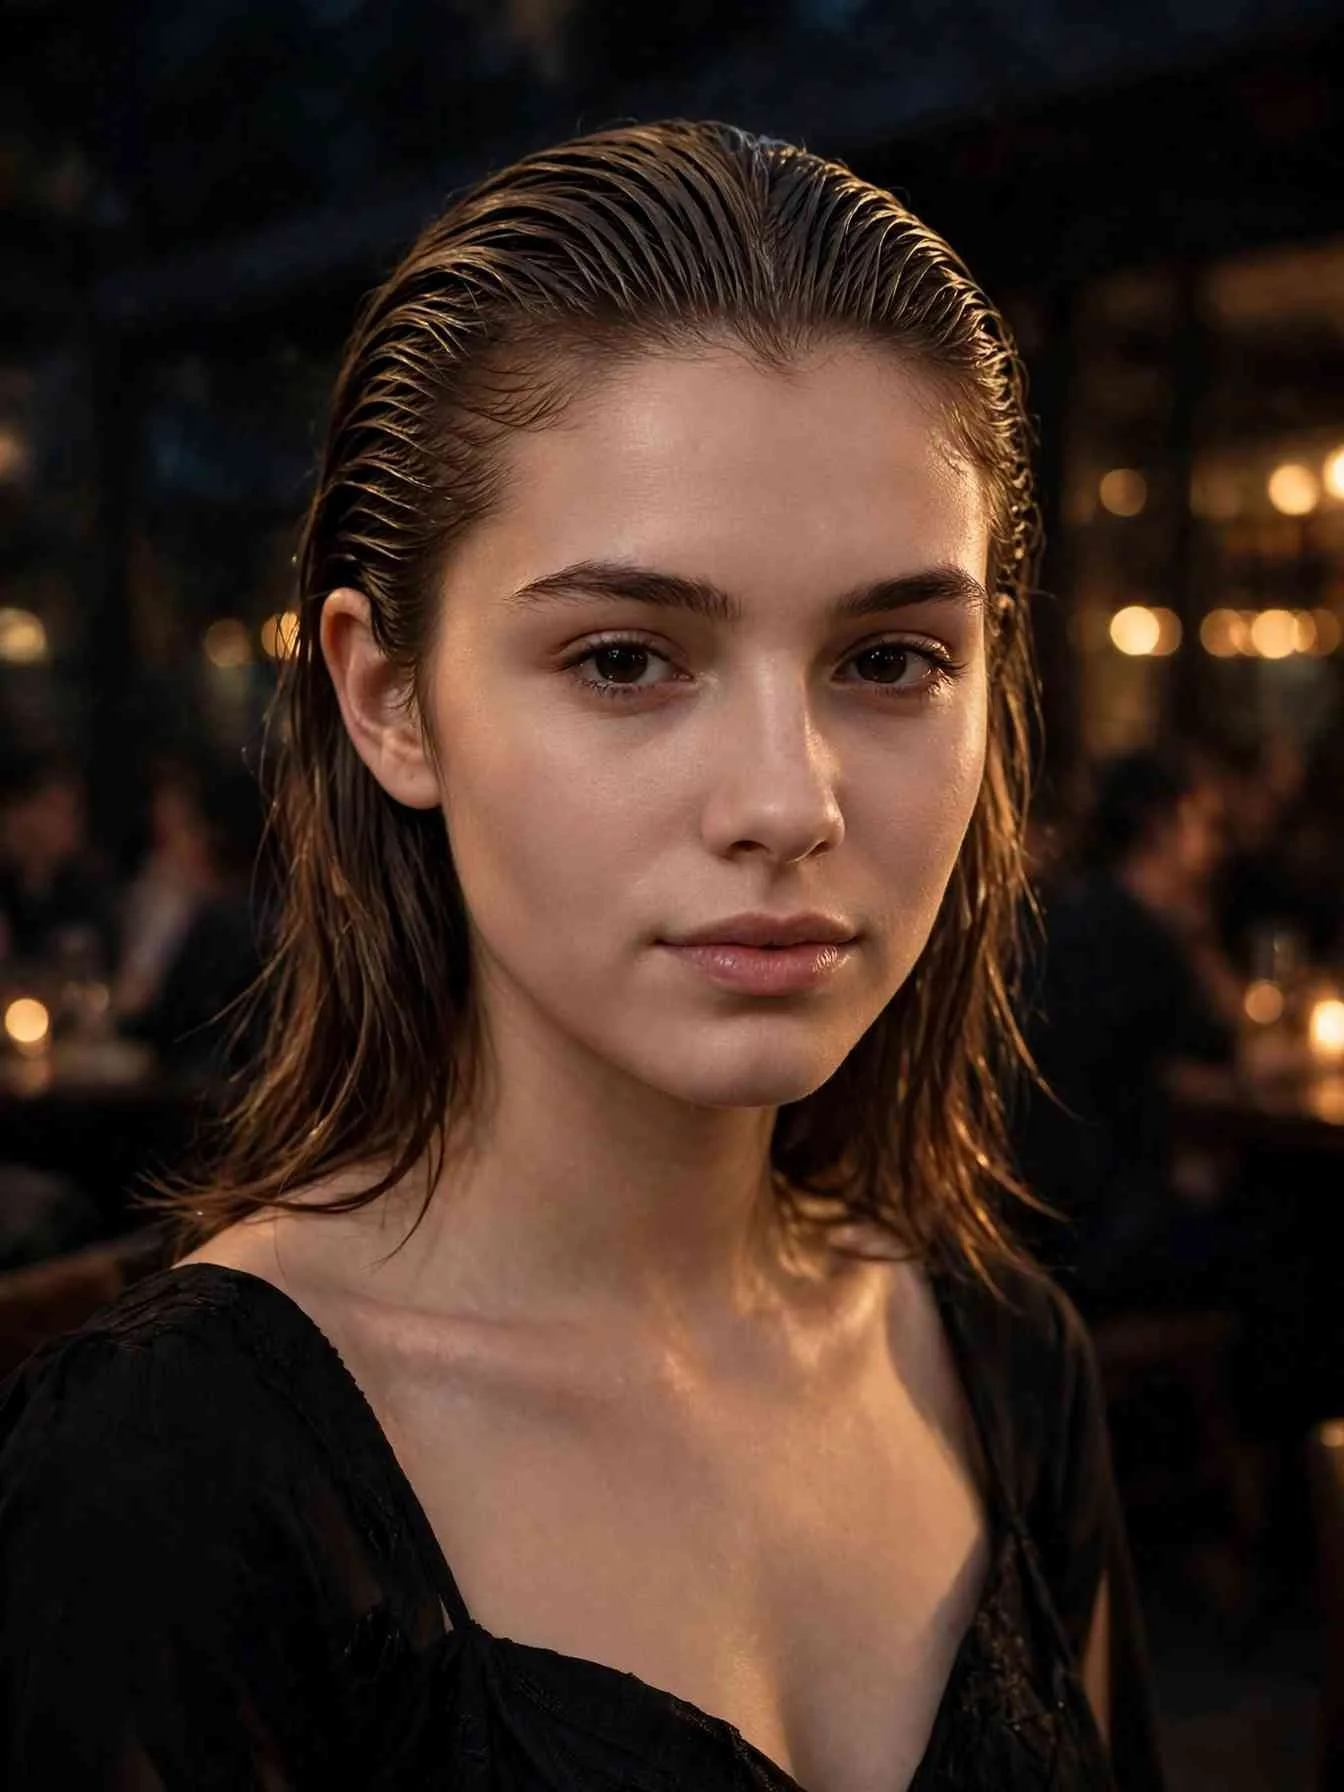
Work a dime-sized amount of gel through damp hair from roots to mid-lengths. Comb everything straight back with a wide-tooth comb. Let it air-dry without touching it. The gel sets as it dries, freezing the combed texture in place. The wet look reads editorial and bold, but the method is simple. Use it for evenings rather than the office. Keep the lengths healthy underneath, since this style shows every split end.
Best for: Evenings and events; confident minimalists.
Ask your stylist for: A fresh trim, since damaged ends ruin the effect.
Half-Up and Claw
19. The Half-Up Claw Clip Twist

Section the top half of the hair from temple to temple. Twist the section once. Clip it at the back of the crown with a matte claw clip in a neutral tone. Leave the bottom half down and smooth. The twist adds more polish than a plain half-pony. Choose a clip sized to your hair density; fine hair needs a small clip or the style slides. For more clip-led looks, our guide to half-up claw clip hairstyles breaks down clip sizes, hold tricks, and texture pairings.
Best for: Medium to long hair; work-from-home days.
Ask your stylist for: Long layers so the twisted section has grip.
20. The Slicked Half-Up Crown
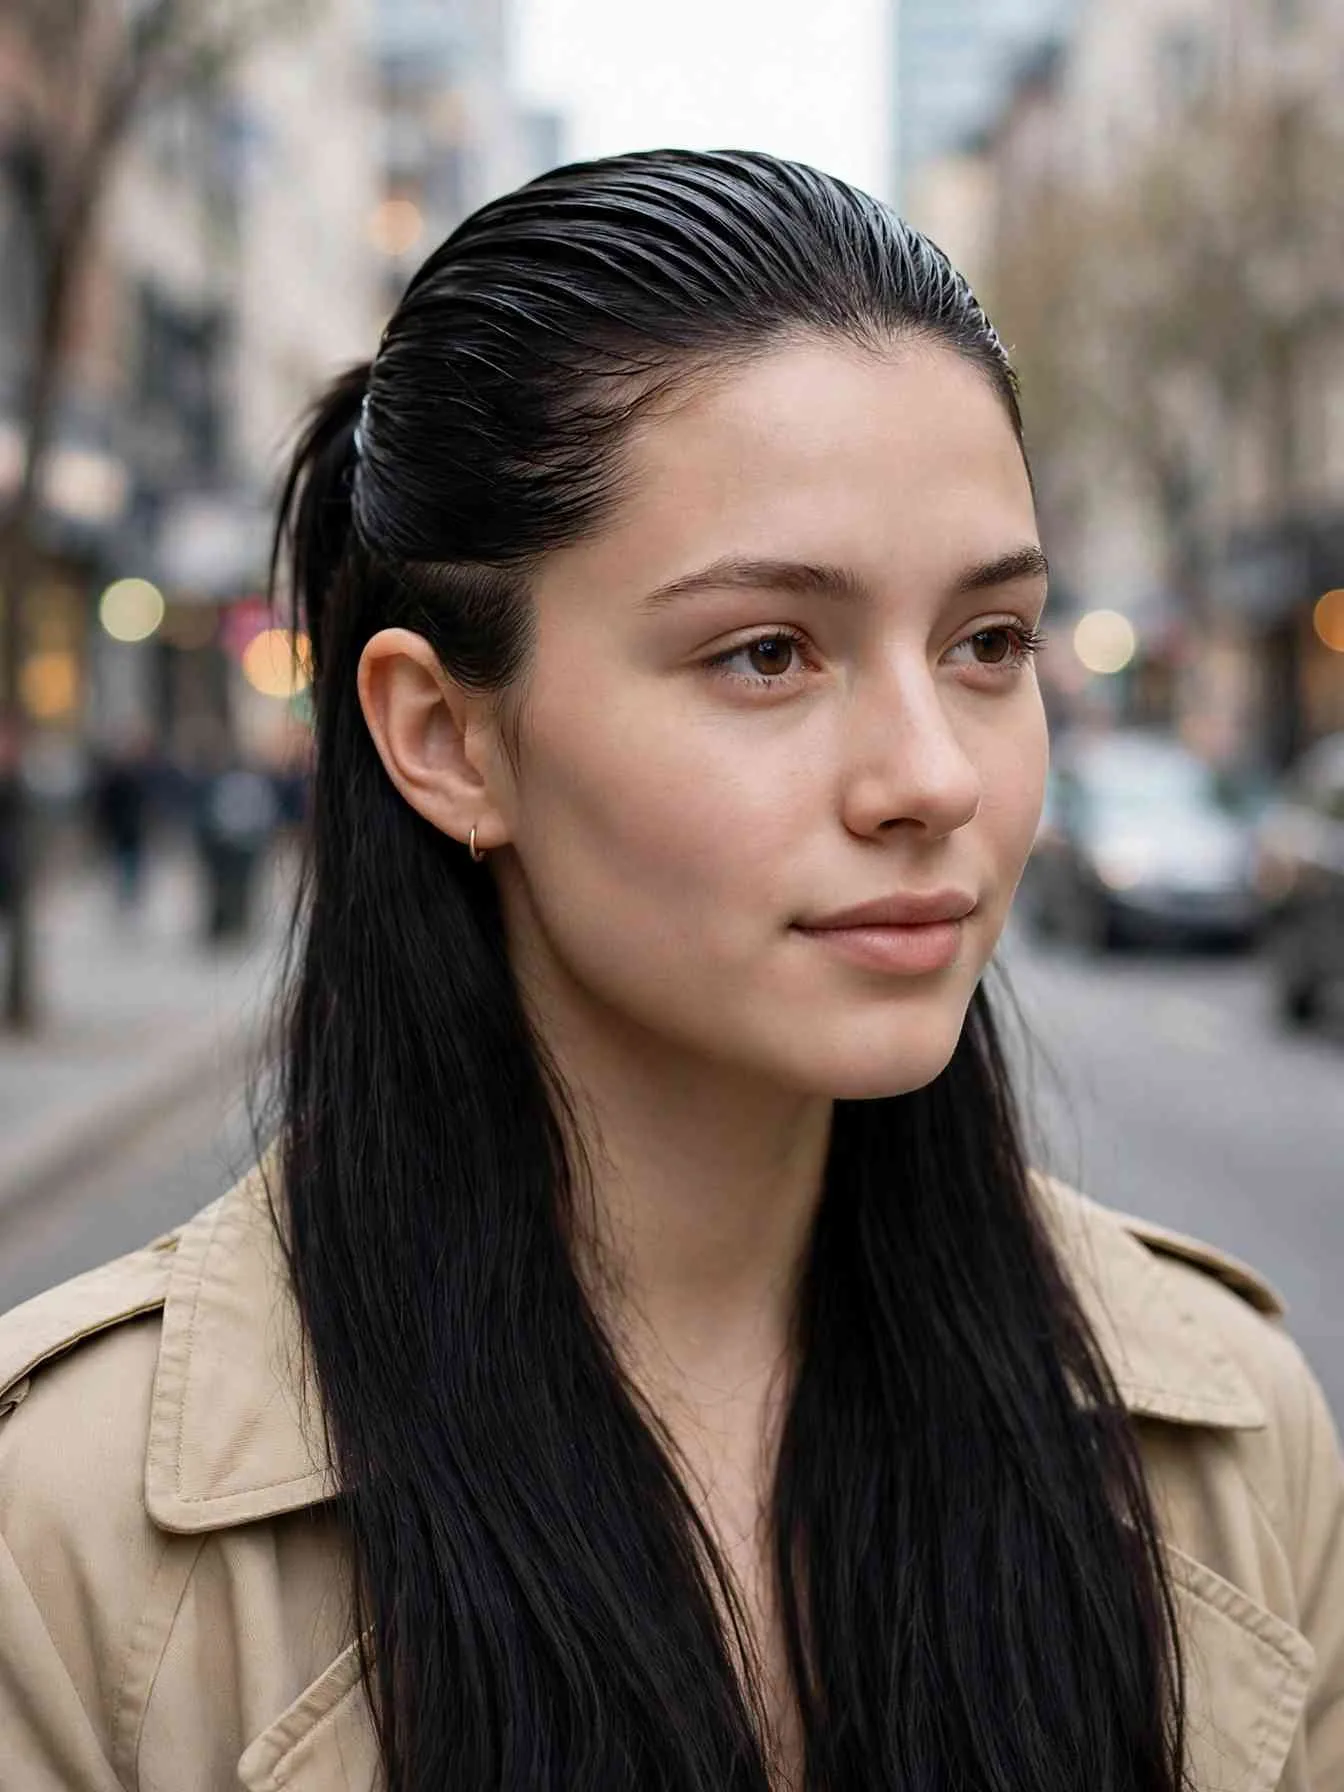
Section the crown area and brush it smooth with gel. Secure it into a small pony at the back of the crown, keeping the sides tight to the head. Leave the rest down and straight. The contrast between the slicked crown and the soft lengths underneath is the whole appeal. This style keeps hair out of the face while showing off length. It also works on third-day hair because the crown section hides root oil.
Best for: Greasy roots; long hair you want to show off.
Ask your stylist for: Face-framing layers that fall naturally around the clip zone.
Accessories and Finishes
21. Sleek Lengths With a Slim Headband

Flat-iron the hair straight and draw a middle part. Slide a slim headband in black, tortoiseshell, or matte gold into place about an inch behind the hairline. Tuck the front sections behind the ears. The headband adds one deliberate accessory without breaking the minimalist rule. It also solves the flat-crown problem on fine hair by adding structure at the roots. Keep the band slim; wide bands tip into a different aesthetic.
Best for: Fine hair; school and office days.
Ask your stylist for: A clean middle-part trim so the band sits evenly.
22. The Silk-Scarf Low Ponytail
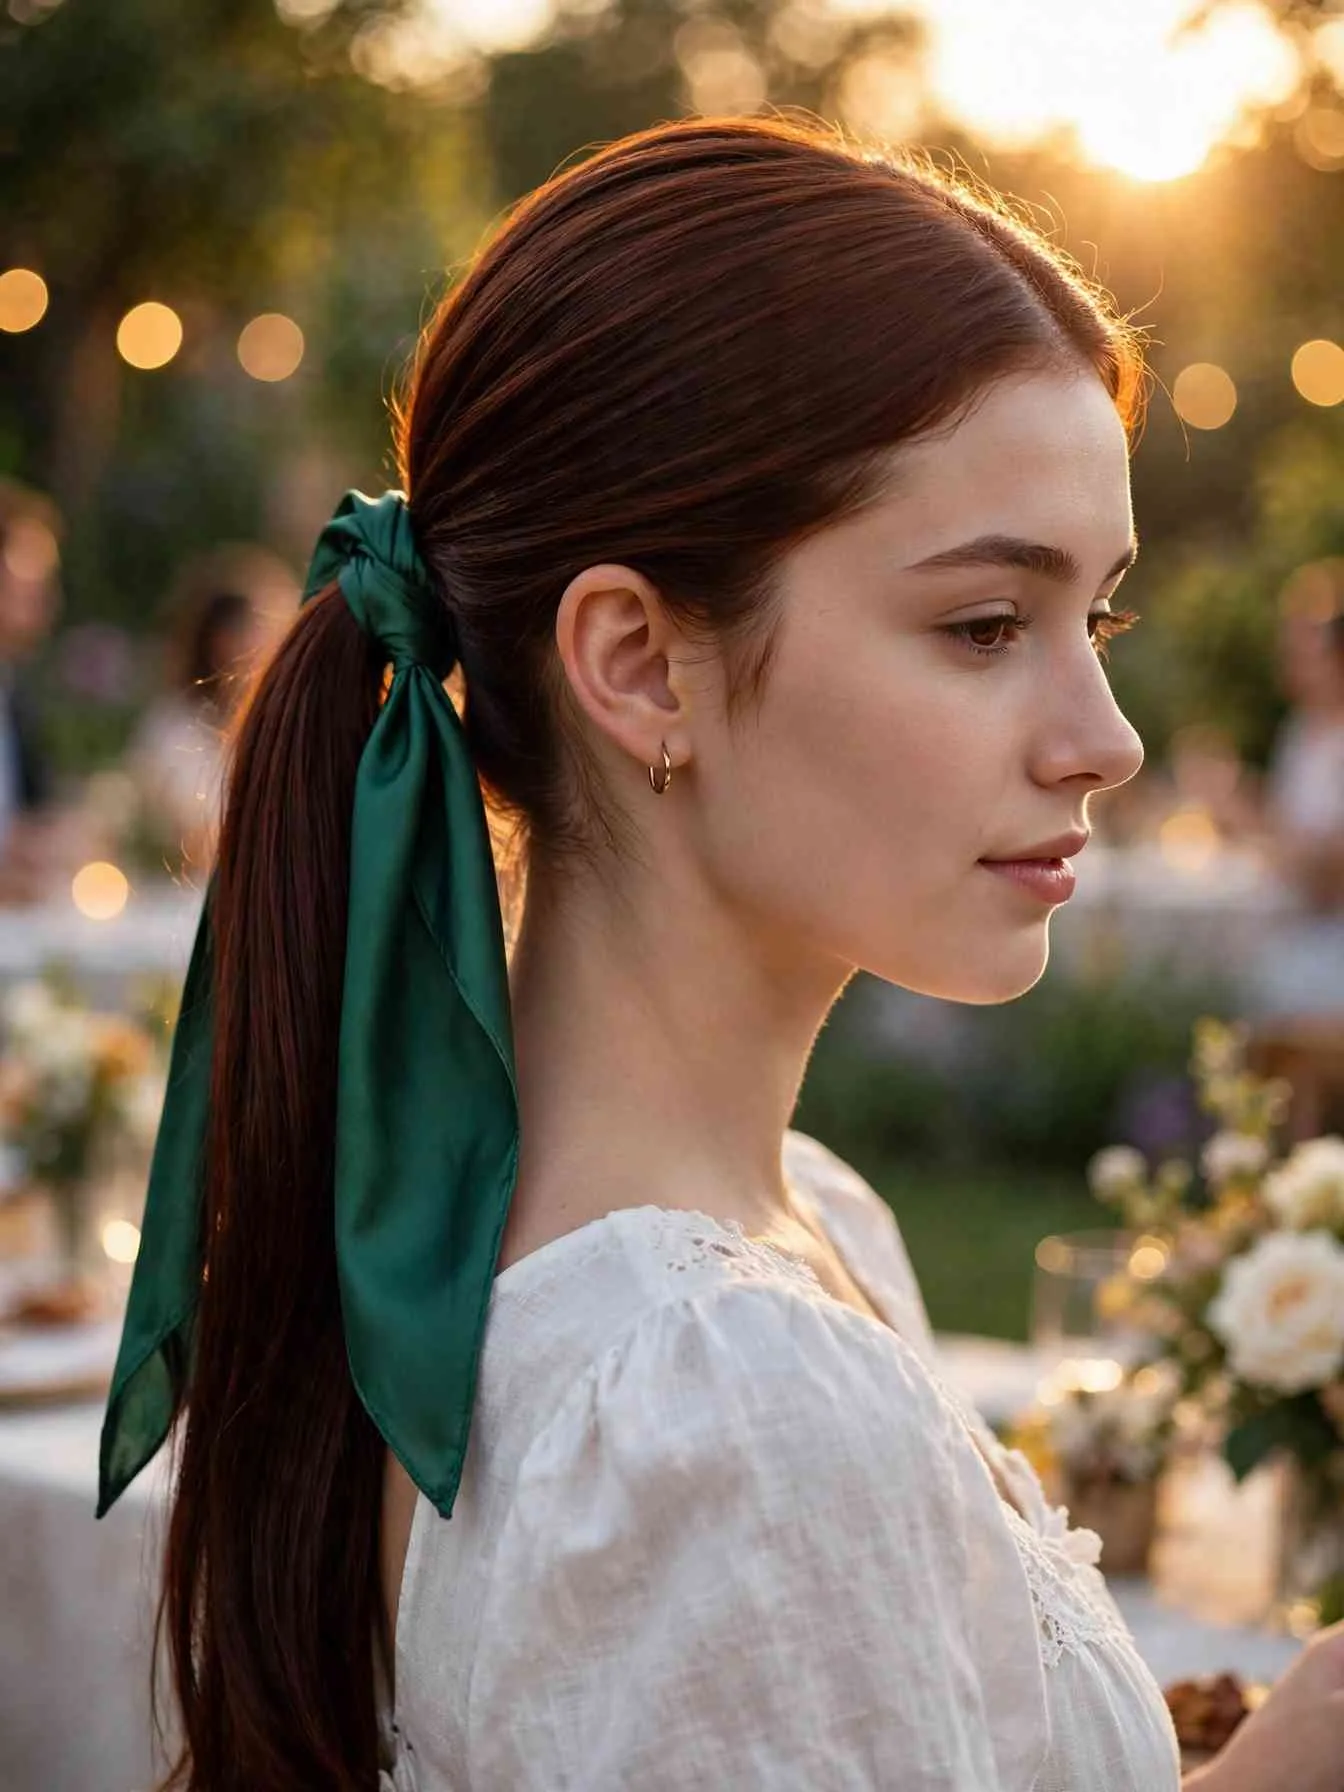
Gather hair into a low pony and secure it. Fold a silk scarf into a narrow band. Tie it around the base with a small knot, letting the ends hang with the tail. The silk adds color and movement while the pony stays sleek underneath. Choose solid colors or small prints; large patterns overwhelm the minimalist look. This is the dressiest finish in the guide and takes under three minutes.
Best for: Special occasions; anyone who wants color without commitment.
Ask your stylist for: Blunt ends so the scarf knot sits on a clean base.
Pick Your Clean Girl Style by Hair Type and Morning
Match the style to your reality, not your aspirations. The table below compares clean girl hairstyles on the three things that matter on a busy morning.
| Family | Time needed | Greasy-hair friendly | Best hair type |
| Sleek ponies | 2 to 5 minutes | Yes, looks 1 to 5 | Straight to wavy |
| Sleek buns | 4 to 7 minutes | Yes, looks 6 to 13 | All types |
| Braid accents | 8 to 12 minutes | Very, looks 11 to 14 | Medium to thick |
| Smooth lengths | 15 to 25 minutes | No, needs clean hair | Straight to wavy |
| Half-up and claw | 3 to 5 minutes | Somewhat, look 20 | Medium to long |
| Accessories | 2 to 3 minutes | Somewhat, looks 21 to 22 | All types |
If you wash daily, the smooth-lengths family is your playground. For three or four day wash cycles, the sleek bun hairstyles and braid accents carry you through the week. The slicked styles actually look better with a little root texture, since clean hair slips out of elastics faster.
Flyaway Control by Hair Texture
Flyaways are the enemy of clean girl hairstyles, and each texture fights them differently.
Fine hair needs the lightest touch. Use a pea-sized amount of gel and a boar-bristle brush. Heavy products drag fine hair flat and make it look thinner. A light mist of flexible-hold spray after styling seals the hairline without stiffness.
Medium and wavy hair responds well to the gel-plus-brush method with slightly more product. Smooth in sections: crown first, then sides, then nape. Sectioning prevents the common mistake of overloading the crown while the sides stay fuzzy.
Thick and coarse hair needs stronger hold. Layer a leave-in conditioner under the gel to keep the hair pliable. Edge-control wax on the hairline lasts longer than gel on coarse textures. Work in small sections and press each one flat before moving on.
Curly and coily hair can absolutely wear clean girl styles. Stretch the roots with a blow-dryer on low heat first. Or work on freshly washed, conditioned hair while it is damp. Use a strong-hold gel and a brush with firm bristles to smooth the hairline. Slicked curly ponytails and low buns with defined curls in the tail look stunning and stay true to the aesthetic.
Clean Girl on Three-Day-Old Hair
Day-three hair is not a problem for clean girl hairstyles. It is an advantage. Natural oils give grip that freshly washed hair lacks.
Start with dry shampoo at the roots, focusing on the crown and part line. Wait two minutes, then brush it through completely. Unabsorbed powder is the main reason day-three styles look dusty. Then style into any bun or braid-anchored look from this guide. The slick back bun and the slicked French braid into a low bun are the two strongest day-three choices.
Avoid the smooth-lengths family on unwashed hair. Flat-ironing over oil bakes it in and dulls the finish. Save glass hair for wash day and let the slicked families carry the rest of the week.
The Traction-Safety Playbook
Sleek styles pull. That is the honest trade-off behind clean girl hairstyles, and it deserves a clear-eyed section.
Repeating tight styles daily can stress the hairline. Board-certified dermatologist Dr. Anetta Reszko spoke to NBC Select about this. She notes the temples and hairline take the most pulling force, so thinning tends to appear there first. Dermatologist Dr. Joyce Park advises loosening the style, switching the part, and giving the hairline rest days when edges start to thin. The American Academy of Dermatology’s guidance on hairstyles that pull advises a light touch. It recommends tight styles only occasionally and names warning signs like broken hairs at the forehead or a receding hairline.
Protect yourself with five habits. Alternate slicked days with loose days. Never sleep in a tight bun or pony. Switch your part weekly so the same follicles do not take the load every day. If a style gives you a headache, it is too tight; loosen it immediately. And favor fabric-covered elastics over thin rubber bands, which concentrate force on fewer strands.
What It Costs: Salon vs DIY
Nearly every one of these clean girl hairstyles is DIY. The total kit runs about $30 to $60 at drugstore prices as of fall 2026. That covers brush, comb, gel, serum, elastics, and a claw clip.
Salon help makes sense for two things: the cut and the occasional glass finish. A blunt trim every 8 to 12 weeks keeps ends sharp enough for sleek styles. A salon blowout for a glass-straight base runs roughly $40 to $85 in the US as of fall 2026. That is a rough US guide. Silk presses run $65 to $125, per published salon price lists like this published Illinois salon price list. Prices move with city, hair length, and density. A keratin smoothing treatment, for wash-and-go sleekness that lasts weeks, runs $150 to $500 depending on length.
Ask for an exact estimate before booking. Stylists quote based on your hair, not a menu average.
Clean Girl Hairstyles FAQs
What Are Clean Girl Hairstyles?
Polished, low-effort styles built on smooth roots, controlled flyaways, and simple shapes like slicked buns and sleek ponytails. The aesthetic favors restraint: one decisive shape, soft gloss, and a clean hairline.
What Is the Difference Between Clean Girl and Vanilla Girl Hairstyles?
Clean girl hairstyles lean sharp and minimal: middle parts, glassy lengths, and slicked shapes. Vanilla girl leans cozy: warm neutrals, soft waves, and relaxed texture. Both value simplicity, but clean girl reads more polished.
How Do I Keep Flyaways Down All Day?
Smooth gel or edge-control wax over the hairline with a boar-bristle brush. Seal it with a light mist of flexible-hold spray. Re-press the hairline once at midday with a clean spoolie and a tiny amount of wax.
Do Clean Girl Hairstyles Work on Curly Hair?
Yes. Smooth the roots with strong-hold gel while hair is damp. Then wear a slicked curly ponytail or a low bun with defined curls in the tail. The contrast between sleek roots and textured lengths fits the aesthetic well.
Can I Wear Clean Girl Styles on Greasy Hair?
Yes, and they often look better. Day-three texture grips elastics and pins more securely. Use dry shampoo at the roots first, brush it through fully, then choose a bun or braid-anchored style.
Will a Slick Back Bun Damage My Hair?
Daily tight wear can stress the hairline over time. The slick back bun concentrates the most pull there, so rotate it with looser sleek bun hairstyles. Alternate slicked days with loose styles, switch your part weekly, and loosen any style that causes pain or headaches. Caught early, tension-related thinning is usually reversible.
What Is the Fastest Clean Girl Hairstyle?
The middle-part low ponytail takes about two minutes: part, smooth, gather, done. The classic slicked-back ponytail takes about four. Both need only a brush, an elastic, and a small amount of gel.
Final Thoughts
Clean girl hairstyles reward consistency over complexity. Pick two or three clean girl hairstyles from this guide. Learn them until they take five minutes, then rotate them through your week. Keep the hairline smooth, the shapes simple, and the tension reasonable. Your mornings get shorter while the results look more intentional. Start tomorrow with the middle-part low ponytail and time yourself.